Import Mesh Files Dialog
Opening The Dialog
The Import Multiple Mesh Files dialog is opened via the Main Menu > Batch > IMPORT Multiple Mesh Files… menu item.
Once the menu item is selected, a multi-file Open dialog will open.
It can be used to select one or more input files from the same folder to be loaded.
The files can be of different datasets and can have different supported file formats.
Once the files are selected, the [Open] button will populate the Import Multiple Mesh Files dialog will these files.
Cancelling the File Dialog will still open the Import Multiple Mesh Files dialog, but it will be empty - the [ADD Mesh Files…] button can be used to add files later.
The various columns of the Listview will be populated automatically with the best suggestions SEQUOIA can make based on the file format, content and name.
Each entry and each column beyond the Input File column can then be edited individually or en-masse before performing the conversion.
User Interface Controls
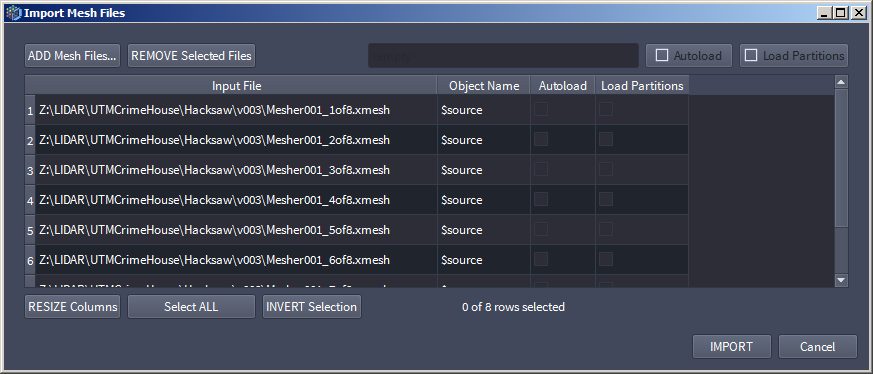
Mesh Files Import Queue Listview
The main element of the Import dialog is the Listview representing the Processing Queue.
Each row represents a mesh file scheduled to be imported using a newly created Mesh Loader object.
Each column represents a mandatory or optional setting used by SEQUOIA to perform the Mesh Loader creation.
The majority of UI controls in the dialog modify the Listview - either the content of specific columns, or the selection of the ListView.
ADD Mesh Files… Button
Pressing this button will open the same multi-file Open dialog to add one or more files to the processing Queue.
This allows the selection of files located in different folders, and even in different storage locations.
REMOVE Selected Files Button
Pressing this button will remove one or more selected entries from the queue.
If no rows are selected, nothing will be removed.
See also the [Select ALL] and [Select INVERT] buttons for quick ways to modify the selection.
Loader Name Pattern Textfield
The text field defines the base name of the Mesh Loader to be created.
The default value is $source, which will name the Mesh Loader according to the input filename.
Autoload Checkbutton
This option controls whether the Mesh Loader will be updated to load the points automatically.
If unchecked (default), the file name will be set in the Mesh Loader, but a manual [Update Mesh Loader] click in the Mesh Loader’s Object Properties will be require to load and display the points.

Note that you cannot check the checkbox in the actual ListView, you must check the Autoload Checkbutton in the upper right corner!
This way, it is possible to select one or more rows and change their Autoload option with a single click.

If the multi-selection contains both checked and unchecked Autoload options, the Autoload Checkbutton in the upper right corner will be set to “indeterminate” state, represented by dark blue shading and a pale checkmark in the checkbox:

Select ALL Button
Pressing this button will select all entries on the Queue.
This is useful to quickly change all entries to the same value, for example to set the Autoload option of all entries to a new value.
This is also useful for removing all entries ( [Select ALL] - [REMOVE Selected Files] ).
INVERT Selection Button
Pressing this button will invert the current selection - selected items will become deselected, and vice-versa.
Selection Status Text
This text displays the number of selected entries, as well as the total number of entries on the Queue.
IMPORT Button
Pressing this button will create Tasks to process the Queue.
Cancel Button
Pressing this button will close the Dialog wiithout processing the Queue.