If you’re new to AWS Portal we recommend starting here. If you’re new to Deadline we recommend starting here.
Configure Limits
Deadline uses its Limit system to limit the number of licenses that are used by the Workers at a time. For example, if you had 5 Maya licenses, you should have a Deadline Limit on your Maya Jobs with a License Count of 5. When a Worker picks up a job with a the Maya Limit attached, it will check out one of the Limits. If there aren’t any more Limits available for Maya, the Worker will not try to render the job. This stops Workers from trying to render jobs that use software that they won’t be able to license.
Deadline also uses the Limit system to enable Usage-Based Licensing. You will need to make a Limit for each UBL product you purchase. Repeat the following steps for each UBL product.
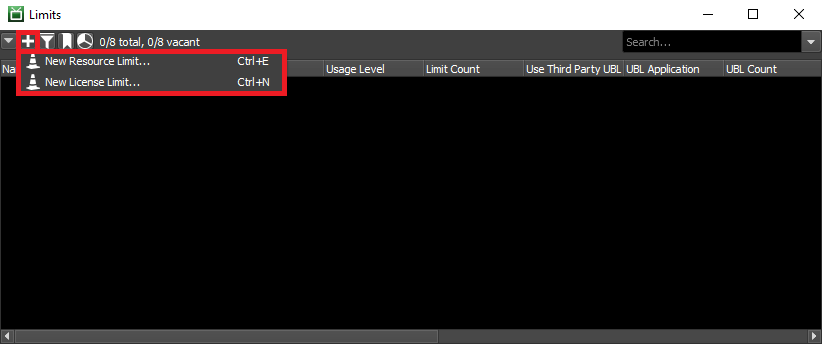
Open a Limit panel in the Deadline Monitor by clicking on View -> New Panel -> Limits. To create a new Limit, click on the + icon in the top left corner of the panel
and select New License Limit...
Here is the dialog for creating a new Limit.
Note
Some of the UBL products are only available on AWS Portal. They will not appear in the list of UBL Applications until you have started an AWS Portal Infrastructure.
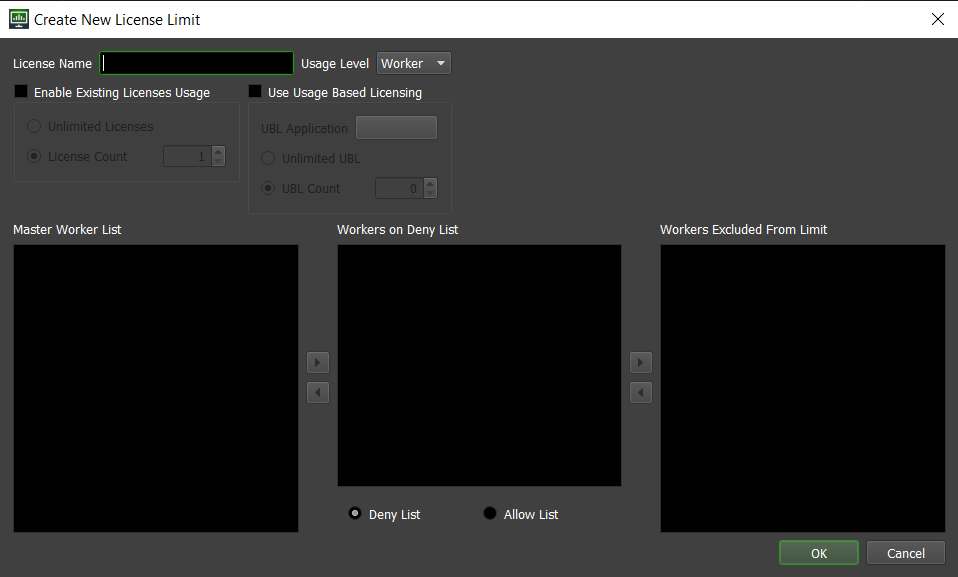
Name your Limit. We recommend naming your Limit after the application it’s created for eg. “arnold” for the Arnold renderer. Usage Level should be Worker and select Use Usage-Based Licensing. Click on the button next to UBL Application and select the product that you purchased and hit OK.
Make sure you have your Limit set to Unlimited Limit, otherwise some of your render nodes may not get licenses.
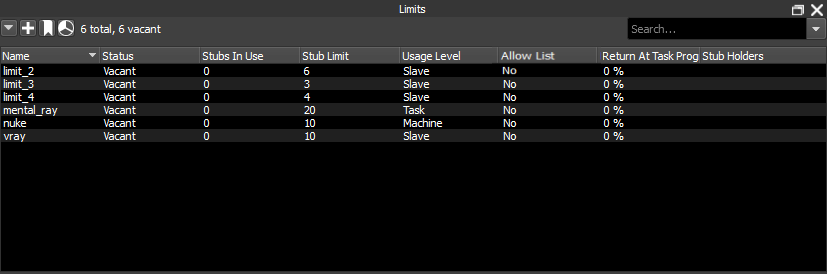
Completed Limits should look like this in the Limits Panel in the Deadline Monitor.