Balancer Configuration
Overview
Balancer has three sets of options that can be configured:
Global Balancer settings in the Repository Options.
Cloud Provider Balancer settings in the Cloud Provider Configuration dialog.
Per-Balancer settings that can be configured from the right-click menu in the Balancer panel.
Note that the availability of these options can vary depending on the context in which they are used, as well as the User Group Permissions that are defined for the current user.
If the Balancer panel is not visible, see the Panel Features documentation for instructions on how to create new panels in the Monitor.
Global Balancer Settings
As mentioned above, there are the global Balancer settings in the Repository Options, which are applied to every running instance of Balancer.
Cloud Provider Configuration
Before the Balancer can do anything, you’ll need to setup a Cloud Region. Balancer settings for each Cloud Provider can be configured in the Cloud Provider Configuration dialog. Deadline supports a number of cloud providers by default. Custom cloud plugins can be written to support different providers. Here’s a list of all the supported Cloud Plugins.
When adding a new Cloud Region you’ll have to enter all of your credentials and settings for that particular provider. You can look at the documentation for each plugin for further details about all the settings and credentials. Enabling the region will show instances in the Cloud Panel. Your credentials need to be verified before you’re able to enable the region to work with the Balancer.
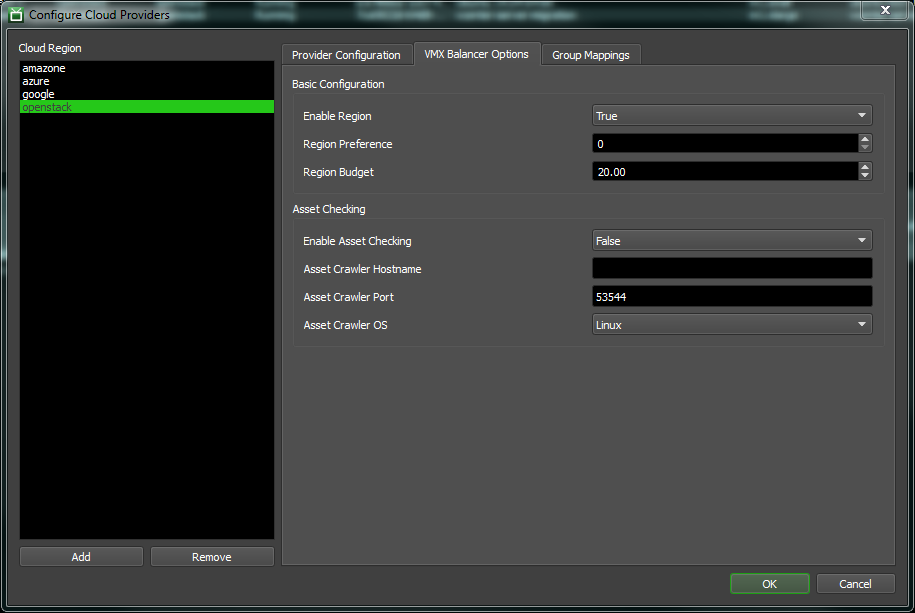
Basic Configuration
The basic configuration options are:
Enabled: Enabling the region makes it usable by the Balancer.
Region Preference: Weighting towards the region.
Region Budget: Total Budget for a region. Governs how many instances will be started for this region.
Asset Checking
Asset Checking can be used to sync assets between the repository and the Workers. The Asset Checking options are:
Enable Asset Checking: Enables asset crawler for jobs with assets.
Asset Crawler Hostname: Hostname for the Asset Crawler.
Asset Crawler Port: Port number for the Asset Crawler.
Asset Crawler OS: Operating system of the Asset Crawler.
The asset script itself can be found in the vmx folder in the Repository, and is called AssetCrawler_Server.py.
Balancer Plugins
The Balancer uses an algorithm that’s defined in a Balancer Plugin. That can be set in the Balancer Settings section in Repository Configuration. We’ve included a default algorithm that works in cycles each consisting for a number of stages.
First, the Balancer will do a House Keeping step in which it will clean up any disks or instances that haven’t been terminated like they were supposed to.
Second, the Balancer will execute the Balancer Algorithm. These are the steps of the default algorithm (note that these steps can be customized with your own Balancer Algorithm plugin):
Create State Structure: This sets up the data structures used in the rest of the algorithm.
Compute Demand: Examines the groups for jobs that are queued and assigns a weighting to the group based on the amount of tasks that need to be done and the group priority.
Determine Resources: Here we determine how much space we have available with our provider and how many limits we have.
Compute Targets: Based on the Demand and the available Resources we set a target number of instances for each group.
Populate Targets: This sets up a full target data structure for use in Deadline.
Third, the Balancer will equalize the targets by starting or terminating instances.
The default Balancer Algorithm has the following settings:
Verbose: Enable for more robust log information.
Pre Job Task Mode: Governs how the Balancer will handle pre job tasks. There are three modes.
Conservative: Consider only the pre job task as work to be done. Ignore all other tasks for this job.
Ignore: Don’t count the pre job task as work to be done. Count the rest of the regular tasks as normal.
Normal: Count the pre job task and regular tasks as work to be done.
As a side note: The default Balancer Algorithm does not count post task jobs as work to be done unless all the other tasks are complete.
You can also write your own custom algorithm as defined in the Balancer Plugin page.
Group Mappings
Group Mappings are the heart of the Balancer. They tell the Balancer what kinds of instances to start for each group.
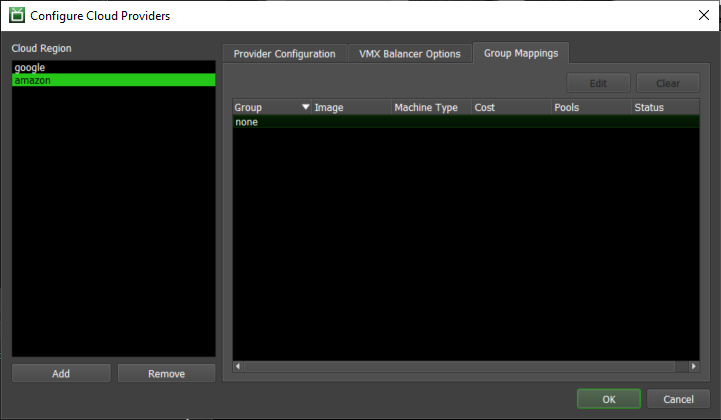
A Group Mapping is mainly comprised of a group, an image, a hardware type and a budget. The image and hardware type are from the provider. The Cost is how much of the region’s budget will be consumed by each instance.
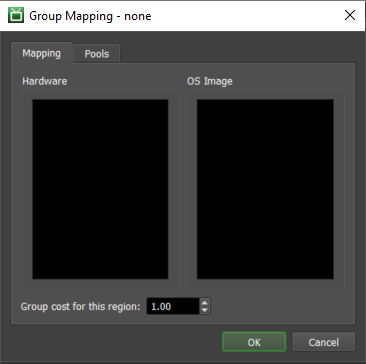
You can also add Pools to a mapping so that instances will be started in those pools.
Balancer States
These are the states that a Balancer can be in. They are color coded to make it clear which state the Balancer is in.
Offline (gray): The Balancer application is closed.
Running (white): The Balancer application is running.
Stalled (red): Balancer becomes stalled if it hasn’t updated its state for a certain amount of time. This could be because the machine crashed, or that Balancer simply didn’t shutdown cleanly.
If you see a red Balancer, it means the Balancer has been marked as stalled. This happens if the Balancer hasn’t updated its state for a certain amount of time. You can configure the Stalled Balancer Threshold in the General Balancer settings in the Repository Options. When a Balancer is marked as stalled, it usually means that the machine crashed, or that Balancer simply didn’t shutdown cleanly. In the latter case, you can simply mark Balancer as offline from the right-click menu.
The Balancer panel’s right-click menu also gives the option to delete Balancers.
Balancer Settings
There are settings that can be specified for individual Balancer instances, which can be modified by right-clicking on a Balancer in the Balancer panel and selecting ‘Modify Balancer Properties’.
You can also auto-configure a Balancer instance by right-clicking on it in the Monitor and selecting ‘Auto Configure Balancer’. This will automatically make this Balancer the Primary Balancer.
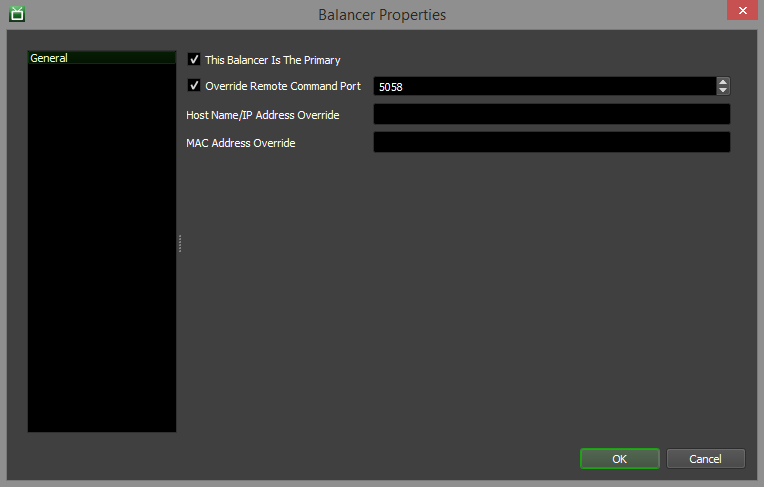
General
These are some general Balancer settings:
This Balancer Is The Primary: If enabled, this is the Primary Balancer.
Override Remote Command Port: If enabled, this port will be used by the Balancer for remote commands instead of a random port.
Host Name/IP Address Override: Overrides the Host name/IP address for remote commands.
MAC Address Override: This is used to override the MAC Address associated with this Balancer. This is useful in the event that the Balancer defaults to a different MAC Address than the one needed for Wake On Lan.
Balancer History
You can view a Balancer’s history by right-clicking on it in the Balancer panel and selecting the View Balancer History option.

Remote Control
You can view the live log for Balancer or control it remotely from the right-click menu. See the Remote Control documentation for more information.
Balancer Redundancy
You can run multiple instances of Balancer on separate machines as backups in case your Primary Balancer instance goes down. If the Primary Balancer goes offline or becomes stalled, Deadline’s Repository Repair operation can elect another running instance of Balancer as the Primary.
To enable Balancer Redundancy, you must enable the Automatic Primary Balancer Election option in the Repository Repair settings in the Repository Options.
Note that when multiple Balancer instances are running, only the Primary Balancer is starting and stopping virtual instances.
