Corona Distributed Rendering
Interactive Distributed Rendering
You can submit interactive Corona DR jobs from 3ds Max. The instructions for installing the integrated submission script can be found further down this page.
The interactive submitter will submit a Corona DR job to reserve render nodes, and the submitter will automatically update the Corona DR server list in the 3ds Max UI.
Do NOT execute Render Legion’s Corona DR Server executable manually on each intended machine. Deadline is more flexible here and will spawn the Corona DR Server standalone executable as a child process of the Deadline Worker. This makes our system flexible and resilient to crashes as when we terminate/complete the Corona DR job in the Deadline queue, the Deadline Worker application will ‘cleanly’ tidy up the DR Server and more importantly, any instances of 3dsMax which it in turn has spawned as a child process. This can be helpful if Corona DR or that instance of 3dsMax becomes unstable and a user wishes to reset the system remotely. You can simply re-queue or delete/complete the current Corona DR job or re-submit.

Port Configuration
Here is a consolidated list of port requirements for Corona DR. Ensure any applicable firewalls are opened to allow pass-through communication. Typically if in doubt, opening TCP/UDP ports in the range: 19660-19670 will cover all Corona implementations for DR. During initial testing, it is recommended to open all ports in this range, verify and then consider tightening up security.
Protocol |
Port Number |
Application |
Notes |
|---|---|---|---|
UDP |
19666 |
3dsMax |
|
TCP |
19667 |
3dsMax |
loopback |
TCP |
19668 |
3dsMax |
Submission Options
The general Deadline options are explained in the Job Submission documentation. The Corona DR specific options are:
Maximum Servers: The maximum number of Corona DR Servers to reserve for distributed rendering.
Use Server IP Address Instead of Host Name: If checked, the Active Servers list will show the server IP addresses instead of host names.
Automatically Update Server List: This option when un-checked stops the automatic refresh of the active servers list based on the current Deadline queue.
Complete Job after Render: When checked, as soon as the DR session has completed (max quick render finished), then the Deadline job will be marked as complete in the queue.
Rendering
After you’ve configured your submission options, press the Reserve Servers button to submit the Corona DR job. The job’s ID and Status will be tracked in the submitter, and as nodes pick up the job, they will show up in the
Active Servers list. Once you are happy with the server list, press Start Render to start distributed rendering.
Note that the Corona DR Server process can sometimes take a little while to initialize. This means that a server in the Active Servers list could have started the Corona DR server, but it’s not fully initialized yet. If this
is the case, it’s probably best to wait a minute or so after the last server has shown up before pressing Start Render.
Update Servers (3dsMax only) button will manually update the Active Servers List. Note, if you modify the Maximum Servers value, the job’s frame range will be updated when this button is pressed or if Automatically Update Server List is enabled.
While using the “interactive” Corona DR Server submission system in 3dsMax, it is recommended to NOT use the Search LAN button or enable the Search LAN during render checkbox, as you risk accidentally selecting the wrong Corona DR servers running on your network, if another user in your studio is also running 1 or more Corona DR servers for their rendering needs.
After the render is finished, you can press the Release Servers button or close the submitter UI (Setup Corona DR With Deadline window) to mark the Corona DR job as complete so that the render nodes can move on to another job in your queue.
Corona DR Submission
You can also submit Corona DR jobs from the Monitor, which can be used to reserve render nodes for distributed rendering.
Note
If you submit the job via the Monitor submission script, that you will need to manually configure/update your local workstation settings to point to the correct, corresponding Deadline Workers either via IP address or hostname, depending on your local network setup. Contact your local system administrator to determine whether you should use hostnames or IP addresses on your network.
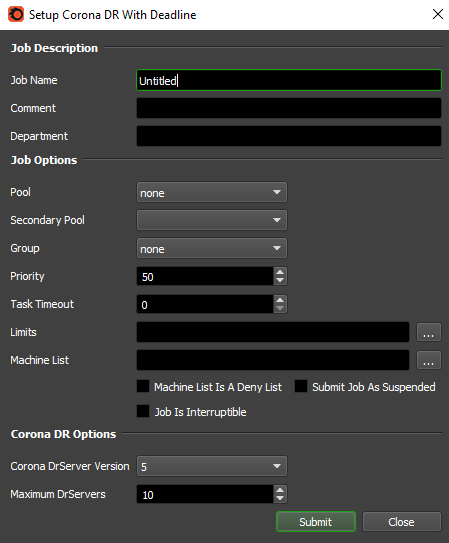
Submission Options
The general Deadline options are explained in the Job Submission documentation. The Corona DR specific options are:
Corona DrServer Version: The version of Corona DrServer to use.
Maximum DrServers: The maximum number of Corona DR Servers to reserve for distributed rendering.
Rendering
After you’ve configured your submission options, press the Submit button to submit the Corona DR job. Note that this doesn’t start any rendering, it just allows the Corona DR Server application to
start up on nodes in the farm. Once you’re happy with the nodes that have picked up the job, you can initiate the distributed render manually from within the application. This will likely require manually configuring your Corona Server list or conveniently, you could use the Search LAN button to automatically find ANY Corona DR servers running on your network. Additionally, Corona provides a Search LAN during render checkbox, which can be used to locate additional Corona DR Servers whilst the render is progressing on your workstation and it also allows any errored or user interrupted servers to re-join this rendering session again.
After the distributed render has finished, remember to mark the job as complete or delete it so that the nodes can move on to other jobs. Alternatively, use the DR Session timeout functionality described below or the auto task timeout to control whether these type of jobs are automatically completed after a certain period of time.
Plugin Configuration
You can configure the Corona DR Server plugin settings from the Monitor. While in power user mode, select Tools → Configure Plugins and select the CoronaDR plugin from the list on the left.


Corona DrServer Executables
Corona DrServer Executable: The path to the Corona DrServer executable file. Enter alternative paths on separate lines.
DR Process Handling
Handle Existing DR Process: Only one instance of the same DR process running over the same port is possible. This option allows for Deadline to fail the task if this is the case or attempt to kill the currently running process, to allow the Deadline managed DR process to run successfully.
DR Job Handling
DR On Job Complete: If desired, you can automatically archive or delete the DR job when it completes.
DR Session Handling
Warning
This feature is NOT supported in Corona 6 DR.
If enabled, these settings control what happens when a Worker that is running Corona DR Server has entered an IDLE state where it is not currently partaking in a Corona DR render. We define a session as the time between a Corona DR render completing and the next DR based render starting. There are additional settings to control the behaviour once at least one DR render has taken place on a Worker.
DR Session Auto Timeout Enable: If enabled, when a DR session has successfully completed on a Worker, the task on the Worker will be marked as complete after the DR session auto timeout period in seconds has been reached (Default: False).
DR Session Auto Timeout (Minutes): This is the timeout period (Default: 15 Minutes) when a DR session will timeout and be marked as complete by a Worker. This timeout is only active prior to the first render on the Worker.
DR Session Auto Timeout: Wait for first render: If enabled, it will force at least one render to complete before Auto Timeout becomes active (Default: True).
DR Session Auto Timeout: After First Minute: This is the timeout period (Default: 15 Minutes) when a DR session will timeout and be marked as complete by a Worker. This timeout becomes active once the first render on the Worker is complete.
DR Server Options
DR Server No Gui: If enabled, the DR Server will be run without a GUI.
Integrated Submission Script Setup
There is an integrated Corona DR submission script for 3ds Max. The installation process for this script can be found below.
3ds Max
The following procedures describe how to install the integrated Corona DR submission script for 3ds Max. The integrated submission script and the following installation procedure has been tested with Max versions 2014 and later (including Design editions).
You can either run the Submitter installer or manually install the submission script.
Submitter Installer
Run the Submitter Installer located at
<Repository>/submission/3dsmaxCoronaDR/Installers.
Manual Installation
Copy the file:
[Repository]\submission\3dsmaxCoronaDR\Client\Deadline3dsmaxCoronaDRClient.mcr to [3ds Install Directory]\MacroScripts
If you don’t have a MacroScripts folder in your 3ds Max install directory, check to see if you have a
UI\Macroscriptsfolder instead, and copy theDeadline3dsmaxCoronaDRClient.mcrfile there if you do.Copy the file:
[Repository]\submission\3dsmax\Client\SMTDSetup.ms to [3ds Max Install Directory]\scripts\Startup\SMTDSetup.ms

FAQ
Is Corona Distributed Rendering (DR) supported?
Yes. A special ‘reserve’ job is submitted that will run the Corona DR Server application on the render nodes. Once the Corona DR Server process is running, these nodes will be able to participate in distributed rendering.
Which versions of Corona DR are supported?
Corona interactive rendering is supported for 3ds Max 2014-2022.
Warning
DR Session Handling is NOT supported in Corona 6 DR.
Corona DR Server application fails to start manually?
During initial configuration of Corona DR Server & any future debugging, it is recommended to disable any firewall & anti-virus software at both the DR master host machine as well as all render Worker machines which are intended to participate in the DR process. We suggest you manually get Corona DR up and running in your studio pipeline to verify all is well before then introducing Deadline as a framework to handle the DR Server application.
Is Backburner required for 3dsMax based Corona DR via Deadline?
Yes. Backburner is a prerequisite for Corona DR to work correctly. Ensure you have the a version of Backburner that matches your 3ds Max version, for example, Backburner 2019 must be installed if you are using 3ds Max 2019.
Do I need to run the Corona DR Server application executable on each machine?
Do NOT execute Render Legion’s Corona DR Server executable manually on each intended machine. Deadline is more flexible here and will spawn the Corona DR Server standalone executable as a child process of the Deadline Worker. This makes our system flexible and resilient to crashes as when we terminate/complete the Corona DR job in the Deadline queue, the Deadline Worker application will ‘cleanly’ tidy up the DR Server and more importantly, any instances of 3dsMax which it in turn has spawned as a child process. This can be helpful if Corona DR or that instance of 3dsMax becomes unstable and a user wishes to reset the system remotely. You can simply re-queue or delete/complete the current Corona DR job or re-submit.
Can I force Corona DR to run over a certain port?
No. Currently this is not possible and the ports used are fixed. Please see the Port Configuration table at the top of this page for more information.
Corona DR rendering seems a little unstable sometimes or my machine slows down dramatically!
Depending on the number of Worker machines being used (Win7 OS < 20), scene file sizes being moved around together with asset files, and your network/file storage configuration, it may help to increase the “Synchronization interval [s]: 60” and decrease the “Max pixels transfer at once: 500000” settings, which can help to reduce the load on your local machine and network.
Error Messages and Meanings
This is a collection of known Corona error messages and their meanings, as well as possible solutions. We want to keep this list as up to date as possible, so if you run into an error message that isn’t listed here, please email Deadline Support and let us know.
Currently, no error messages have been reported for this plugin.
