If you’re new to AWS Portal we recommend starting here. If you’re new to Deadline we recommend starting here.
Creating an AWSPortal IAM User
Note
If you have not already created an Admin user, instructions for creating one can be found here: Creating an Admin IAM User.
First, log into the AWS Console using the aws account you created.
Click on Services at the top of the AWS Console, and find the IAM section under Security, Identity and Compliance. Select Users

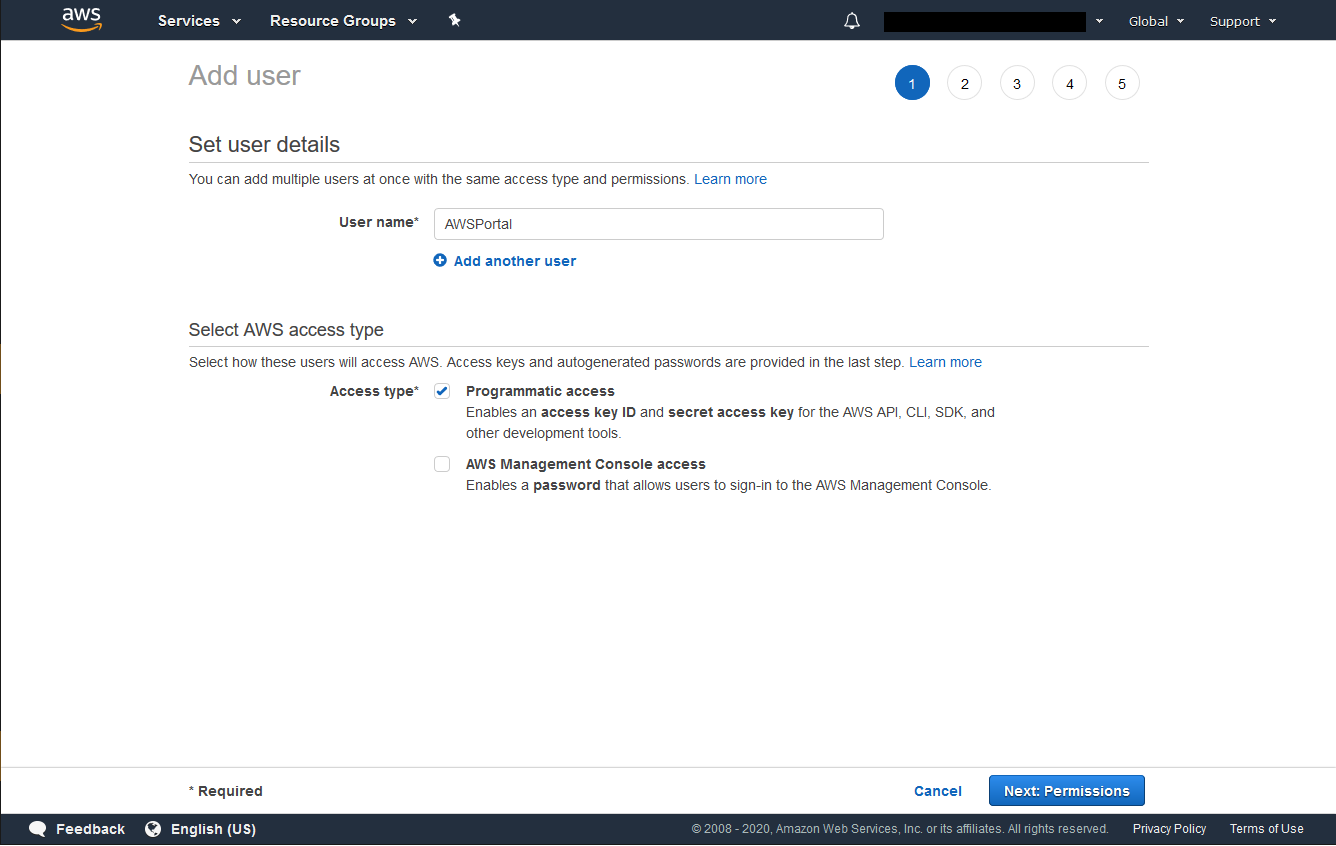
Click on the Add user button at the top. Enter the User Name AWSPortal and select the Programmatic Access checkbox. Click on the Next: Permissions button to proceed.
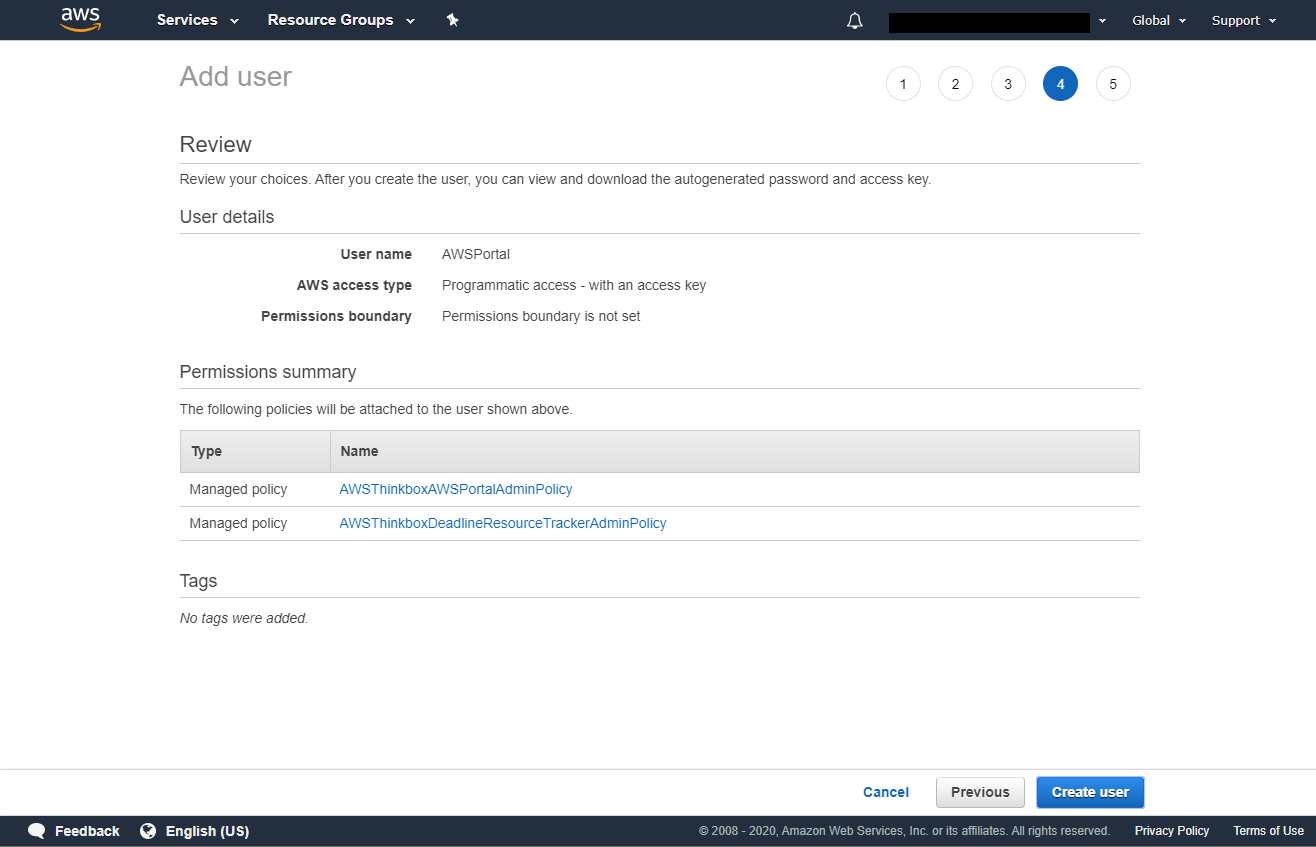
Search for AWSThinkboxAWSPortalAdminPolicy and AWSThinkboxDeadlineResourceTrackerAdminPolicy in the search box and check them in the list below. Continue by clicking on the Next: Review button.

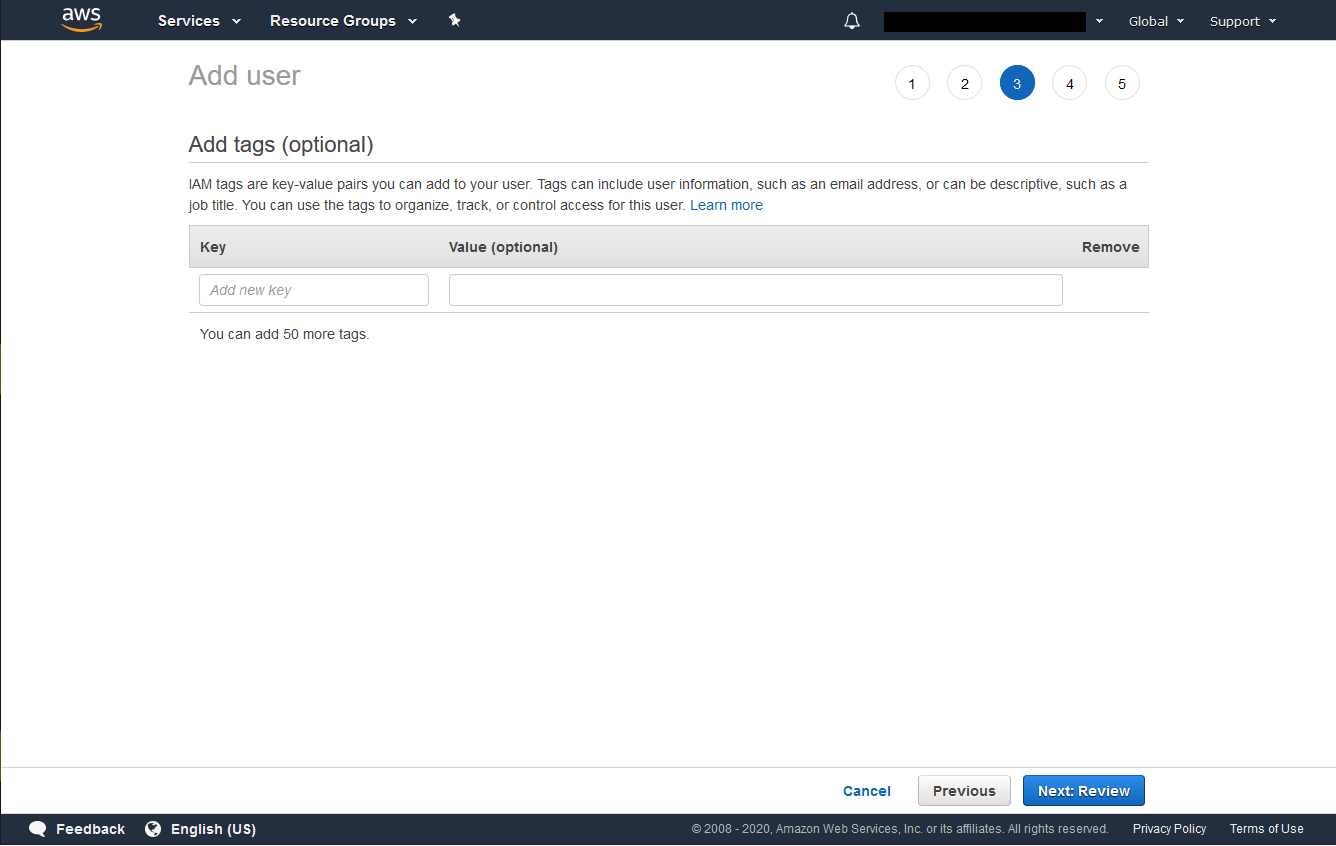
You can add tags with additional data to the user but they are not required. Click on the Next: Review button to continue.
Verify that it looks correct and click Create user.
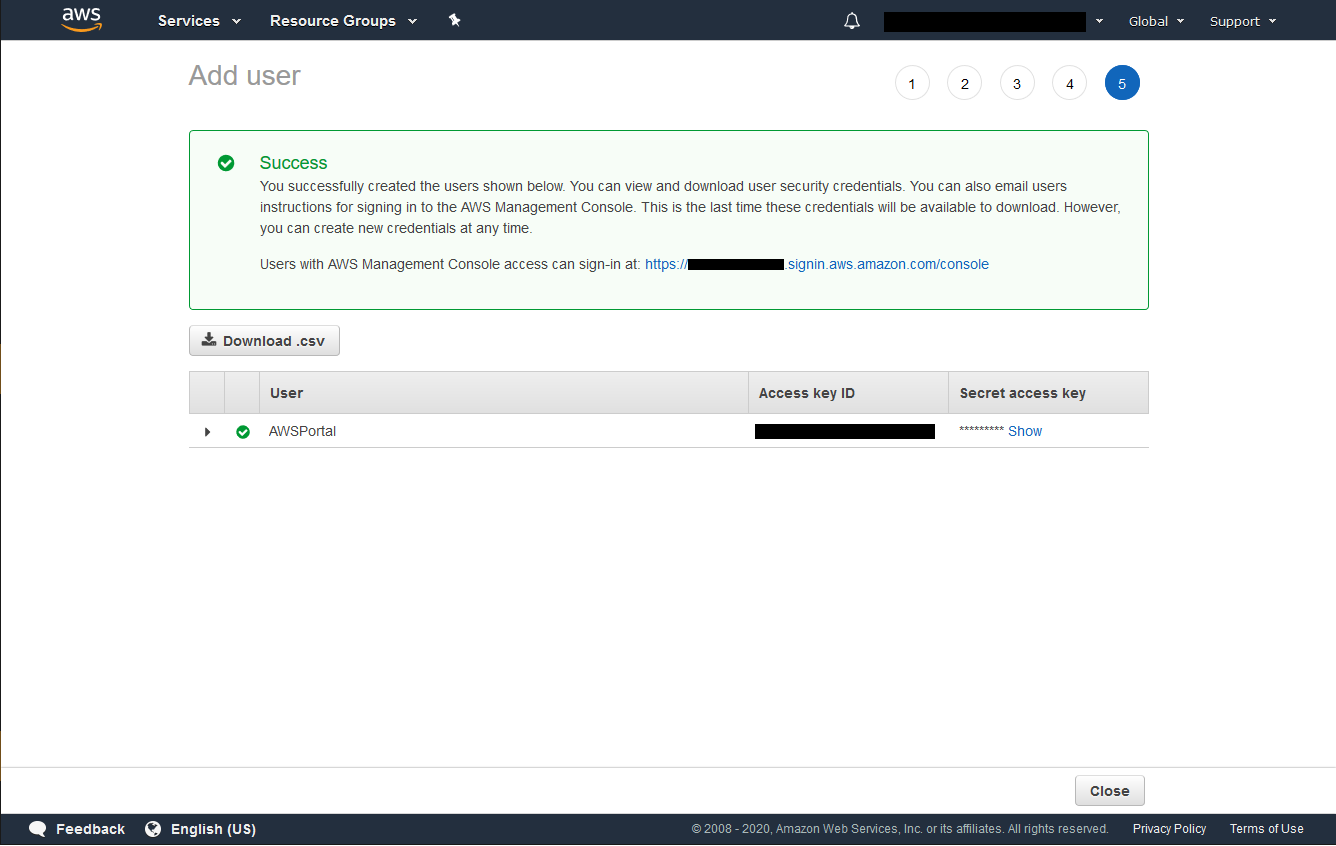
Once the user is created you’ll see a confirmation screen. Here you’ll be able to get your Access Key and Secret Key, which you’ll need when you login to AWS Portal console the first time.
Warning
This is the only time you’ll be able to get your Secret Key, so be sure to note it down, or press the ‘Download .csv’ button to download a file which contains both keys.
Warning
This secret key can be used to access your AWS account. It is important that you keep it stored securely. Please refer AWS Guidelines for standard best practices for management of AWS access keys.