If you’re new to AWS Portal we recommend starting here. If you’re new to Deadline we recommend starting here.
Connecting to a Windows AWS Portal Worker From a Windows Machine
If you are connecting to the Gateway instance from a Windows machine use the following steps.
Install PuTTY
Download and install PuTTY from the PuTTY download page. If you already have an older version of PuTTY installed, we recommend that you download the latest version. Be sure to install the entire suite.
Converting Your Private Key Using PuTTYgen
AWS Portal Link creates the DashKey in a private key format (.pem) which PuTTY does not natively support. PuTTY has a tool named PuTTYgen, which can convert keys to the required PuTTY format (.ppk). You must convert your private key into this format (.ppk) before attempting to connect to the Gateway instance using PuTTY.
To convert the DashKey
Start PuTTYgen as Administrator (for example, from the Start menu, choose All Programs > PuTTY > PuTTYgen, Right Click > Run as administrator).
Under Type of key to generate, choose RSA.
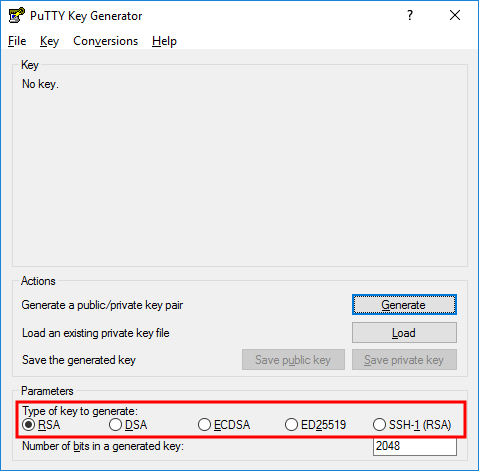
If you’re using an older version of PuTTYgen, choose SSH-2 RSA.
Choose Load. By default, PuTTYgen displays only files with the extension .ppk. To locate your .pem file, select the option to display files of all types. Then navigate to the directory with the DashKey that you found earlier.
Select the DashKey file, and then choose Open. Choose OK to dismiss the confirmation dialog box.
Choose Save private key to save the key in the format that PuTTY can use. PuTTYgen displays a warning about saving the key without a passphrase. Choose Yes.
Specify the DashKey. PuTTY automatically adds the .ppk file extension.
The DashKey is now in the correct format for use with PuTTY. You can now connect to your Gateway instance using PuTTY’s SSH client.
Starting a PuTTY Session
Use the following procedure to connect to the Gateway instance using PuTTY. You need the DashKey.ppk file that you created earlier for the DashKey.
To start a PuTTY session
Start PuTTY as Administrator (from the Start menu, choose All Programs > PuTTY > PuTTY, Right Click > Run as administrator).
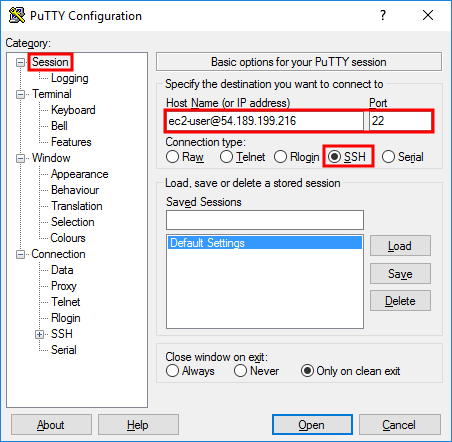
In the Category pane, choose Session and complete the following fields:
In the Host Name box, enter ec2-user@public_dns_name_or_ipv4_address.
Under Connection type, select SSH.
Ensure that Port is 22.
(Optional) You can configure PuTTY to automatically send ‘keepalive’ data at regular intervals to keep the session active. This is useful to avoid disconnecting from your instance due to session inactivity. In the Category pane, choose Connection, and then enter the required interval in the Seconds between keepalives field. For example, if your session disconnects after 10 minutes of inactivity, enter 180 to configure PuTTY to send keepalive data every 3 minutes.
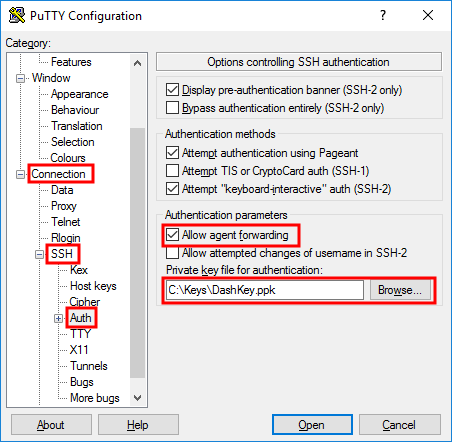
In the Category pane, expand Connection, expand SSH, and then choose Auth. Complete the following:
Choose Browse.
Select the DashKey.ppk file that you generated earlier, and then choose Open.
Select the Allow agent forwarding check box.
(Optional) If you plan to start this session again later, you can save the session information for future use. Choose Session in the Category tree, enter a name for the session in Saved Sessions, and then choose Save.
Choose Open to start the PuTTY session.
In the Category pane, expand Connection, expand SSH, and then choose Tunnels. Complete the following:
In the Source port box, enter 13389
In the Destination box, enter the workers_private_ipv4_address:3389
Click Add
Ensure the Local box is checked
If this is the first time you have connected to this instance, PuTTY displays a security alert dialog box that asks whether you trust the host you are connecting to.
Choose Yes. A window opens and you are connected to your Gateway instance.
Configuring the Worker to accept RDP connections
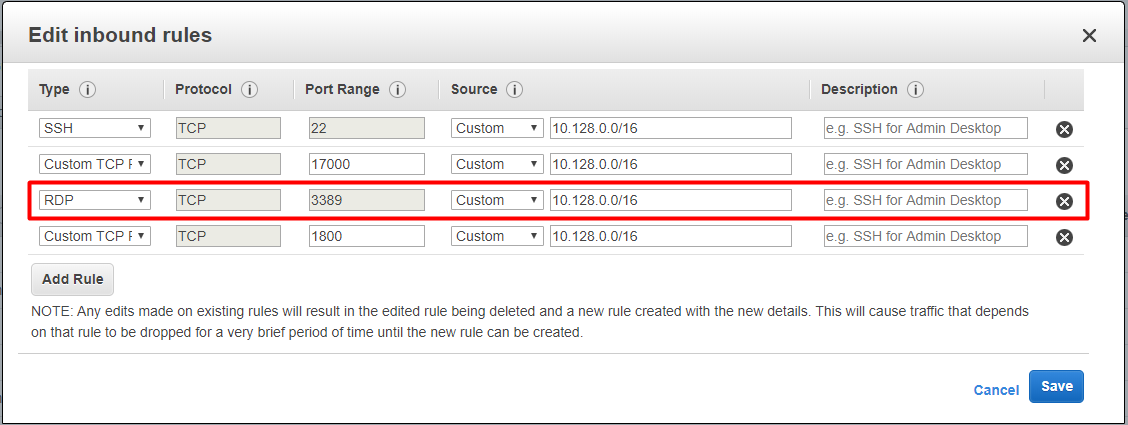
By default the security group of the instance the Worker is running on won’t allow for incoming traffic on port 3389 (RDP). Follow these steps to allow incoming traffic on this port:
Open AWS Console
Go to Services > EC2 > Instances
Find the instance with the Worker you want to connect to
With the Worker instance selected find the security group displayed in the description pane below, click the link to edit the security group
Change to the Inbound tab then click Edit > Add Rule > Select RDP from the “Type” dropdown and for the source, copy the address from the “SSH” rule.
Connecting to the Worker
Once you have logged into the Gateway instance you can now log into your AWS Portal Worker instances.
Open Remote Desktop Connection.
Click Show Options
In the Computer box, enter localhost:13389
In the User name box, enter Administrator
You will need the password for the Windows machine
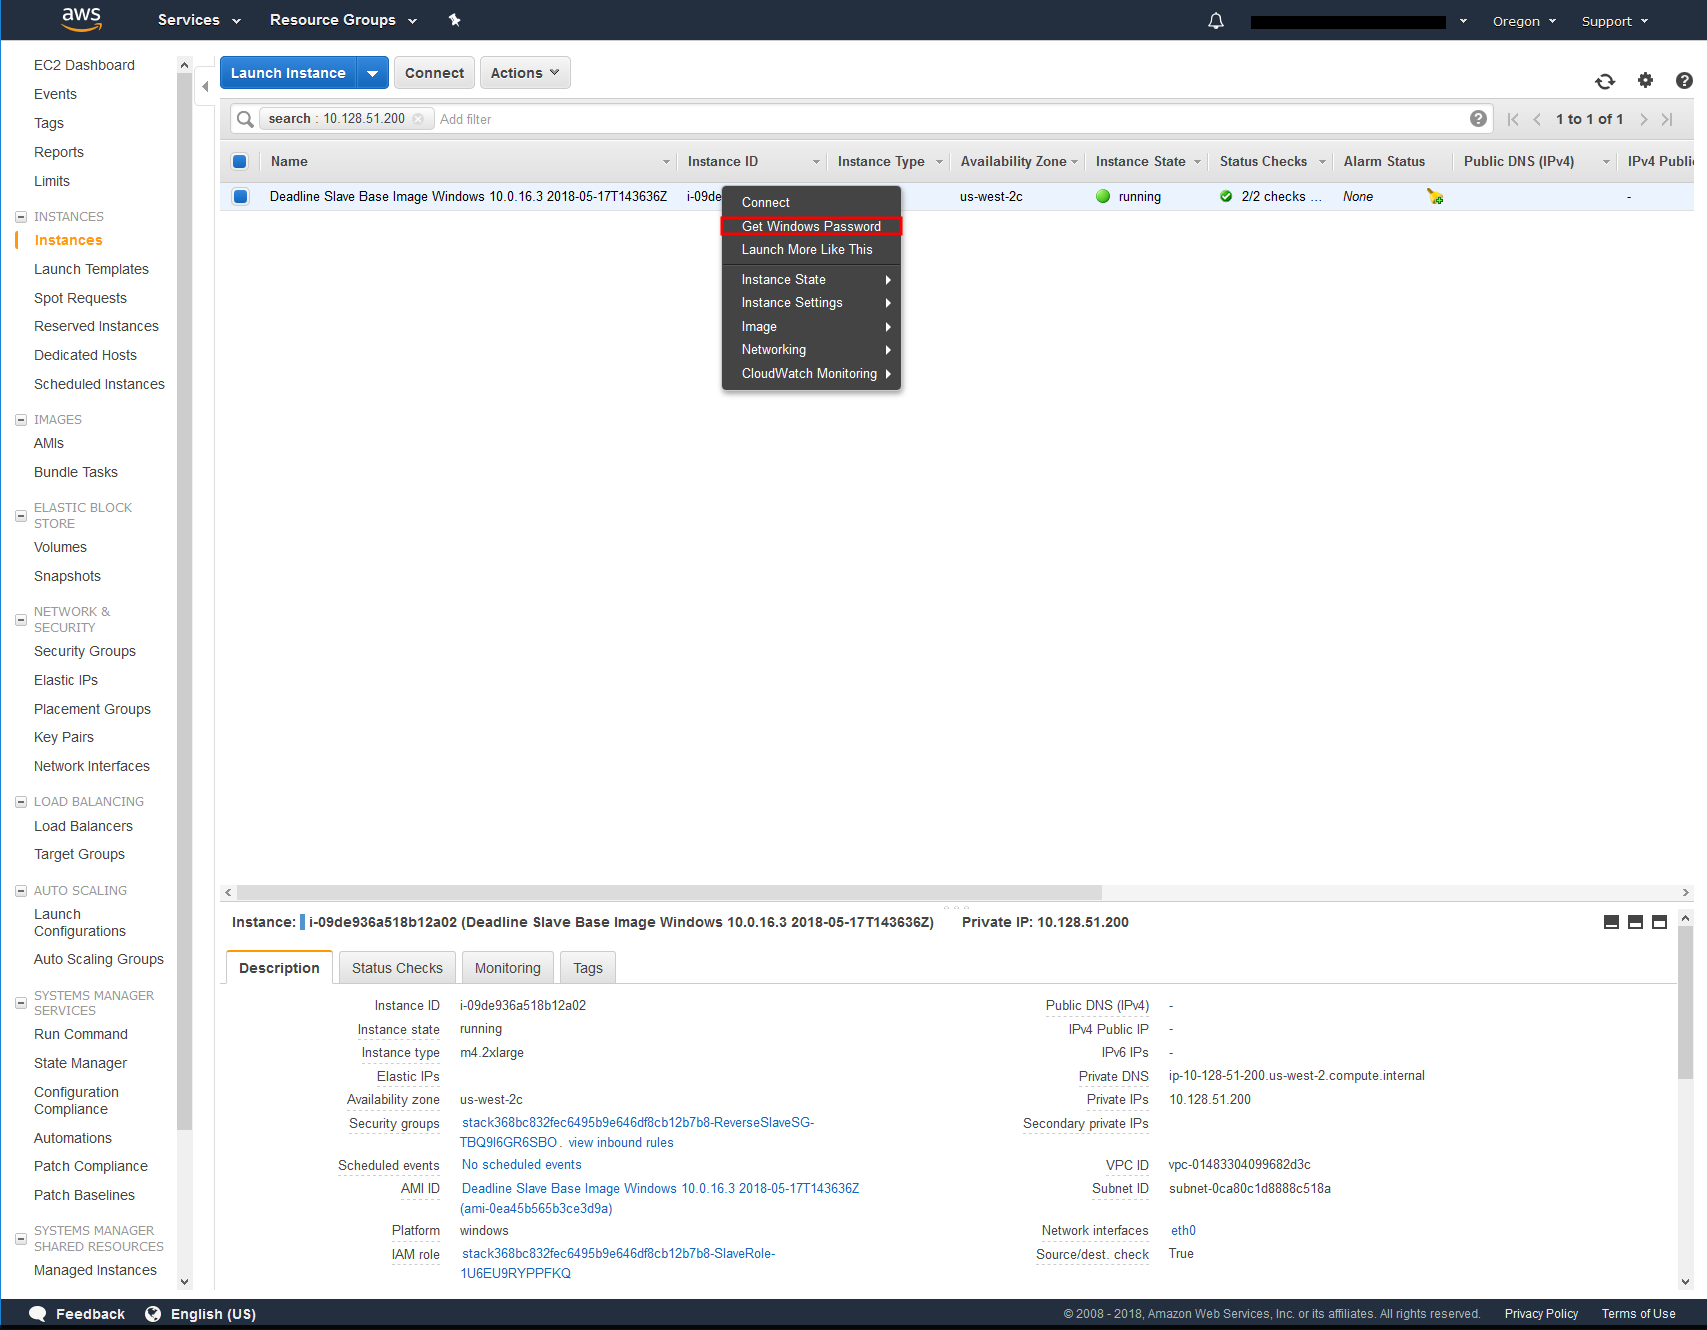
Open AWS Console
Go to Services > EC2 > INSTANCES > Instances
Filter by IP Address
Right Click instance > Get Windows Password
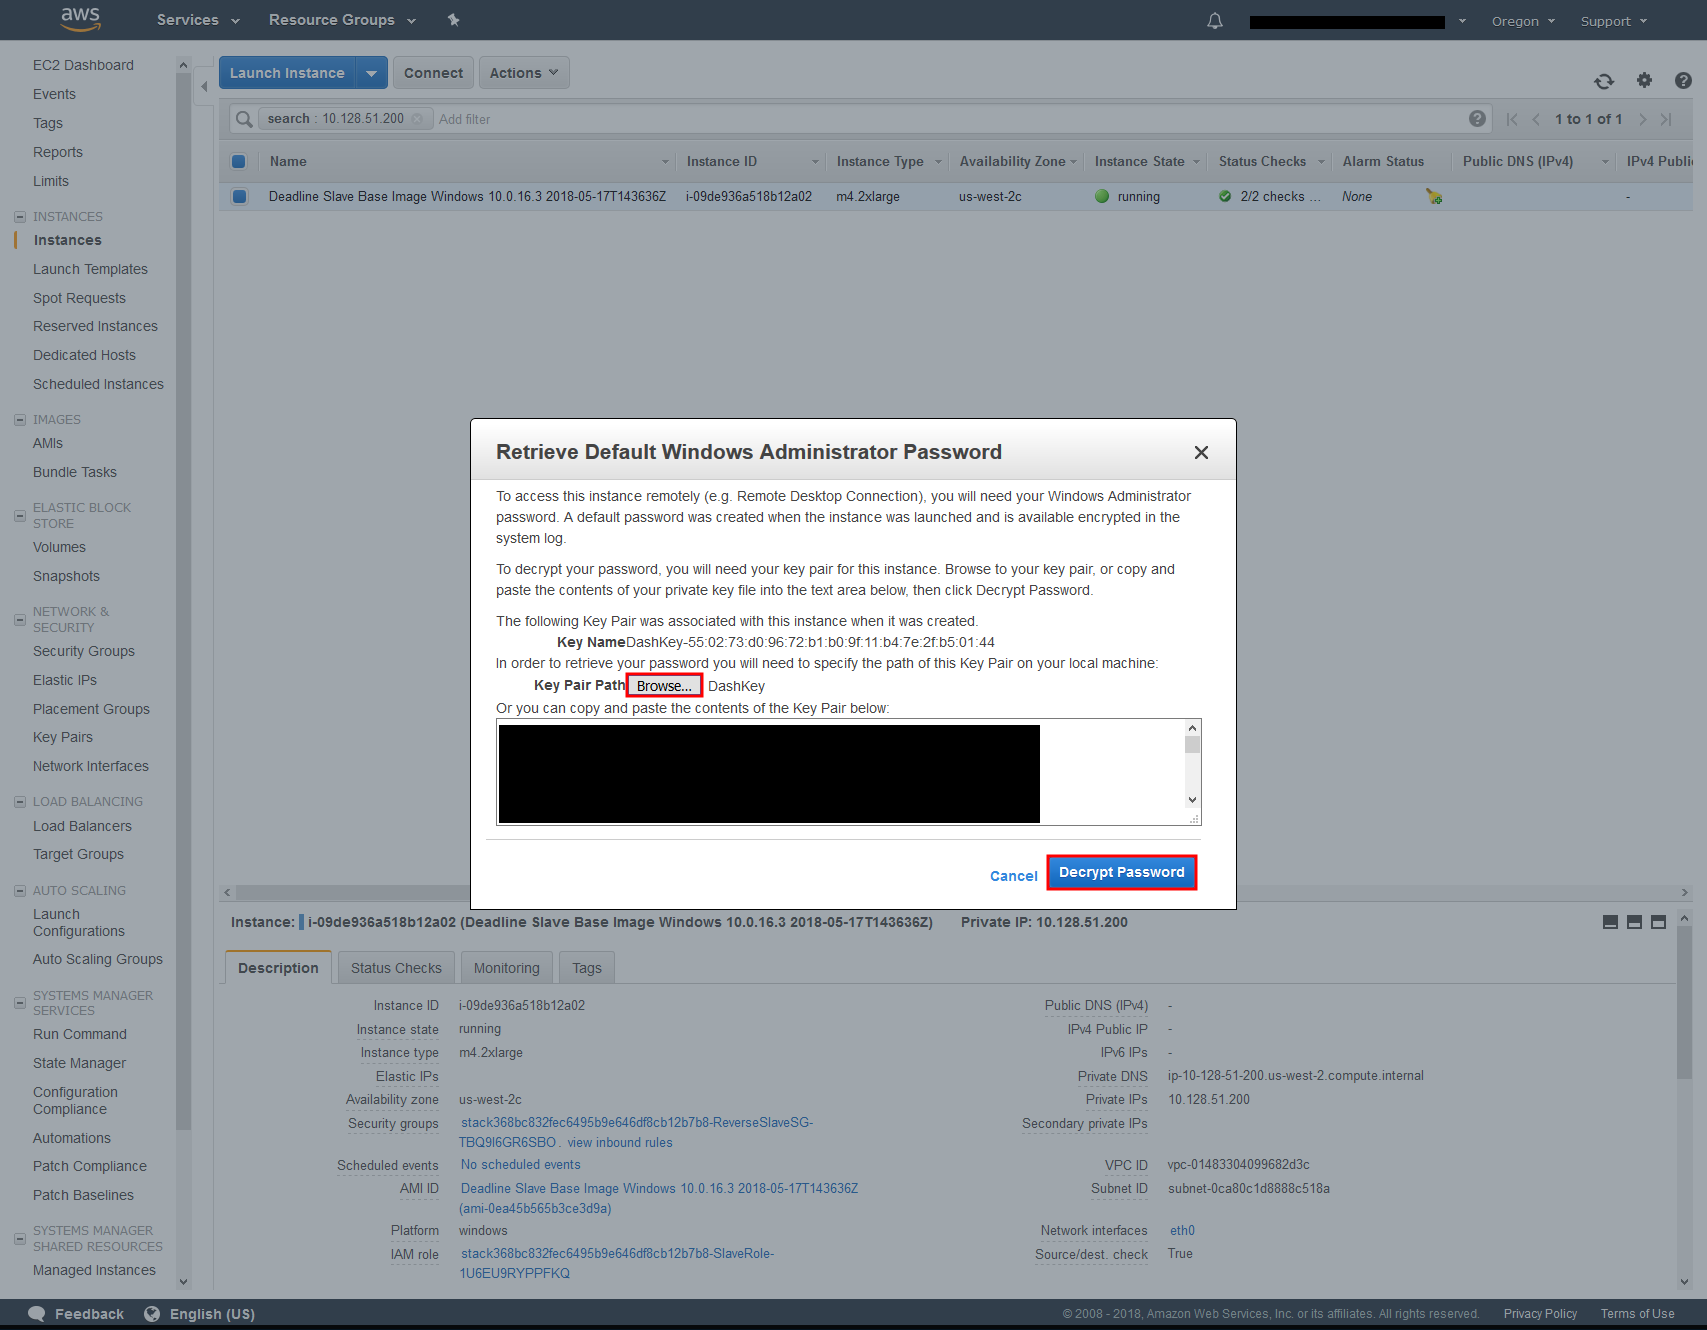
Click Browse… beside Key Pair path
Navigate to DashKey location
Select DashKey and click open
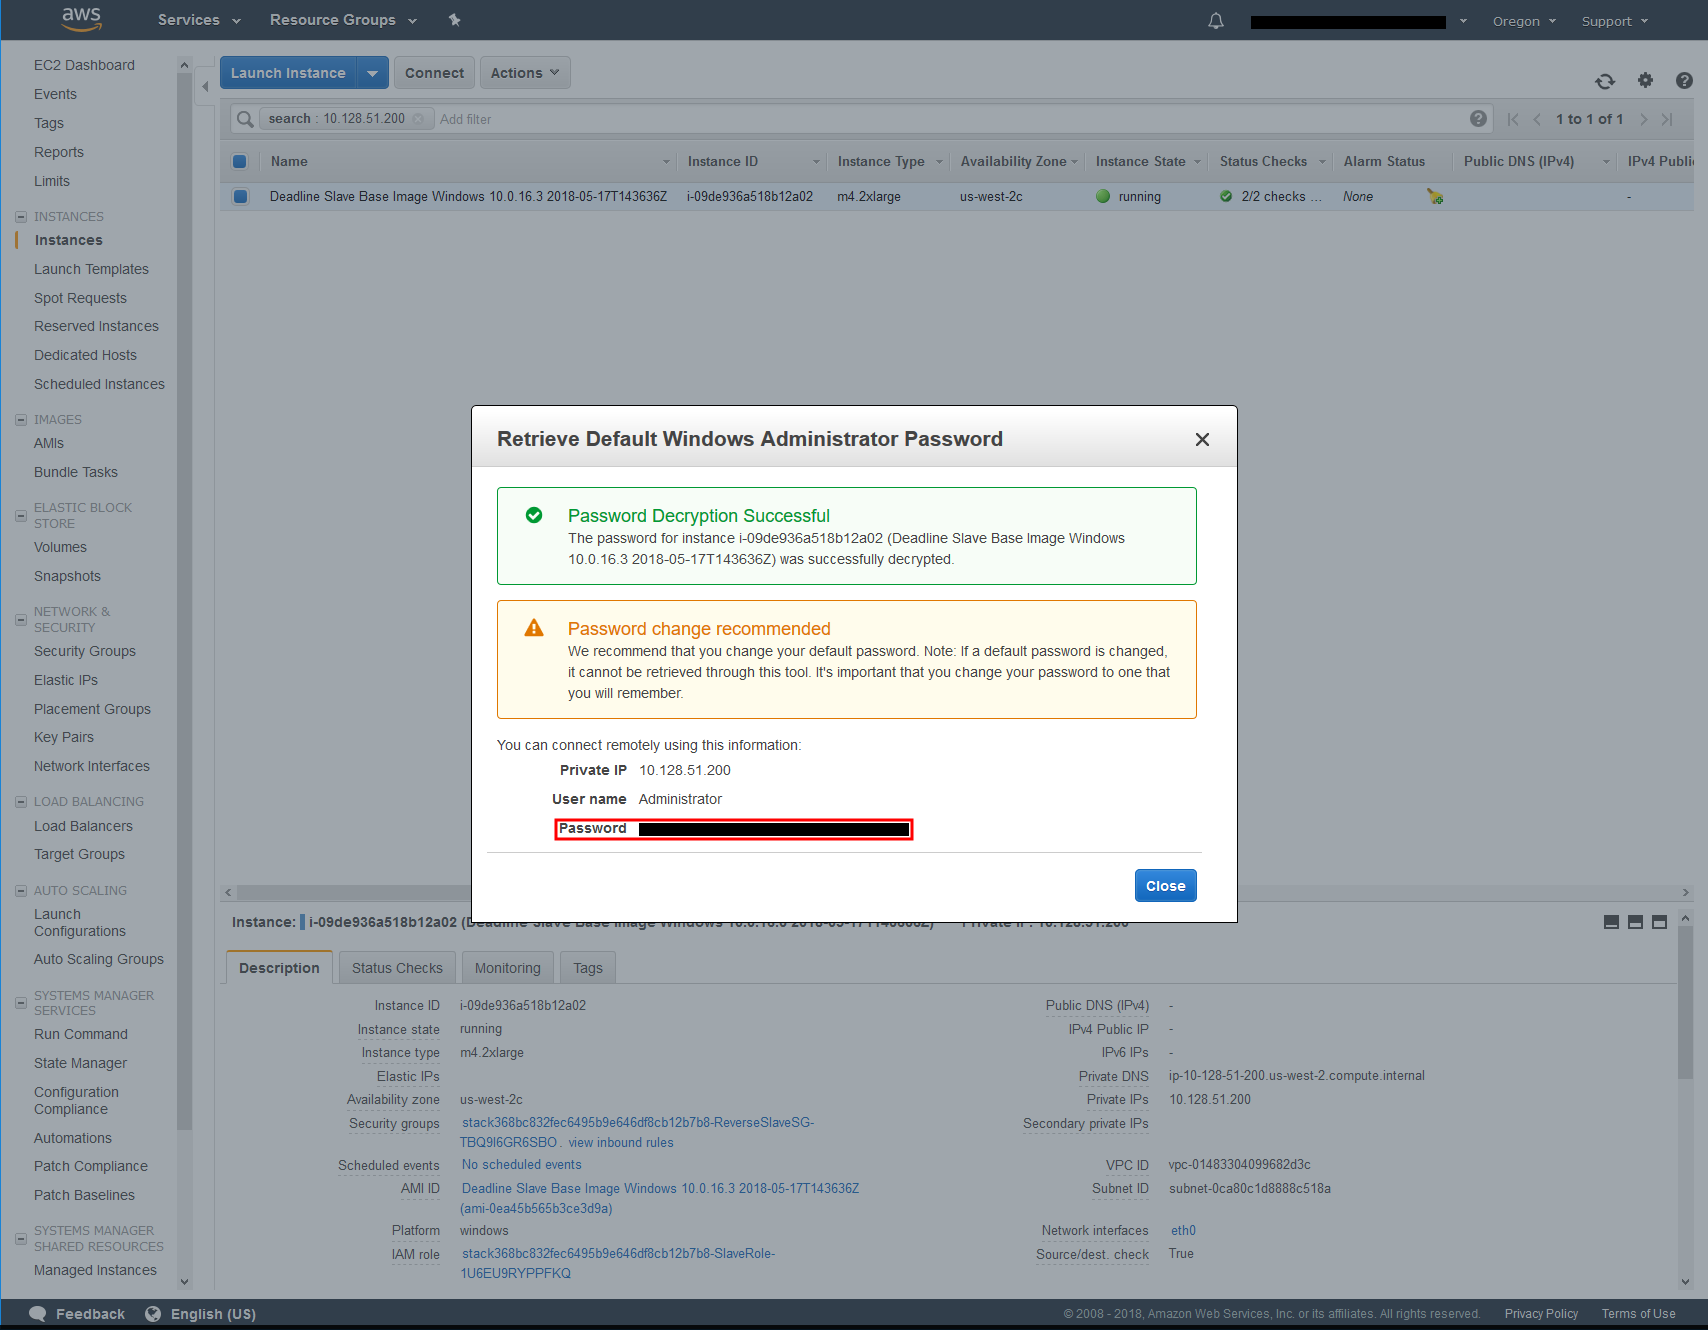
Click Decrypt Password
Copy Password
Click Connect
Paste in the Password
You will get a warning saying. The identity of the remote computer cannot be verified. Do you want to connect anyway?
Click Yes
You are now connected to your AWS Portal Worker instance.
