Integrated Submitter Installation (Quick)
Overview
This guide will walk you through the installation of the integrated submitters, which can be used to submit jobs from within your application (3ds Max, Maya, Nuke, etc). These should be installed on any machines you wish to submit jobs from. Note that jobs can also be submitted from the Submit menu in the Monitor. See the Submitting Jobs documentation for more information.
At this point, you should already have the Database and Repository installed, and the Client software installed. If you do not, please see the Database and Repository Installation (Advanced) and Client Installation (Advanced) documentation for installation instructions. You also need to have the software that you will be submitting from installed as well (3ds Max, Maya, Nuke, etc).
Installing The Submitters
The submitter installers can be found in the submission folder in the Deadline Repository. Open the folder for the application you want to install the submitter for (3dsmax, Maya, Nuke, etc), and then open the Installers folder. There will be an installer for each operating system that the current application runs on.
Simply run the appropriate installer then follow the step as follows. Note that these steps are similar for each application and each operating system.
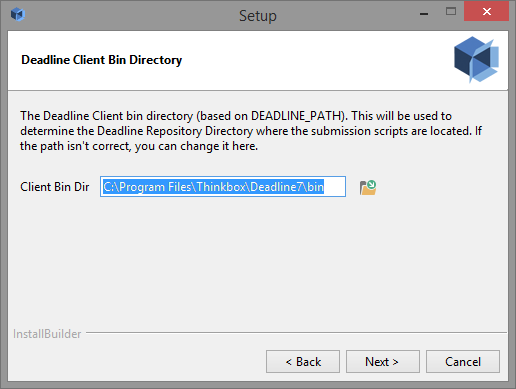
The Deadline Client Bin Directory page shows what DEADLINE_PATH is currently set to. This value is originally set by the Client installer, and is used by the submission scripts to find the Client’s bin directory so that it can find the Repository and submit jobs. You can change the DEADLINE_PATH value here if it’s incorrect or if it doesn’t exist, and the submitter installer will give you the option to make the change permanent.
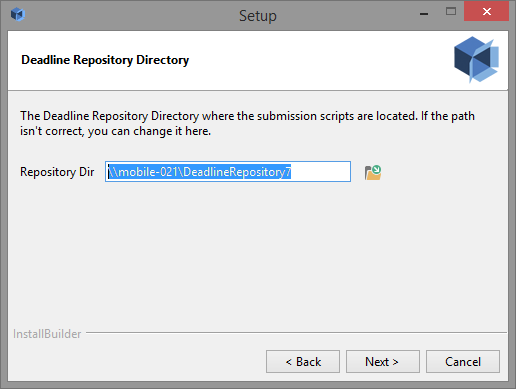
The next page will show the Repository directory that the Client is currently connected to, which is where the submission scripts are installed from. If this path is incorrect, you can change it here.
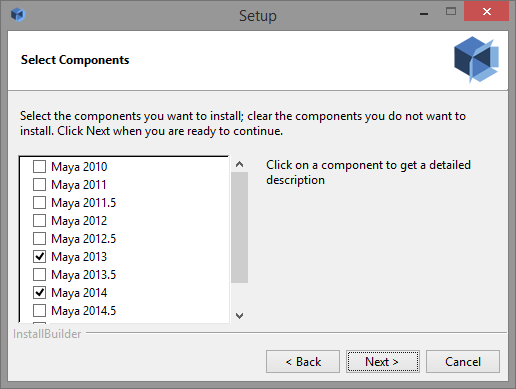
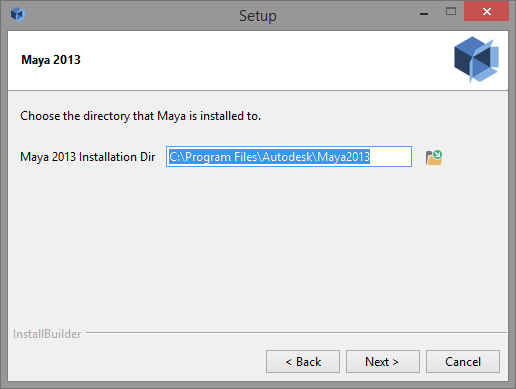
Select the components you wish to install (the installer will try to auto select the versions it detects), and then verify the install location for each one.
After configuring these, press Next to continue with the installation.
