Selection Channel Support
Available in Krakatoa v1.5.1 and higher
Overview
- The 3ds Max Modifier Stack supports a selection channel (including Soft-Selection Weights for non-boolean selection) for controlling the influence of modifiers on sub-object elements like vertices, edges and faces.
- Krakatoa v1.5.1 adds support for the Selection channel of particles loaded by a PRT Loader or created by a PRT Volume object, and in v1.6.0 also for the PRT FumeFX object.
- The Selection channel can be saved to PRT files and loaded by PRT Loaders.
- The Selection channel can be read, modified and written by Magma Modifiers.
- The Selection channel can be set by the 3ds Max Volume Select Modifier.
- The Selection channel can be acquired by the PRT Volume object from the source geometry.
- The Selection channel can be used by the Krakatoa Delete Modifier to delete selected particles.
Workflow Examples
Sine Wave Selection By Z Position
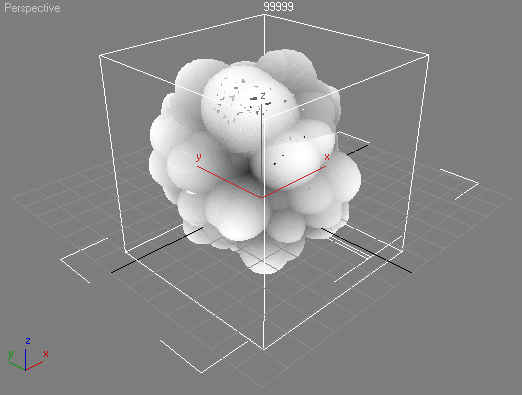
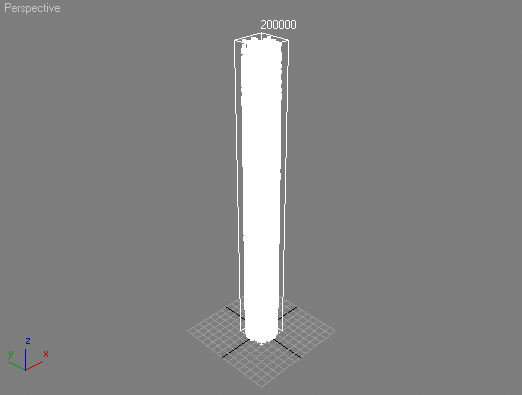
- In the following example, we will use a PRT Volume created from a Cylinder to resemble a column of particles.
- Assign a new Magma Modifier to the modifier stack of the PRT Volume.
- In the Magma Editor,
- Press SHIFT+CTRL+S to create an Output node set to the Selection channel.
- Press SHIFT+P to create an Input node set to the Position channel.
- Press CTRL+R to enable Auto-Reorder mode.
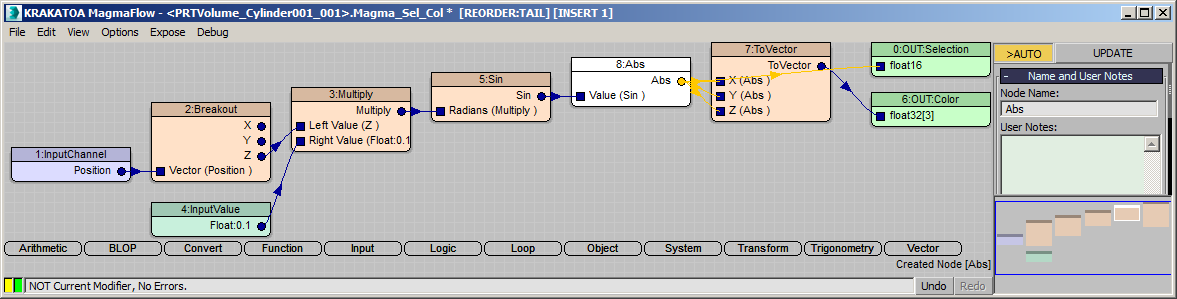
- In the Magma Editor’s command panel, press the Extract Z button to insert a Breakout operator and output the Z component.
- Press the Multiply (Star) key on the Numeric Keypad to add a Multiply operator.
- Press CTRL+1 to add a Float Input, then enter 0.1 to scale down the Z value 10 times.
- Select the Multiply node again and hit the [ key to insert a Sin Operator into the flow.
- At this point, the Z position is scaled down and passed into the Sin operator, producing a sine wave in the Selection channel.
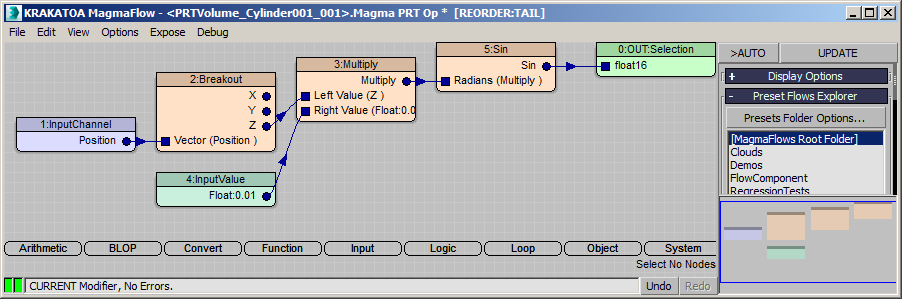
- To visualize this, we can
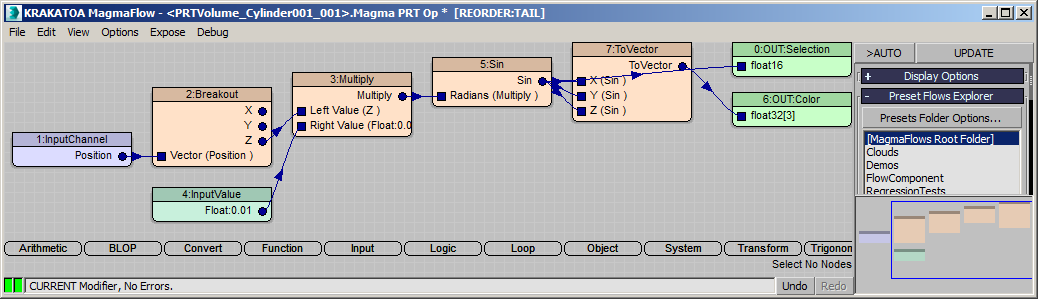
- Add another Output node by pressing SHIFT+CTRL+C for Color.
- Connect the Sin operator’s output to the Color Output node.
- Select the wire between the two and press C and then V to insert a Convert > ToVector operator.
- Connect the output of the Sin operator to the second and third inputs of the ToVector operator.
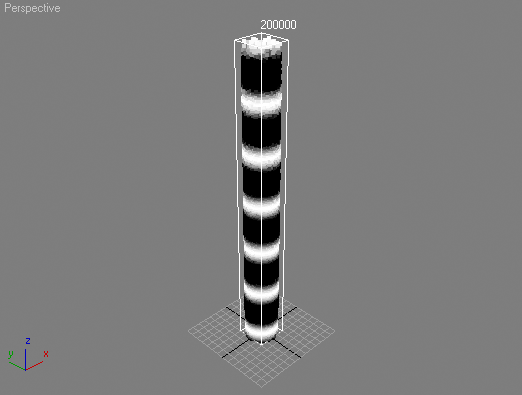
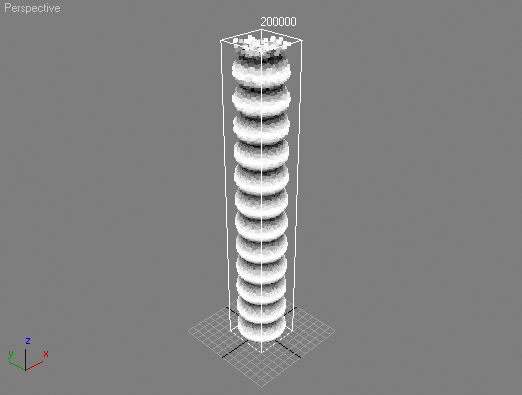
- The result in the viewport looks like this - the Sin function changes its output between +1 and -1, but the values below 0 are shown as solid black:
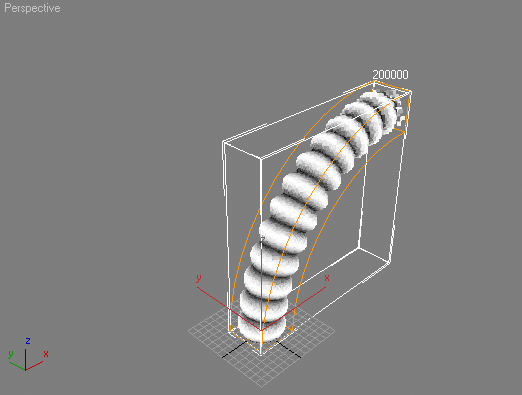
- At this point, the PRT Volume has a valid Soft Selection with values between -1 and +1 and we can add a Modifier to test that:
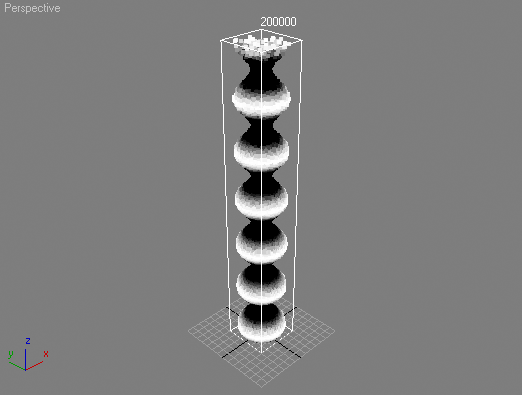
- We add an XForm modifier, enter the Gizmo sub-object level and scale the X and Y axes only to 150%.
- The result in the viewport looks like this:
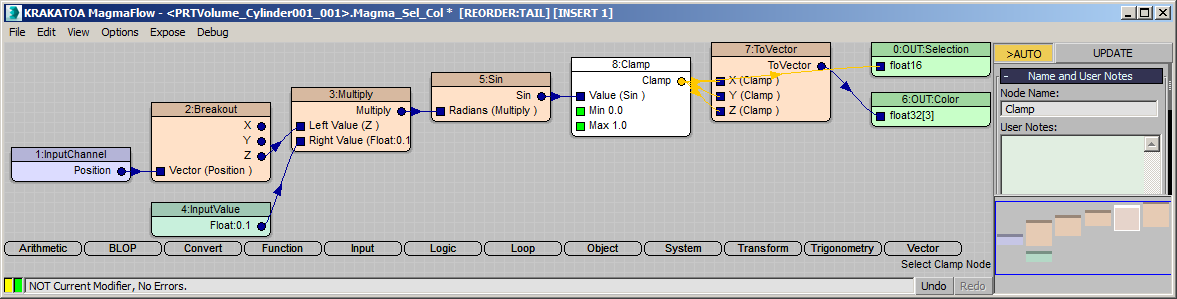
- We could clamp the selection value in the range from 0.0 to 1.0, thus “flattening out” the negative portions of the Sine wave:
- Select the Sin Operator and hit the F and then the C key to insert a Function > Clamp Operator.
- The resulting flow looks like this:
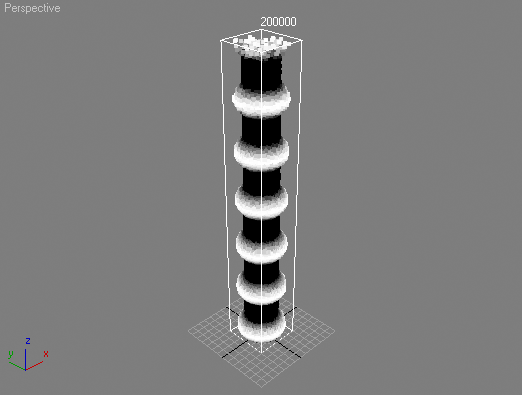
- The viewport representation of the PRT Volume changes accordingly:
- Instead of clamping the negative values, we could turn them into positive ones by replacing the Clamp Operator with an AbsoluteValue Operator.
- Select the Clamp operator and press the Backspace key to remove it while retaining the connections passing through it.
- Select the Sin operator and press A and then B to insert an Abs Operator that will calculate the absolute value and remove the negative sign.
- The viewport looks like this:
- So far, we have affected the XForm modifier with our custom procedural Soft-Selection.
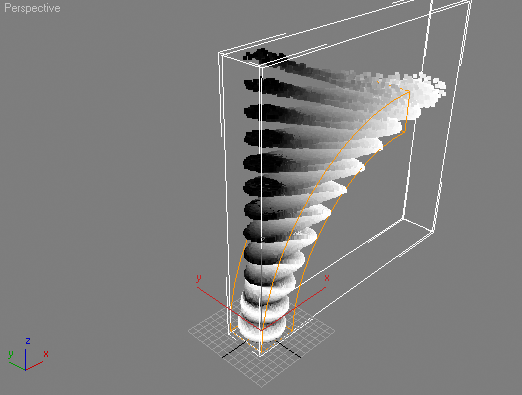
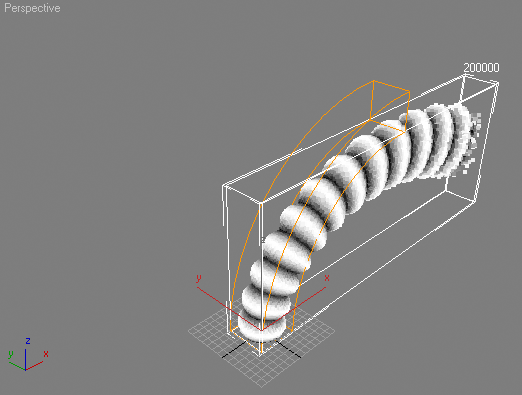
- If we would add another deformation modifier like Bend with Angle of 90 degrees for example, it would also be affected by the same selection.
- Note that if we were using a PRT Loader instead of a PRT Volume, we would have to go to the Base Object and press the “Get All From Object” button in the Modifier Gizmo Size group in the Culling and Deformations rollout to ensure the Bend gizmo will be resized according to the particle system’s size.
- Then we can add a Bend modifier and set the Angle value to 90.0:
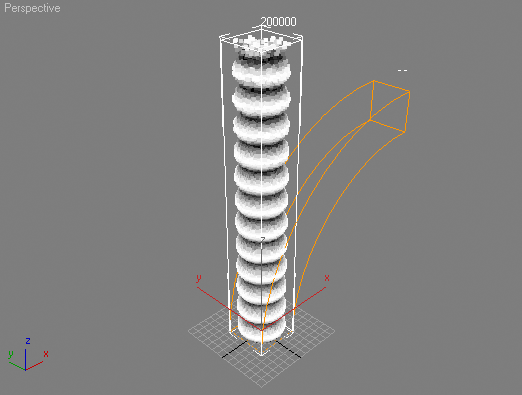
- This is, of course, not necessarily what we want. Like with regular 3ds Max modifiers, we will have to reset the selection after the first deformation for the second to ignore it.
- To do this, we just add a new Magma Modifier to the stack just below the Bend modifier and set it to write the value of 1.0 into the Selection channel:
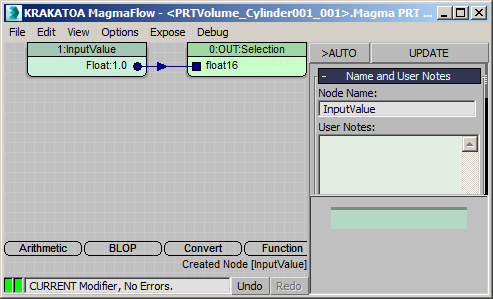
- The Bend now applies correctly to all particles because they all have a Selection (read: Modifier Influence) value of 1.0:
- Using a Selection value of 2.0 increases the influence of the Bend proportionally, deforming the particles more:
- On the other hand, setting the Selection value to 0.0 disables Bend modifier completely. This could be useful when animating the influence of a modifier from 0.0 to 1.0 or higher:
Spherify By Texture Map
- The Selection channel could also be set by a Texture Map value.
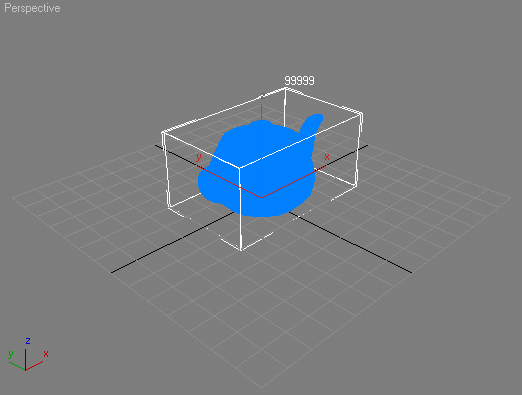
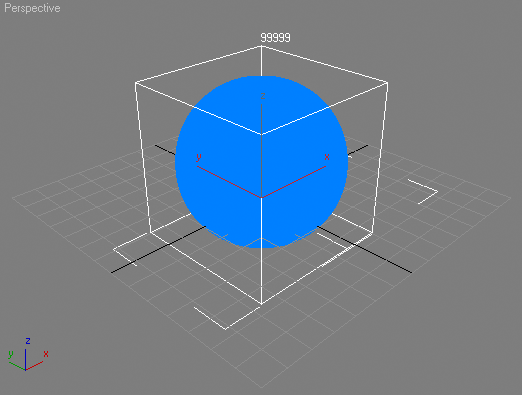
- Create a Teapot and turn it to particles using a PRT Volume.
- Add a Spherify modifier on the stack
- At this point, we have a teapot that turned into a sphere:
- Now let’s add a Magma Modifier below the Spherify Modifier
- Open the Magma Editor.
- Press SHIFT+CTRL+C to create a Color Ouput node.
- Press I, then T to create an InputTexmap node, connected to the Color Output
- Then we press the <Add Texture Map> button and pick the Cellular Map
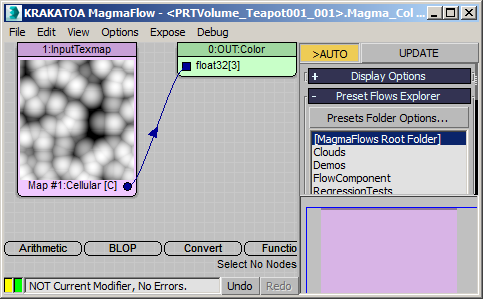
- Since the Output is set to Color, we can immediately see the default Cellular Map in object space coordinates:
- Assuming that we want to use the Color in the rendering AND also control the Selection by the Cellular map,
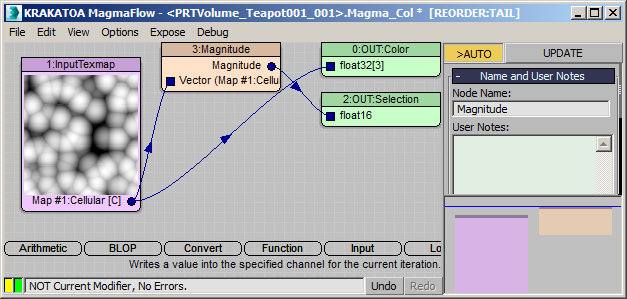
- Add a second Output node set to selection by pressing SHIFT+CTRL+S.
- Connect the InputTexmap output socket to the Selection Output’s input socket.
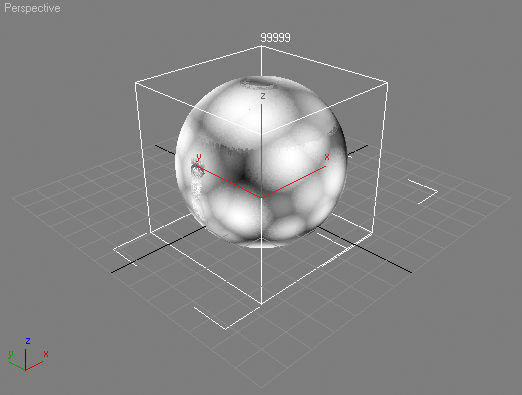
- Select the new wire and press V and then M to insert a Vector > Magnitude Operator to turn the Vector into a Float:
- Our Teapot is now Spherified according to the grayscale map we applied: