Motion Blur
Available in Krakatoa v1.0.0 and higher.
Matte Sampling enhanced in Krakatoa v1.6.0
Overview
- In real world terms, Motion Blur is the camera effect caused by the motion of objects while the camera shutter is open - light bouncing off the moving object registers on film and produces a blurred trail as the object changes its position over time.
- In Krakatoa, Motion Blur is the camera effect caused by moving particles and by moving Matte Objects occluding the particles.
- These two aspects of Motion Blur in Krakatoa are handled independently and have different settings.
- Krakatoa also supports the 3ds Max Multi-Pass Motion Blur Camera Effect which handles both Particle and Matte Objects at once but at a significant performance cost.
Krakatoa Motion Blur
Particle Motion Blur
- The built-in Krakatoa Motion Blur method was designed to provide the fastest performance by making some assumptions that can be applied to a large percentage of use cases
- The motion of the particles during the motion blur interval is assumed linear.
- The illumination of the particles during the motion blur interval (shutter time) is assumed constant and is calculated at the center of the interval.
- The motion is calculated based on the current particle position centered at the shutter interval without the ability to control the Motion Blur Bias, and the particle’s velocity vector which produces linear motion.
- These assumptions mean that the particle data can be loaded just once for the current frame and that the lighting calculations can be performed just once before drawing multiple sub-frame sample passes to produce the final Motion Blur effect.
- Only sorting, Matte Objects evaluation (see below) and final pass drawing have to be performed for each pass.
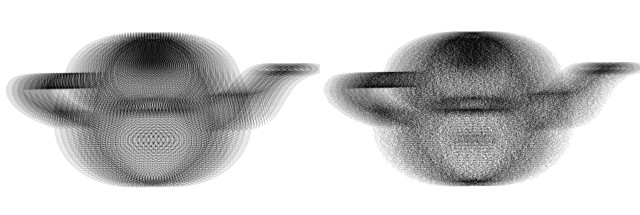
- By default, the velocity of the particle during the interval is assumed constant which can lead to stepping in the final result if the distance between two samples is larger than a pixel.
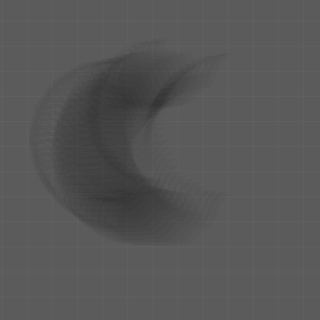
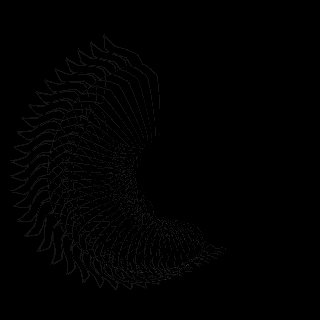
- This can be addressed by enabling the >Jittered Motion Blur option which shifts each particle’s samples randomly along the velocity vector and produces a less uniform and more fuzzy looking final image (see example image).
Matte Objects Motion Blur
- As mentioned already, the Matte Objects Motion Blur is somewhat decoupled from the Particle Motion Blur calculations and provides its own controls to tweak quality vs. speed and match the sampling and bias of geometry renderers to integrate with.
- A Matte Object can move due to two main causes - node transformations (position, rotation and scale animation) and mesh deformations (caused by base object vertex animation, modifiers and Space Warps).
- These two causes for Matte Object animation are also handled separately so it is possible to take into account only the transformation or both transformation and geometry changes.
- By default, the Transformation of Matte Objects will be sampled once per Particle Motion Blur Pass, thus reflecting correctly any sub-frame motion of the Matte Object caused by Position, Rotation or Scale animation, while the Geometry will be evaluated only once for the first sample and then assumed unchanging.
- If the Matte Objects Segments value is enabled by checking the >Use option in the Main Controls rollout, the number of samples evaluated can be decoupled from the Particle Samples and any sub-samples between the actually evaluated transformation values will be interpolated linearly.
- If the >Sub-Sample Geometry option is also checked, the geometry of the object will also be sampled on the same sub-frame times as the transformations and in-between vertex positions will be interpolated, as long as the topology has not changed between the two samples.
- Since the geometry evaluation could be costly in some complex scenes, this can be used to speed up rendering a lot when the geometry changes are not too abrupt within the shutter interval - for example, if rendering 16 passes Particle Motion Blur, the Geometry Sub-Sampling could be set to 3 segments causing the Matte Objects’ modifier stacks to be updated only 4 times.
- If the Matte Segments value is not used but the >Sub-Sample Geometry option is checked, the geometry and transformations will be up updated before each Particle Motion Blur pass to provide the highest quality result but at cost of performance.
Matte Motion Blur Examples
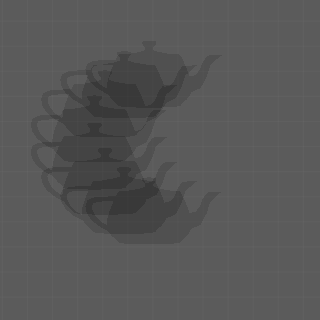
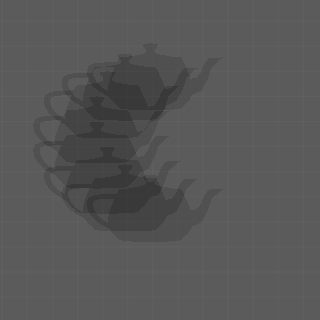
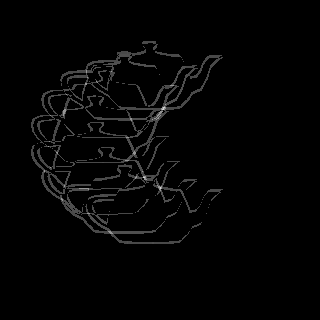
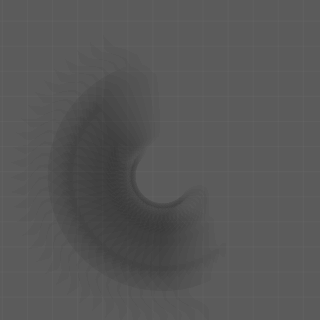
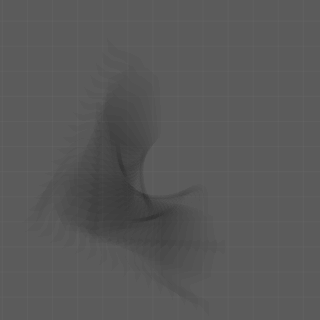
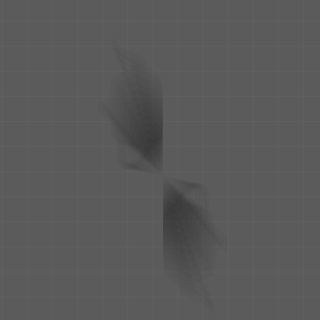
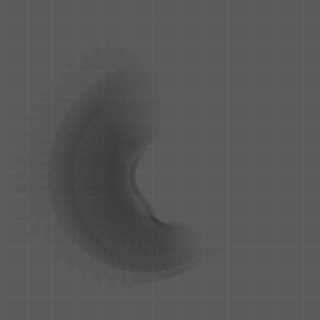
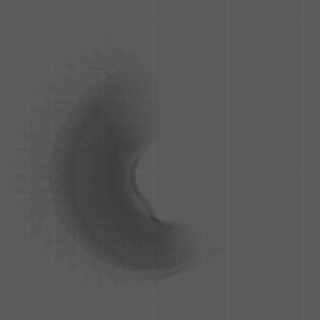
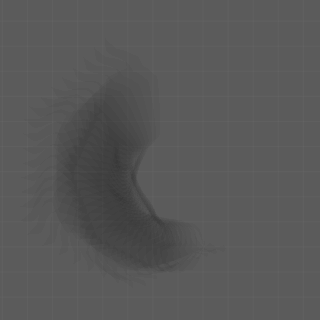
- In the following example, a Teapot primitive set as Matte Object was placed on a circular path using Path Constraint and animated to travel the whole circle from frame 0 to frame 2.
- The background is a Box primitive converted to particles using a PRT Volume and rendered additively.
Path Motion, No Follow
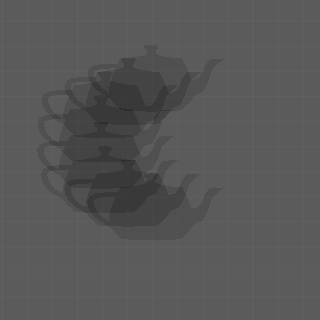
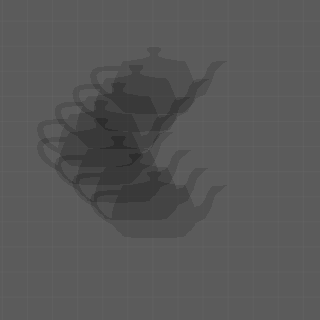
- The following images were rendered on frame 1 using shutter of 360 degrees (one frame) - the Teapot travels from top of the circle (90 degrees on the path, half a frame back) to bottom of the circle (270 degrees on the path, half frame forward).
- The first image shows 8 passes motion blur with Matte Segments unchecked, thus sampling the transformation before each particle pass.
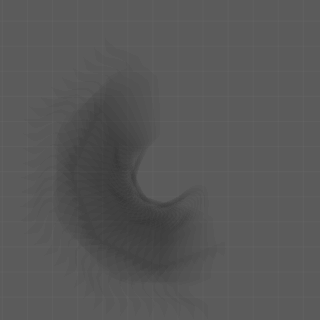
- The second image show the same rendering with Use Matte Segments checked and Matte Segments set to 4 segments:
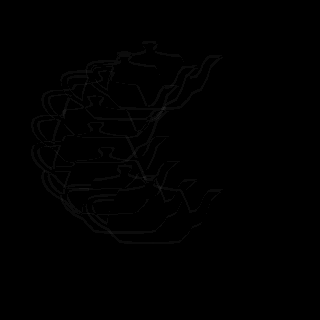
- Here is the difference between the two images above, the left shows the actual pixel difference, the right one has the luminosity exaggerated to make it more visible:
- The following two images show the same rendering with Use Matte Segments checked and Matte Segments set to 3 and 2 segments - the linear interpolation between the few samples produces a bad approximation of the circular path and would only work if the motion of the matte object were mostly linear:
- Using 1 segment is a bad idea when the Matte Object is not moving along a straight line - it totally misses the curvature of the path because it samples only the start and end transformations and interpolates between them:
- Here is the same setup, but with 32 passes Particle Motion Blur - left image had the transformation evaluated on each sub-frame sample, the right one used 8 Matte Segments:

- The difference is relatively small (left image shows the real difference, the right image has the luminosity exaggerated to make the difference more visible):
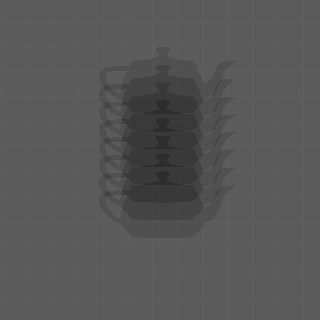
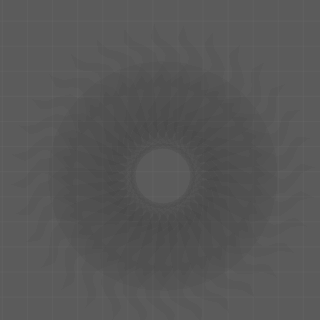
- Here is an example with the Shutter opened extremely to two frames, thus capturing the complete motion of the Matte Object along the circular path with 32 Particle Samples and evaluating the transformation on each sample (Use Matte Segments OFF):
Path Motion, Follow
- Now let’s check the “Follow” option on the path and see how the Rotation component of the Transformation is evaluated and interpolated:
- The left image evaluates the transformation on each sample, the right uses 4 Matte Object segments and interpolates linearly between the samples:


- Below is the Difference between the above two images, the first one the original difference result, the second one brightened up to exaggerate the difference and make it more visible:

- Using too few Matte Object Samples (2 in this case) produces degenerated motion when using curved paths like the circle here:

- Here is the same setup, but with 32 Particle Samples, left image with Shutter of 360 and right one with Shutter of 720:
- Using less Matte Object Segments can speed things up - evaluating the transformation causes a full world state evaluation of the object and if it is a complex rig with a high-resolution mesh including slow modifiers, this can take its time even if the Geometry itself is not being sampled.
- The left image uses 8 Segments and is relatively close to the fully evaluated one above, but at 4 segments we start seeing edges and linear segments as the path is interpolated between the few samples:

- Going as low as 2 and 1 Segments only makes sense if the object is moving mostly linearly and not rotating, with a circular path and Follow the results are unusable:
Path Motion, Follow, Bend Deformation
- Now let’s add some vertex deformations to the Matte Object using a Bend modifier animated from 0 degrees on frame 1 to 360 degrees on frame 2 and applied to the Y axis.
- Here is the rendering with 8 passes to show the deformation of the teapot over time:

- The same rendering with 32 Particle Samples and Matte Segments Off vs. 16 Matte Segments shows that the results are visually very close, but the evaluation time of the geometry (especially in cases of complex geometry, rigging and modifier stacks) would be shorter thanks to the fewer segments in the second case:

- Here is the pixel difference and the exaggerated difference between full sampling and 16 Matte Segments sampling:
- Going as low as 8 Matte Segments (left) still produces a fairly usable result for faster previews, but the 4 Matte Segments rendering (right) is already too rectangular to approximate the transformations and deformations of the object:
3ds Max Multi-Pass Motion Blur
- The 3ds Max Multi-Pass Motion Blur Camera Effect is supported for the few cases where the disadvantages of the built-in method are more significant than the advantages.
- This mode should be used when the particle system has really complex motion at sub-frame steps, or when the lighting changes significantly within the shutter interval.
- Both Particle and Matte Objects motion blur are handled together using the same settings.
- Each sub-frame sample requested by the effect will cause all particles to be reloaded and relit and the transformation and geometry of all Matte Objects to be updated.
- If the particle animation is coming directly from a Particle Flow with a short integration step (under one frame), any changes in position, velocity and any other particle properties will be correctly reflected by the Motion Blur.
- In short, the Multi-Pass Motion Blur effect provides a higher quality result at cost of performance and should only be used when the quality advantages overweight the performance disadvantages.
Mixing Multi-Pass Motion Blur and Depth Of Field Effects
- 3ds Max supports only one Multi-Pass effect per camera, so mixing Multi-Pass Depth Of Field and Multi-Pass Motion Blur is not possible.
- It is possible to use the Krakatoa Depth Of Field effect with 3ds Max Multi-Pass Motion Blur, but it will be very time consuming.