Multi/Sub-Object Material Support
Applicable to Krakatoa v1.6.0 and higher
- Overview
- Examples
- Using MtlIndex channel from Particle Flow
- In the following example,
- Using MtlIndex channel with MagmaFlow
- Assigning Static MtlIndex
- Assign MtlIndex Using Logical Test - Local Top/Bottom Material
- Assign MtlIndex In Camera Space
- Assign MtlIndex Based On Selection Channel
- Assign MtlIndex Using Texture Map Magnitude
- Assigning More Than Two Sub-Materials Using Texture Map Component
- Controlling Emission Using MtlIndex Channel
Overview
- The Multi/Sub-Object Material is supported Krakatoa in v1.6.0 and higher.
- It can be used to assign up to 1000 materials to particles via their MtlIndex channel.
- Only the Diffuse Colors and Opacity channels will be used to produce Color and Density particle data.
- No other channels will be populated.
Note:
- While the Material ID in the 3ds Max UI and MAXScript is 1-based, the MtlIndex channel is zero-based, but has the same function.
- Thus, if you are specifying a MtlIndex channel value using a MagmaFlow, you should set the Integer Input Node to 0 when you want the first sub-material to be applied to a particle.
- In Krakatoa MX prior to v1.6.0, the MtlIndex channel was not respected and only the FIRST sub-material of a Multi/Sub-Object Material would have been assigned to all particles, and the MtlIndex channel was always saving as 0 out of Particle Flow regardless of its actual value.
Examples
Using MtlIndex channel from Particle Flow
- The MtlIndex channel is native to Particle Flow.
- It can be assigned using a Material Static or Material Dynamic operator or a Script Operator.
- If saved to PRT files, the MtlIndex channel will be loaded by the PRT Loader and if a Multi/Sub-Material is assigned to the PRT Loader, the particles will pick up the corresponding sub-material’s Diffuse Color and Opacity.
- If the PRT sequence is being loaded back into Particle Flow, the MtlIndex can be loaded via the Krakatoa PRT Loader Update and if a Mutli/Sub-Material is assigned, the correct sub-materials will be applied to the particles.
In the following example,
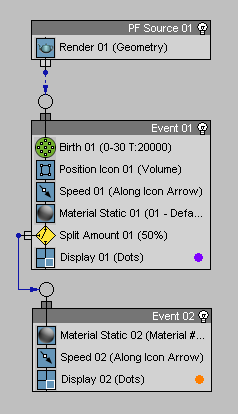
- A Standard Flow was created with 2000 particles.
- 50% of the particles were split into a second event.
- The particles in the first event (purple) were assigned Material ID 1 via Material Static operator (resulting in MtlIndex channel value of 0)
- The particles in the second event (orange) were assigned Material ID 2 via Material Static operator (resulting in MtlIndex channel value of 1)
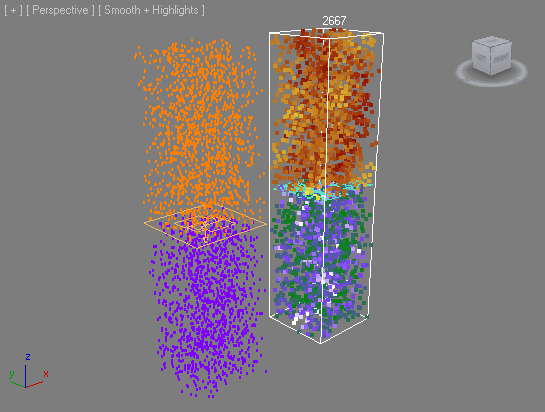
- The particles in the second event were also sent moving up by inverting the Speed Operator’s direction.
- The system was saved to a PRT Sequence including the MtlIndex channel.
- Then a PRT Loader was created, offset to the side and set to load and show all particles saved in the previous steps.
- When it was assigned a Mutli/Sub-Object Material with two Standard sub-materials, one with a Cellular Diffuse Map and one with a Turbulent Noise Diffuse map, the Viewport displayed half of the particles using the one material and the other half with the other.
Using MtlIndex channel with MagmaFlow
- The MtlIndex channel could be provided procedurally via a Krakatoa Channels Modifier to both PRT Loader and PRT Volume objects.
- Keeping in mind that the MtlIndex is zero-based, you can
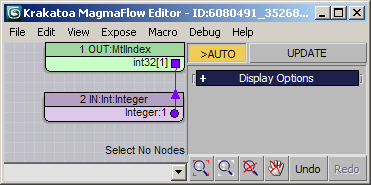
- Assign a static Integer value to all particles using an Integer Value Input Node connected to MtlIndex Output.
- Animate the Integer to change over time and thus switch between Sub-Materials over time
- Use a Switch Operator node to assign different materials based on logical tests of any particle property
- Use procedural inputs or operators like a TextureMap Input or a Noise Operator to vary the MtlIndex in space
- and so on.
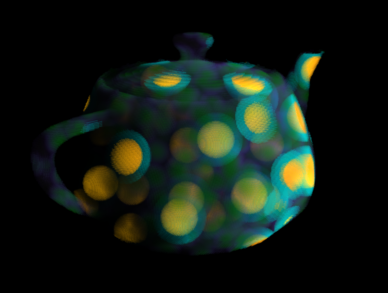
Assigning Static MtlIndex
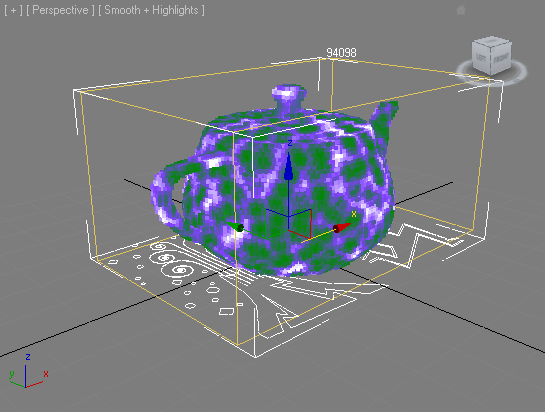
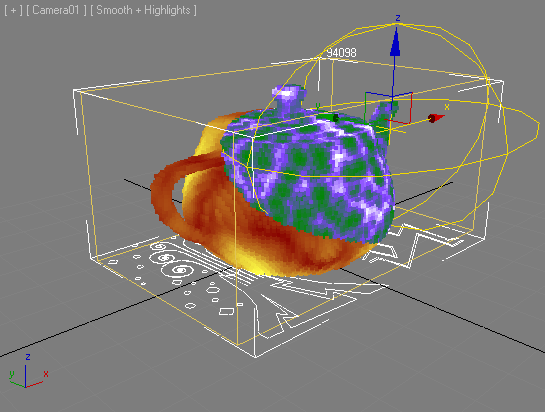
- In the following example, a Teapot was turned into particles using a PRT Volume object.
- The same Multi/Sub-Object material used in the previous example was assigned to the PRT Volume - note that all particles are assumed to have MtlIndex 0 (Material ID 1) by default and no Material IDs will be acquired by the PRT Volume from the Volume Object used as the source, so all particles show the first sub-material with the cellular map.
- Adding a Krakatoa Channels Modifier to the modifier stack of the PRT Volume and setting it to feed the Integer Input Value of 1 into the MtlIndex Channel of the Output Node causes all particles to pick up the second sub-material:
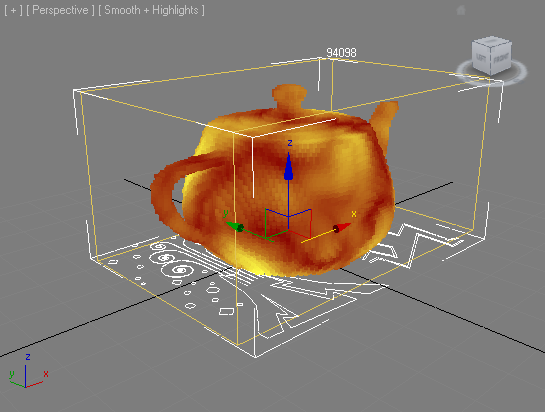
- You can keyframe the Input Node to change between 0 and 1 to get an animated material switch between any number of sub-materials.
Assign MtlIndex Using Logical Test - Local Top/Bottom Material
- We can emulate the Top/Bottom Material by taking the Normal channel of each particle and checking whether the Z component is less than zero.
- Since the Less Operator returns 0 for false and 1 for true, particles with negative Normal Z will get sub-material 2 (MtlIndex 1), whole particles with positive Normal Z will get sub-material 1 (MtlIndex 0).
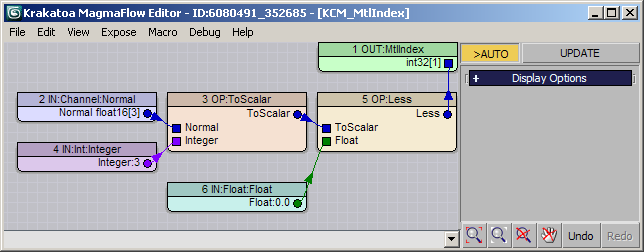
- Note that the Normal channel in the KCM is in local space, while the real Top/Bottom Material is currently supported only in world space.

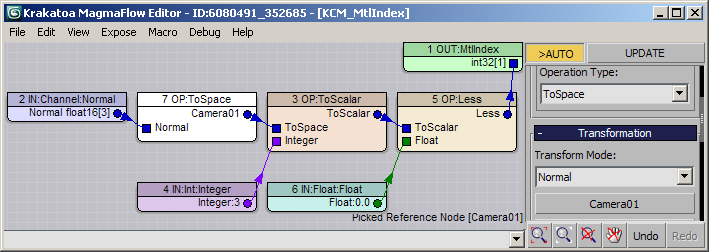
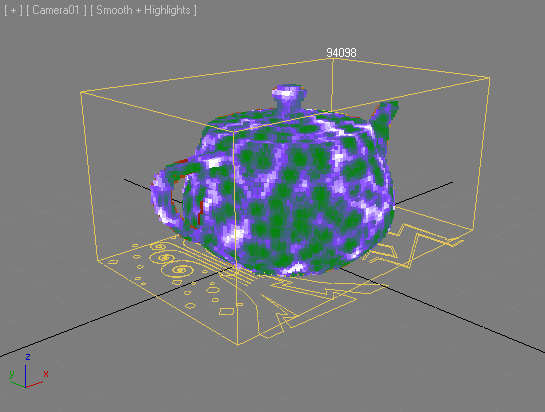
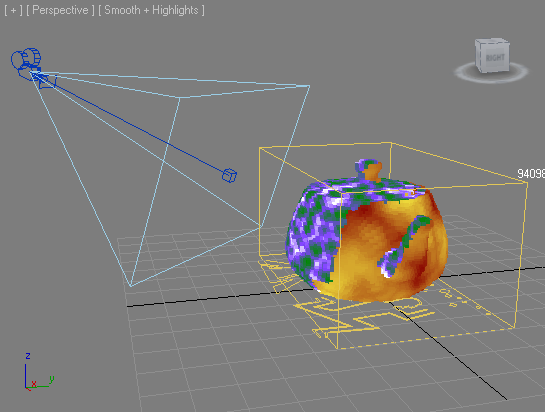
Assign MtlIndex In Camera Space
- This means that you can not only get a Top/Bottom in local space, but in any space you like, for example View Space, other object’s space and so on!
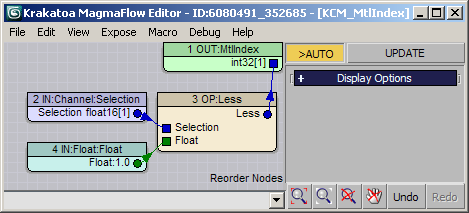
Assign MtlIndex Based On Selection Channel
- We can use the Volume Select modifier to set the Selection Channel of particles to either 1 (selected) or 0 (deselected).
- We can then either convert the Selection Channel to Integer or test against a Float Value of 1.0 in a Less Operator to produce MtlIndex 0 and 1 to assign the two sub-materials based on whether a particle is selected or not:
- Note that we can control both Color and Density for each sub-material, for example the Cellular Map is used to map both Diffuse Color (green and purple) and Opacity (white/gray/black) - you can get similar results using multiple KCMs setting Color and Density channels, but this setup is much easier to use:
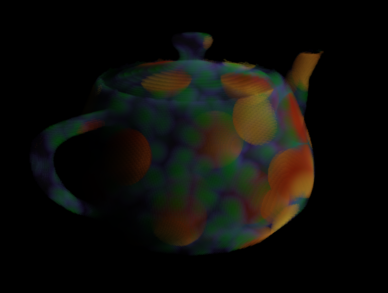
Assign MtlIndex Using Texture Map Magnitude
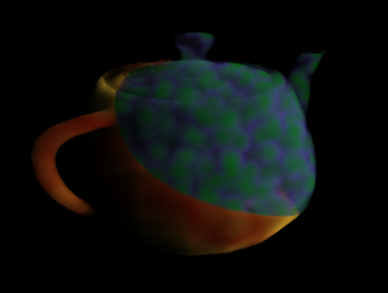
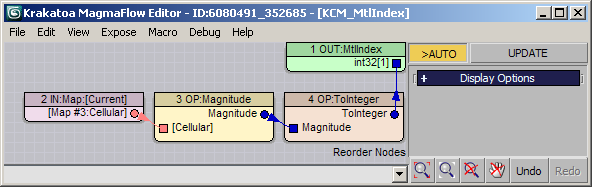
- We could define which material goes where by using a Texture Map Input Node whose Magnitude can be converted to an Integer to set the MtlIndex channel.
- When the Magnitude is below 1.0, the ToInteger will return 0 and the first sub-material will be used.
- When the Magnitude is above 1.0, the ToInteger will return 1 and the second sub-material will be used.
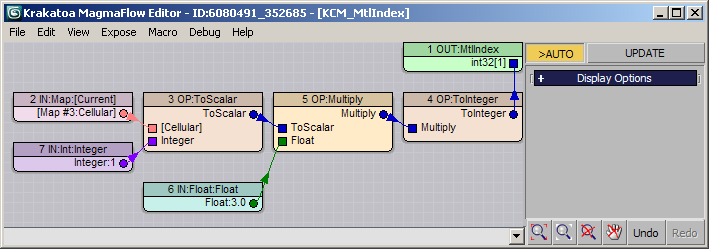
Assigning More Than Two Sub-Materials Using Texture Map Component
- So far we have been assigning only two sub-materials - one for MtlIndex 0 and one for MtlIndex 1.
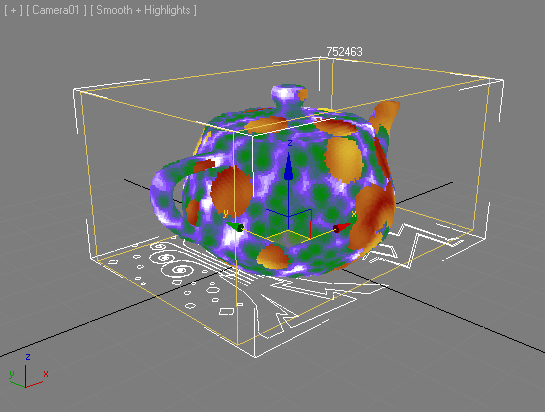
- We can modify the above example to produce more than two MtlIndex values by simply multiplying the control value and then converting to Integer.
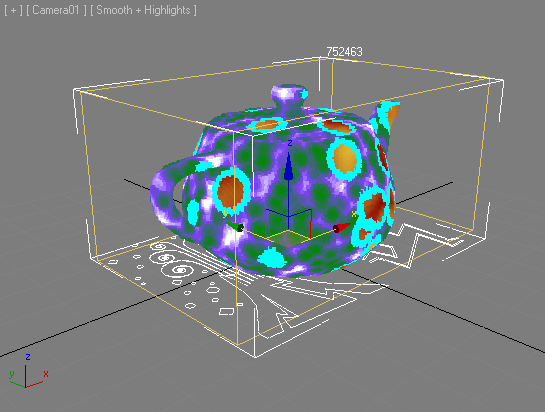
- For example, taking the Red Channel (first component) of the Cellular Texture Map and multiplying it by 2 produces MtlIndices of 0, 1 and 2.
- We set previously second orange Sub-Material to be the 3rd and add a new second sub-material with pure Cyan color:
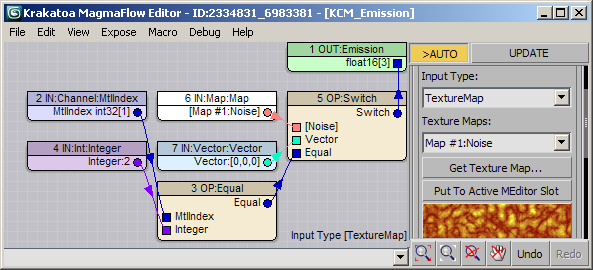
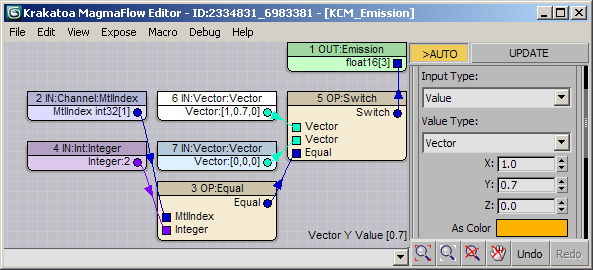
Controlling Emission Using MtlIndex Channel
- Now that we have three sub-materials assigned to the particles, we can easily use the existing MtlIndex channel and set other properties based on logical tests and Switch Operators.
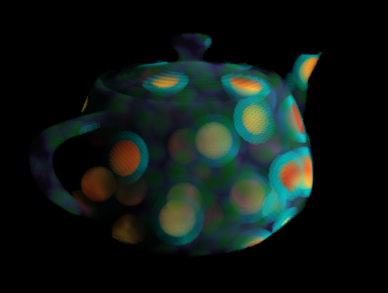
- For example, let’s make the particles that have MtlIndex channel of 2 self-illuminated.
- We test the value of the MtlIndex against 2 and use a Switch Operator to set the Emission Channel to orange color when the result is true or to black color when the result is false:
- Note that since the Material is applied to the particles AFTER the modifier stack, it is not possible to get the Material’s Color into the Self-Illumination channel using a local KCM.
- You can either use a Global Channels Override KCM to get the final color of the particle and copy into the Emission channel, or
- Get the Texture Map used in the second sub-material and assign to the Emission channel: