Basic Particle Rendering Tutorial
This tutorial reflects the features and workflows of Krakatoa v1.5.0 and higher
Overview
- In this first tutorial, we will build a simple particle system that will be used to explore many fundamental components of Krakatoa.
Sample Scene
- You can either
Quick Render Test
Let’s get right into what Krakatoa does best - quickly rendering particles.
Rendering a Representative Frame
- In the Time Configuration dialog, verify that the Real Time checkbox is unchecked.
- Click Play in the 3ds max Playback Controls and watch the teapot disintegrate into smoke.
- Go to frame 50, which we will use as our test frame.
- Assign Krakatoa as the current renderer.
- If running Krakatoa v1.6.0 or higher, you can select “Set Krakatoa As Current Renderer / Open Krakatoa GUI” from the Krakatoa Menu in the 3ds Max Main Menu bar.
- Alternatively, if you have installed the Krakatoa MacroScripts as explained in the topic Krakatoa MacroScripts, you can click the Krakatoa GUI icon. If the current renderer is not Krakatoa, you will be prompted about switching to it - answer Yes. If Krakatoa is already the current renderer, the GUI will open immediately.
- You could also open the Render Dialog and assign Krakatoa as the production renderer, but this method is not recommended because the current renderer will be replaced and cannot be restored, while the former method can switch back and forth between Krakatoa and the previous renderer without losing the settings of either one.
- Click the >Iterative [Full] checkbutton above the large RENDER button in the Main Controls rollout of the Krakatoa GUI.
- This will ensure that only the current frame will be rendered and that no file will be written to disk even if an output path was specified.
- The RENDER button will now read RENDER FRAME.
- Leaving all settings to their defaults, click the large RENDER FRAME button.
- Krakatoa will request Particle Flow to update the particle system up to frame 50, and will then render the frame.
The rendered result is far from impressive, but it provides what we are looking for at this stage - a quick preview of the contour of our particle cloud. At this low particle count and default render setting, you can begin to make out curves and swirls in the cloud. Viewport playback is very fast, so you can easily preview the general motion of the particle system.

Increasing Detail
We have achieved a shape of sufficient visual interest for our test renderings, but the particle count is so low that it is difficult to make out any detail. At this point, you will increase the number of particles.
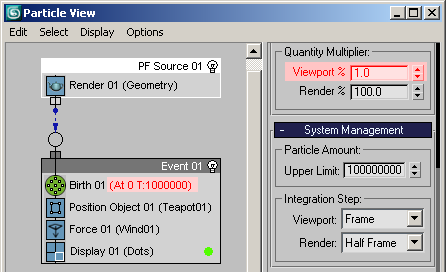
- Select the PF Source 01 event in Particle View and change the Quantity Multiplier > Viewport % to 1.0 - this will make sure only 1% of all particles will be displayed in the viewport.
- In Particle View, select the Birth 001 operator and set Amount to 1,000,000. This increases our particle count 100 times, but the viewport will display only 1% (10,000 particles), keeping the redraws fast.
- In the Krakatoa GUI > Main Controls rollout, click the RENDER FRAME button again.
The Particle Flow will have to update all particles up to frame 50 again - you can see the progress in the status line as usual and it will take a long while. After that, Krakatoa will acquire the new particles and render them.
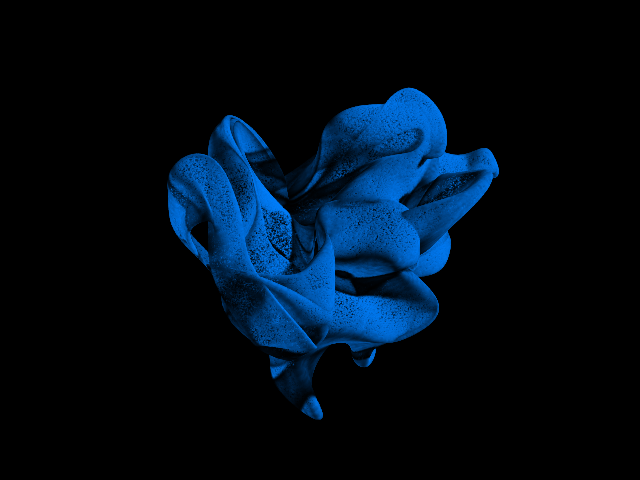
There are now sufficient particles to show more detail and show self-shadowing within the cloud.

Quickly Changing Overall Color
When you render a frame in Krakatoa, Particle Flow will temporarily cache the particles and save you the time of computing the particle system for subsequent renders. Of course, if you change Particle Flow settings, or switch to another frame, Krakatoa will need to request the actualized particles and Particle Flow will count up again.
Note:
There are more advanced methods of caching to memory and disk that will be discussed in later sections.
- You can quickly change the look of the test frame by altering some Krakatoa settings and rendering again from the cached particle data:
- Expand the Global Render Values rollout,
- Check the >Override Color checkbutton
- Change the color swatch next to it to an electric blue hue, approx. R:0 G:128 B:255.
- Click RENDER FRAME to see your particles in their new blue color.
- Notice that Particle Flow did not recalculate particle positions - Krakatoa used cached data from Particle Flow to speed up rendering.
Changing Density
- In the Density Controls area, change the Density Exponent from -1 to -3.
- This will reduce the rendered density of each particle by two orders of magnitude (100 times less!)
- This is a good idea because we increased the number of particles 100 times and the resulting cloud is now too dense and dark, blocking almost all light at its surface without letting it pass through and illuminate the other particles.

Note on Density settings:
Density Per Particle and Density Exponent work together to create a simple editing mechanism for particle density. The Density Exponent provides a quick method to dial in density adjustments in powers of 10 and simplifies entry of very large or very small values. In our example, a Density Per Particle of 5 and a Density Exponent of -3 equate to an overall setting of 5 x 10⁻³ or 0.005.
- Again, pressing RENDER FRAME shows the results of your changes almost immediately.

Changing Lighting Density Independently
- Right now, Krakatoa performs two render passes - one calculates the Lighting and the Self-Shadowing (Attenuation) of the particles, the other (Final) pass draws the particles in the frame buffer.
- Both are currently using the Density settings of the Final Pass - 5.0/-3, which means that the particles have the same Density from both the point of view of the light as well as the point of view of the camera.
- Krakatoa allows us to change this and make the particles more transparent to the light than to the eye.
- To do this, we have to check the >Use option to the left of the Lighting Pass Density Settings.
- Here, we can enter a separate value for the Lighting Pass Density.
- Let’s say that we want the Lighting Pass to use the current 5.0/-3 Density, but the Final Pass should render the particles 10x more dense using 5.0/-2.
- We enter -3 in the Lighting Pass Density Exponent and -2 in the Final Pass Density Exponent:

If we would render now, we get more solid-looking particles but with the same shadow density as in the previous test:
- At this point, let’s switch back to the previous settings - turn off >Use Lighting Pass Density Settings and set Final Pass Density Exponent back to -3.
Self-Illuminated Particles
- To obtain a different look, we can make the particles completely self-illuminated. This will render the particles flat without any self-shadowing.
- To do so, we just
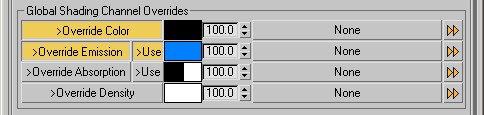
- Enable >Override Emission in the Global Render Values rollout,
- Check the >Use checkbutton next to it (it is a convenient duplicate of >Use Emission in the Main Controls rollout)
- Swap the Color and Emission swatches by dragging and dropping the one color into the other, thus turning the Color black and Emission blue:
Note to users of previous Krakatoa versions:
In versions of Krakatoa prior to v1.5.0, turning off lighting would have rendered the particles self-illuminated. Krakatoa v1.5.0 introduced explicit Emission controls and data channel and would render particles completely black if no lights are present in the scene and Emission is not enabled. There are significant positive implications related to this change, for example emission can now be specified per particle, additive rendering can be mixed with volumetric rendering per-particle by just specifying different values for Color, Emission and Absorption and so on.
Additionally, Krakatoa v1.6.0 adds a separate Emission Strength set of controls similar to the Density and Density Exponent ones. It can be used to increase or decrease the Emission channel’s intensity and fine-tune the particle appearance independently from the Density controls.
Illuminating Self-Illuminated Particles
- In the previous step, our particles were completely self-illuminated despite the fact they were still illuminated by a Spot Light.
- This was because we were overwriting the Color of the particles with black, so the particles would not be lit at all (light multiplied with black results in black!)
- To make the particles both illuminated by the scene light and self-illuminated at the same time, we can just disable the >Override Color checkbox and we will get our green particles illuminated by the white light and then glow in blue:


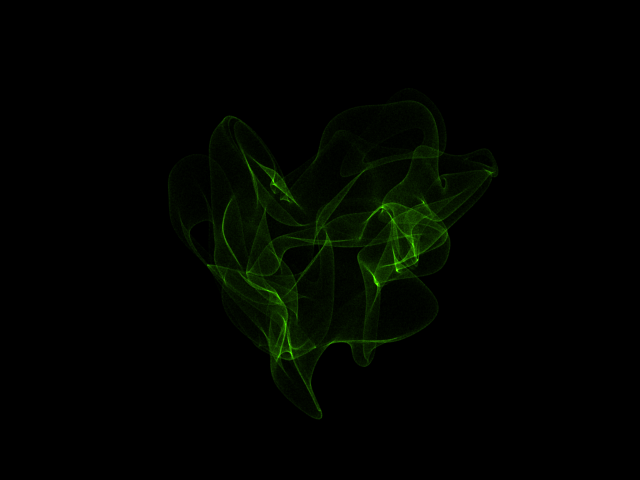
Basic Additive Rendering
- To complete this exercise, let’s try yet another style of rendering.
- In the Global Render Values, turn off >Override Emission.
- In the Lighting and Shading group of the Main Controls rollout, enable >Force Additive Mode.
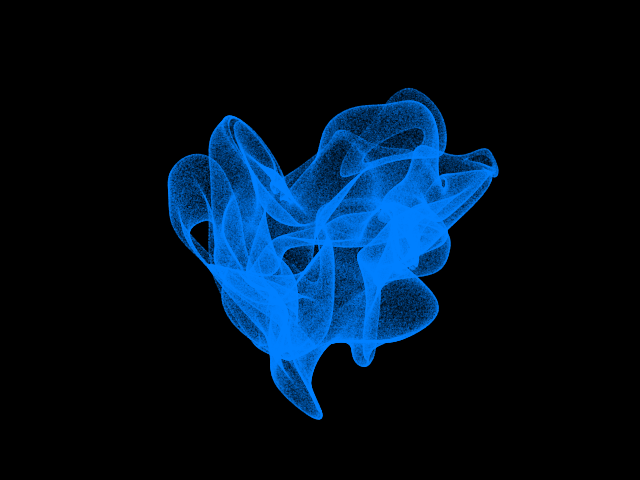
- Click RENDER FRAME to see the additively rendered particle cloud
Note to users of previous versions of Krakatoa:
When >Force Additive Mode is checked, both >Use Emission and >Use Absorption become grayed out. This is because Force Additive mode enables both these channels internally, then copies the content of the Color Channel into the Emission Channel, while setting both Color and Absorption to black. The result is particles that glow but don’t reflect nor absorb light which is what Additive Mode is all about. In earlier version of Krakatoa, Additve Mode was a special render mode. Now it is possible to make even a single particle render additive by specifying its Emission channel as color and the Color and Absorption as black!
- Let’s change the Density Per Particle from 5.0 to 1.0 and the Density Exponent from -3 to -2 to increase the global density of the cloud from 0.005 to 0.01.
- Click RENDER FRAME to see your results…

Notes about Particle Counts:
By default, 3ds Max creates all Particle Flow systems with a Limit of only 100,000 particles. However, since we opened the Krakatoa GUI after the creation of the Particle Flow, Krakatoa has automatically increased this value to a much higher value of 100 million.
A machine with 4GB of RAM can handle about 60 million particles, and there is nearly no practical limit to the amount of RAM you can install on a 64 bit computer.
Summary
Krakatoa can use cached particles from Particle Flow to allow for fast rendering adjustments or even changes in the point of view, preventing the time-consuming recalculation of your particle system. In a few quick minutes, we were able to produce swirls of silt, wispy smoke and tendrils of plasma energy - all without waiting for Particle Flow to repeatedly update. Krakatoa also provides a user-controlled manual caching system for lighting and particles from any source which we shall explore later.
Krakatoa can produce dramatically different looks rendering Volumetric or Additive particles and can quickly provide variations in particle density. Multiple options are available for color assignment and density modification.
What’s Next?
- In this exercise, you have continued to refine the results by making adjustments to particle counts, density settings and color.
- Upcoming tutorials will show you how to save particles to disk, introduce you to Krakatoa’s compositing features, and enable you to maximize particle counts with particle partitioning.