Amazon EC2
Overview
The Amazon EC2 plugin for Deadline allows for communication between Deadline and the EC2 service. It works with both the Cloud Panel in the Monitor and the Deadline Balancer application.
Configuration
Before you can configure the Amazon EC2 plugin for Deadline, you must add Amazon as a provider in the Cloud Providers dialog in the Monitor. The Amazon EC2 plugin requires only a few credentials before it can be used in Deadline. All information can be found in the AWS Console (https://aws.amazon.com/console/).

Configuration Settings

Enable Region: Enables the cloud region for use in Deadline.
Options
AWS Credential Option: Specify the form of AWS Credentials to use, either an AWS Named Profile (which references credentials found in ~/.aws/credentials) or a manually entered Access Key ID and Secret Access Key. We recommend using AWS Named Profile.
- AWS Named Profile: The AWS Named Profile you wish to use as credentials. Named Profiles can be found in ~/.aws/credentials. (required when using AWS Credential Option ‘AWS Named Profile’)
For more information on AWS Named Profiles and how to create them, visit: https://docs.aws.amazon.com/cli/latest/userguide/cli-configure-profiles.html
- Access Key ID: Your EC2 Access key. (required when using AWS Credential Option ‘Access Key ID and Secret Access Key’)
Secret Access Key: Your EC2 secret key. (required when using AWS Credential Option ‘Access Key ID and Secret Access Key’)
- Region: The EC2 region you want to use. (required)
- Account Number: Your EC2 account number. Used to filter the image list.
More information here: https://docs.aws.amazon.com/general/latest/gr/acct-identifiers.html
VM Configuration
- Key Pair Name: The Key Pair to be used for the instance (required).
More information here: https://docs.aws.amazon.com/AWSEC2/latest/UserGuide/ec2-key-pairs.html
- Subnet ID: ID of the Subnet to start instances in (required).
More information here: https://docs.aws.amazon.com/vpc/latest/userguide/VPC_Subnets.html#vpc-subnet-basics
- Instance Types: List of the Hardware Types used on EC2. Make sure you use types that are supported by Amazon.
More information here: http://aws.amazon.com/ec2/instance-types/
User Data: Any data you want to pass to an instance. Can be used to configure instances as part of start up scripts. Doing curl http://169.254.169.254/latest/user-data from within the instance will get you everything you put in here.
- Security Group: Start instances in this security group.
More information here: https://docs.aws.amazon.com/AWSEC2/latest/UserGuide/ec2-security-groups.html
Customization
Instance Name: The name of the instances that are started by the Balancer. We add some random hex values to the end for uniqueness.
Making an Image
Here are some tips for making a Worker image on EC2.
Firstly, start a regular image using one of the provided blank images from Amazon. Next, install the Deadline Worker as a service. If you’re using Windows you might want to go into Services and change the user that the Worker is run as to NETWORK SERVICE. That way the Worker will start when the instance is turned on and you won’t have to have the user login. Then, install all the rendering and packaged software that you require to render. After that, on Windows run ‘ec2Config Settings’ and turn the ‘Set Computer Name’ check box on. That way the Worker will have a unique Worker name when a new image is started. On Linux, hostnames are set to the private ip by default so you shouldn’t need to change anything.

Finally, in the EC2 web console, right-click on your instance, select ‘Image’ and ‘Create-Image’.

AWS Policies
You can set permissions for individual users and groups with Amazon Web Services. For full access to the Deadline functions the AWS user requires the follow permissions:
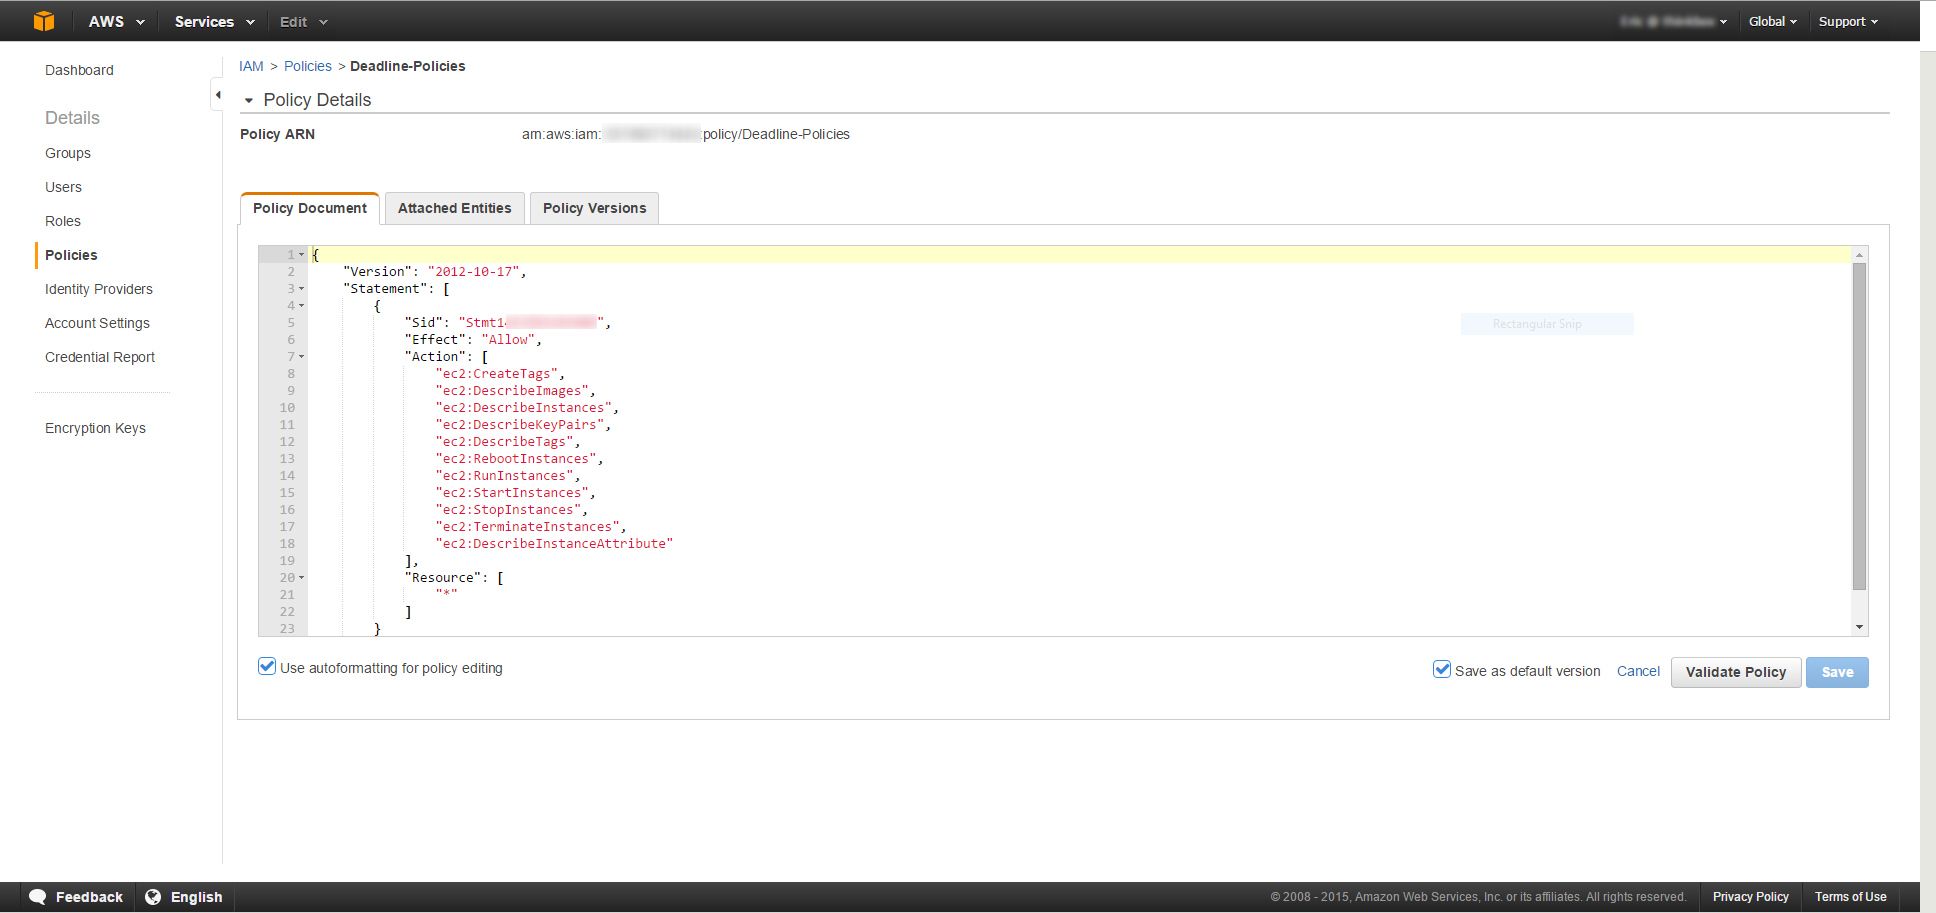
Here’s an example policy that can be copied:
{
        "Version": "2012-10-17",
        "Statement": [
                {
                        "Sid": "Stmt1234567891234",
                        "Effect": "Allow",
                        "Action": [
                                "ec2:CreateTags",
                                "ec2:DescribeImages",
                                "ec2:DescribeInstances",
                                "ec2:DescribeKeyPairs",
                                "ec2:DescribeTags",
                                "ec2:RebootInstances",
                                "ec2:RunInstances",
                                "ec2:StartInstances",
                                "ec2:StopInstances",
                                "ec2:TerminateInstances",
                                "ec2:DescribeInstanceAttribute"
                        ],
                        "Resource": [
                                "*"
                        ]
                }
        ]
}
where Stmt1234567891234 would be replaced with your appropriate Sid.
You can create new policies in the Security Credentials section of the AWS portal or use the AmazonEC2FullAccess default policy. If you want to test your created policies you can do it with the AWS Policy Simulator. You can also create a new policy in the Simulator.
FAQ
Are Amazon EC2 Spot Instances supported?
Deadline supports EC2 Spot Instances when using the AWS Portal and the Spot Event Plugin. The Amazon EC2 Cloud Plugin does not support the creation of Spot instances, however they can be viewed in the Cloud Panel.
Error Messages and Meanings
This is a collection of known Amazon EC2 Cloud error messages and their meanings, as well as possible solutions. We want to keep this list as up to date as possible, so if you run into an error message that isn’t listed here, please email Deadline Support and let us know.
Currently, no error messages have been reported for this cloud plug-in.
