Krakatoa C4D Render Settings
Introduction
- Krakatoa for CINEMA 4D appears as a plugin-in renderer in the Render Settings dialog.
- The Render Settings dialog of Krakatoa implements four tab sections - Output, Options, Shader and Logging.
Output Tab

Render To drop-down list
- Controls the Krakatoa output type and destination.
- Possible values are:
- Viewer - the rendered images will be sent to the CINEMA 4D Picture Viewer.
- File - each pass will be saved to a separate image file on disk according to the settings below.
- MultiChannel EXR - all passes of a rendered frame will be saved to a single OpenEXR image file on disk.
- Save Particles to File Sequence - the particles will be saved to disk instead of rendering to an image. See here for details.
Save File Type drop-down list
- Controls the output file type of the Krakatoa rendered image.
- Default is EXR. For best results, we recommend saving only to OpenEXR with Krakatoa.
- This setting completely overrides the Format specified in the Save tab of CINEMA 4D.
- Only the path and file name will be taken from the CINEMA 4D settings.
Save RGBA Token text field
- This token, if any, will be inserted as a suffix in the output filename of the Beauty RGBA pass when saving to File.
- Default is empty string, resulting in the exact name specified in the Save tab of CINEMA 4D.
- You can enter any valid token, e.g. _rgba_, _beauty_, .rgb. or something similar to rename the output and advertise the fact it is the main pass of the Krakatoa output.
Save Normal Pass checkox and Token text field
- When unchecked (default), no Normal Pass will be generated.
- When checked, a Normal Pass will be generated by Krakatoa.
- Pixels will contain only the data of the nearest particle to the camera, without filtering.
- If a particle does not contain a valid Normal channel, a default value of 0,0,0 will be used instead.
- PRT Volume particles have a valid Normal channel acquired from the neatest point on the mesh surface.
- Repopulation particles have a valid Normal channel acquired from the nearest point on the Level Set surface.
- PRT Loader particles might have a valid Normal channel if one was generated in the host application and was saved in the file.
- When the Render To option is set to File, a separate file with the filename taken from the CINEMA 4D Save tab plus the Save Normal Token value will be saved.
- When the Render To option is set to MultiChannelEXR, the pass will be stored in the same single OpenEXR output file as the beauty pass.
Save Velocity Pass checkbox and Token text field
- When unchecked (default), no Velocity Pass will be generated.
- When checked, a Velocity Pass will be generated by Krakatoa.
- Pixels will contain only the data of the nearest particle to the camera, without filtering.
- If a particle does not contain a valid Velocity channel, a default value of 0,0,0 will be used instead.
- Most particles in CINEMA 4D contain a native Velocity channel.
- Krakatoa PRT Volume and PRT Fractal particles currently do not provide a Velocity channel.
- Krakatoa PRT Loader particles only provide a Velocity channel if it was saved to the file by the host application.
- When the Render To option is set to File, a separate file with the filename taken from the CINEMA 4D Save tab plus the Save Velocity Token value will be saved.
- When the Render To option is set to MultiChannelEXR, the pass will be stored in the same single OpenEXR output file as the beauty pass.
Save Z-Depth Pass checkbox
- When unchecked (default), no Z-Depth Pass will be generated.
- When checked, a Z-Depth Pass will be generated by Krakatoa.
- Pixels will contain only the data of the nearest particle to the camera, without filtering.
- The data stored in the pass is in Real World Units distance to the camera, so in most image viewers the pass will appear completely white.
- When the Render To option is set to File, a separate file with the filename taken from the CINEMA 4D Save tab plus the Save Z-Depth Token value will be saved.
- When the Render To option is set to MultiChannelEXR, the pass will be stored in the same single OpenEXR output file as the beauty pass.
Save Occluded Particles Pass checkbox
- When unchecked (default), no Occluded Particles Pass will be generated.
- When checked, an Occluded Particles Pass will be generated by Krakatoa, and the Beauty Pass will contain only the unoccluded particles.
- Any particle that is even partially occluded by matte geometry will be drawn in the Occluded Particles Pass.
- Combining the Beauty Pass over a Geometry Rendering pass over Occluded Particles Pass should produce the final composite with correct Anti-Aliasing thanks to the Alpha channels of the Beauty and Geometry pass images.
- When the Render To option is set to File, a separate file with the filename taken from the CINEMA 4D Save tab plus the Save Occluded Token value will be saved.
- When the Render To option is set to MultiChannelEXR, the pass will be stored in the same single OpenEXR output file as the beauty pass.
Save Particles panel
- Contains the particle saving and partitioning controls used when Render To is set to Save Particles to File Sequence.
- It is documented here.
Options Tab
Global Render Values panel

Override Background Color checkbox and color picker
- When unckecked (default), the particles will render over a default black background..
- When checked, the particles will render over the specified custom color.
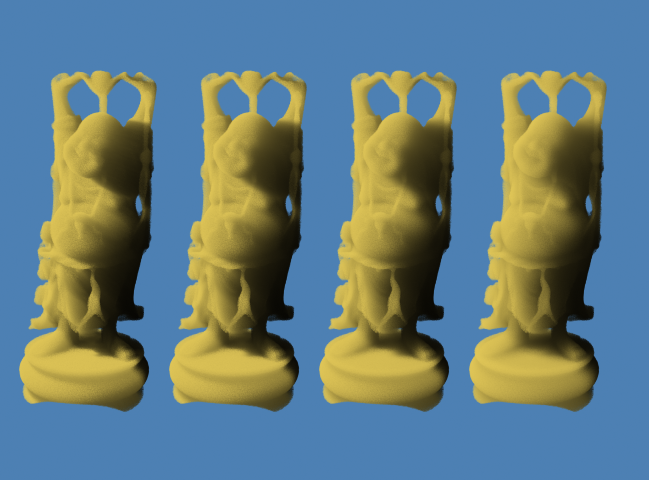
- Default color is [0.3,0.5,0.7] which provides a sky-blue color to easier distinguish lit from dark shadowed particles. It matches the default value of Krakatoa MY.
Override Color checkbox and color picker
- When unckecked (default), particles will render in their per-particle Color.
- The particle Color channel defaults to white [1,1,1] unless defined otherwise by the particle source itself, or overwritten by the Object’s Color Override.
- When checked, all scene particles will be forced to a uniform color.
- Default Override Color value is white [1,1,1].
Override Emission checkbox and color picker
- When unckecked (default), particles will use their per-particle Emission color (or [0,0,0] if not defined)
- When checked, all scene particles will be forced to a uniform Emission color.
- Default Override Emission Color is white [1,1,1].
- The Emission color is only used for rendering if the “Use Emission” checkbox is checked in the “Rendering Controls” panel.
Override Absorptions checkbox and color picker
- When unckecked (default), particles will use their per-particle Absorption color (or [0,0,0] if not defined)
- When checked, all scene particles will be forced to a uniform Absorption color.
- Default Override Absorption color is black [0,0,0], producing the same result as when Use Absorption is not enabled.
- The Absorption color is only used for rendering if the “Use Absorption” checkbox is checked in the”Rendering Controls” panel.
- The Absorption color defines the amount of color that is extinguished from each color component as light passes through particles. The amount of extinction depends on the Density of the particle and the amount in the Absorption components.
Override Density checkbox and value spinner
- When unckecked (default), particles will render in their per-particle Density.
- The particle Density channel defaults to 1.0 unless defined otherwise by the particle source itself, or overwritten by the Object’s Density Override.
- When checked, all scene particles will be forced to a uniform Density.
- Default override Density is 1.0.
Rendering Controls panel
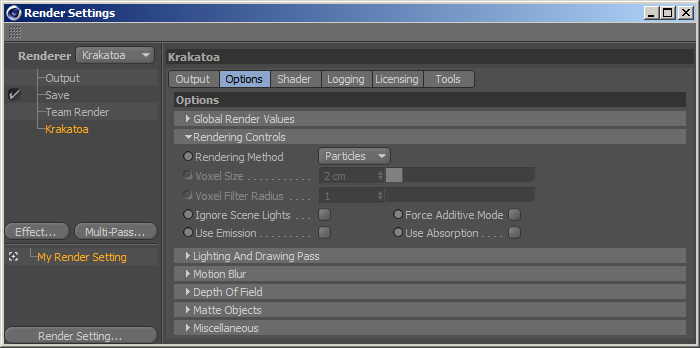
Rendering Method drop-down list
- Controls the rendering method of the Krakatoa renderer.
- Possible values are:
- Particles - each particle will be drawn as a pixel-sized point and filtered over one or more pixels based on the Draw Point Filter mode specified in the “Lighting And Drawing Pass” panel. This mode requires many particles.
- Voxels - particles will be registered on a voxel grid and each voxel will be drawn using a marching plane for each light source, with an additional drawing pass for camera effects and self-illumination (Emission).
Voxel Size value spinner
- Controls the size of the voxels (a.k.a. Grid Spacing).
- Only enabled if “Rendering Method” is set to “Voxels”.
- The value is in Real World Units (it does not display the units type in Beta 2, to be fixed in Beta 3)
- Larger values produce fuzzier looking but faster rendering images.
- The Voxel Size should be selected according to the content of the scene.
Voxel Filter Radius value spinner
- Controls the number of Neighbor Voxels to sample when drawing a pixel.
- Only enabled when “Rendering Method” is set to “Voxels”.
- The value is an integer and defaults to 1 (sample the current voxel only).
- Increasing the value will smooth out the result as more and more voxels are taken into account, at a significant performance price - increasing the value by 1 will typically double the render time.
Ignore Scene Lights checkbox
- Controls whether the lighting pass will be performed or not.
- When unchecked (default), the scene light sources will be evaluated and a lighting pass will be calculated to produce volumetric shadows as light is attenuated as it passes through particles.
- When checked, the scene light sources will be ignored and no lighting pass will be caulculated, producing no volumetric lighting. This is useful when rendering self-illuminated particles (using Emission only).
- Note that when “Force Additive Mode” is checked (see below), the Lighting Pass calculations will be disabled internally anyway.
Force Additive Mode checkbox
- When unchecked (default), the Color, Density, Emission and Absorption channels will be used to calculate volumetric, additive or mixed shading according to the per-particle or global values.
- When checked, the existing Color, Emission and Absorption channels will be tweaked internally to produce Additive rendering without the need to adjust the relevant channels manually.
- The following changes will be made to produce Additive Rendering automatically:
- The content of the Color channel will be copied into the Emission channel, overwriting any existing values in it.
- The content of the Color channel will be reset to black [0,0,0]
- The Absorption channel will be set to black [0,0,0]
- The Lighting Pass will be skipped and no lighting calculations will be performed.
- Since Additive Rendering is fully emissive with no light scattering (Color) or volumetric attenuation (Absorption), the above changes produce Additive Rendering using the particle Color as Emission color with a single click.
Use Emission checkbox
- When unchecked (default), particles will use no Emission (additional lighting per particle) and will only scatter light if illuminated.
- When checked, particles will use their Emission channel (if any) or the Override Emission channel (if enabled) to add an additional source-less illumination.
- This could be used to emulate “Ambient Lighting” or “Self-Illuimination” a.k.a. “Incandescence”.
- When rendering in Voxel mode, the Emission will be added in a separate lighting pass.
Use Absorption checkbox
- When unchecked (default), particles will use implicit Absoption of black [0,0,0] to attenuate light as it passes through particles with non-zero Density, resulting in grayscale shadows.
- When checked, particles will use their Absorption channel (if any) or the Override Absorption channel (if enabled) to affect the R, G and B components of the passing light individually and produce a tinted shadow as the light passes through particles.
Lighting And Drawing Pass panel
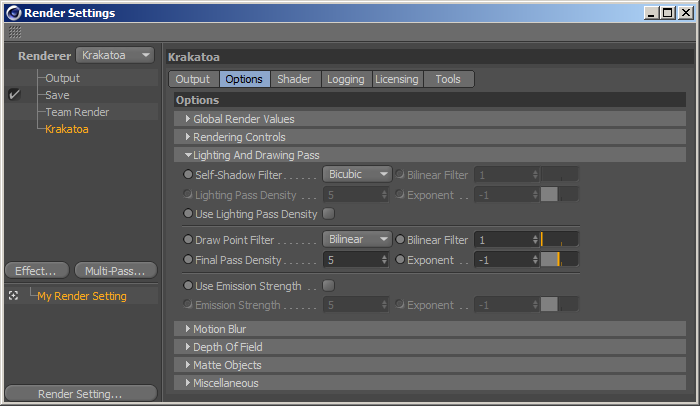
Self-Shadow Filter drop-down list
- Controls the filter type to be applied when drawing a particle into the Attenuation Buffer.
- Possible values are:
- Nearest - draws a single pixel with the whole particle density.
- Bilinear - draws a pattern of 2x2 pixels (when Bilinear Filter size is 1), or NxN pixels according to the Filter size using Bilinear interpolation. To produce even softer shadows than Bicubic at cost of some performance, increase the Bilinear Filter and set to Bilinear. See below for examples.
- Bicubic (default) - drawn a pattern of 3x3 pixels using Bicubic interpolation. Produces smoother, softer shadows.
(Self-Shadow) Bilinear Filter value spinner
- Controls the size of the Bilinear Filter.
- When set to 1, each particle will be drawn as a pattern of 2x2 pixels.
- When set to higher values, each particle will be drawn into a circular pattern according to the Filter Size value.
- Higher values produce smoother results at cost of performance.
- The image below shows the difference between Bilinear Filter Size 1,2,4 and 8:
- Here is a scaled up portion of the rendered image showing the difference between Bilinear Filter Size of 1,2,4 and 8 - the higher the filter, the more diffuse the shadow:
Lighting Pass Density value spinner
(Lighting Pass) Exponent value spinner
- The two value spinners work together to define the Lighting Pass Density scaling value for the whole scene.
- These values will only be used when the “Use Lighting Pass Density” checkbox is checked (see below). Otherwise, the Final Pass Density values will be used instead.
- The final value is calculated as (Density * 10 ^ Exponent), or Density E Exponent. In other words, the default values of 5.0 and -1 produce 5.0*10^-1 = 5.0*0.1=0.5.
- Changing the Exponent by one will produce an order of magnitude higher or lower value.
- This allows the entering of very high or very small values without limitations by the allowed decimal precision of CINEMA 4D value fields. For example, to specify the value of 0.0000000123, you can simply enter Density of 123.0 and Exponent of -10.
Use Lighting Pass Density checkbox
- When unchecked (default), the Final Pass Density values will be used to scale the lighting pass density, too.
- When checked, the Lighting Pass Density and Exponent values will be used to scale the particle density while calculating the lighting pass independently.
- This allows for non-physical behavior where the particles appear more or less dense to the light sources than to the camera.
Draw Point Filter drop-down list
- Controls the filter type to be applied when drawing a particle into the various render pass images.
- Possible values are:
- Nearest - draws a single pixel with the whole particle density.
- Bilinear - draws a pattern of 2x2 pixels (when Bilinear Filter size is 1), or NxN pixels according to the Filter size using Bilinear interpolation.
- Bicubic (default) - drawn a pattern of 3x3 pixels using Bicubic interpolation.
(Draw Point) Bilinear Filter value spinner
- Enabled only when the “Draw Point Filter” drop-down list is set to “Bilinear”.
- Controls the size of the Bilinear Filter.
- When set to 1, each particle will be drawn as a pattern of 2x2 pixels.
- When set to higher values, each particle will be drawn into a circular pattern according to the Filter Size value.
- Higher values produce smoother results at cost of performance.
Final Pass Density value spinner
(Final Pass) Exponent value spinner
- The two value spinners work together to define the Final Pass Density scaling value for the whole scene.
- The final value is calculated as (Density * 10 ^ Exponent), or Density E Exponent. In other words, the default values of 5.0 and -1 produce 5.0*10^-1 = 5.0*0.1=0.5.
- Changing the Exponent by one will produce an order of magnitude higher or lower value.
- This allows the entering of very high or very small values without limitations by the allowed decimal precision of CINEMA 4D value fields. For example, to specify the value of 0.0000000123, you can simply enter Density of 123.0 and Exponent of -10.
- Note that if “Use Lighting Pass Density” or “Use Emission Strength” checkboxes are unchecked, these values will also be used to control the Lighting Pass and/or Emission Strength values.
Use Emission Strength checkbox
- When unchecked (default), the Final Pass Density values will be used to scale the Emission Strength, too.
- When checked, the Emission Strength and Exponent values will be used to scale the particle Emission channel independently.
- The Emission Strength controls let you adjust the intensity of the Emission channel globally without the need to tweak the individual particle channels.
Emission Strength value spinner
(Emission Strength) Exponent value spinner
- The two value spinners work together to define the Emission Strength scaling value for the whole scene.
- The final value is calculated as (Strength * 10 ^ Exponent), or Strength E Exponent. In other words, the default values of 5.0 and -1 produce 5.0*10^-1 = 5.0*0.1=0.5.
- Changing the Exponent by one will produce an order of magnitude higher or lower value.
- This allows the entering of very high or very small values without limitations by the allowed decimal precision of CINEMA 4D value fields. For example, to specify the value of 0.0000000123, you can simply enter Strength of 123.0 and Exponent of -10.
Motion Blur panel
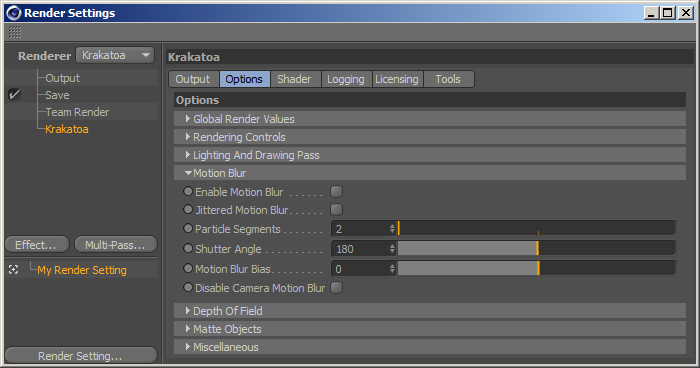
Enable Motion Blur checkbox
- When unchecked, particles will be drawn only at the current time and will produce no motion blur.
- When checked, particles with a valid Velocity channel will be drawn multiple times at different time samples within the shutter interval to produce motion blur.
- NOTE that Motion Blur is not supported in the CINEMA 4D Viewports due to a limitation of the C4D API. Only the Picture Viewer / output image will produce Motion Blur.
Jittered Motion Blur checkbox
- When unchecked (default), particles will be spread uniformly in the shutter interval.
- This can produce obvious stepping, but is faster to render and uses less memory.
- When checked, the particles will be jittered within the shutter interval to produce less uniform distribution.
- This will reduce the stepping, but is slower and requires an additional memory channel to store per-particle timing information.
Particle Segments value spinner
- Controls the number of particle samples to draw within the motion blur shutter interval.
- Defaults to 2, minimum value is 1, allowing a single pass to be drawn with Jittered Motion Blur for a quick approximation without the overhead of multiple drawing passes.
- Increasing the number of Particle Segments will produce smoother results at cost of time.
- Note that the lighting pass will be calculated only once at the center of the motion blur shutter interval, so only the Final Pass Sorting and Drawing will be performed multiple times.
Shutter Angle value spinner
- Controls the duration of the motion blur interval.
- Default is 180 degrees, corresponding to opening the shutter for half frame.
- While real-world camera machanical shutters do not allow 360 degrees or higher shutter angles, the maximum value of the Krakatoa Shutter Angle is not limited.
- Higher values produce longer motion blur trails, but might require more Particle Segments.
Motion Blur Bias value spinner
- Controls the centering of the motion blur unterval.
- The default value of 0.0 centers the motion blur interval to the Shutter interval.
- Possible values are between -0.5 and 0.5.
Disable Camera Motion Blur checkbox
- When unchecked (default), camera animation will produce motion blur even from static particles.
- When checked, camera animation will be ignored and not taken into account.
Depth Of Field panel
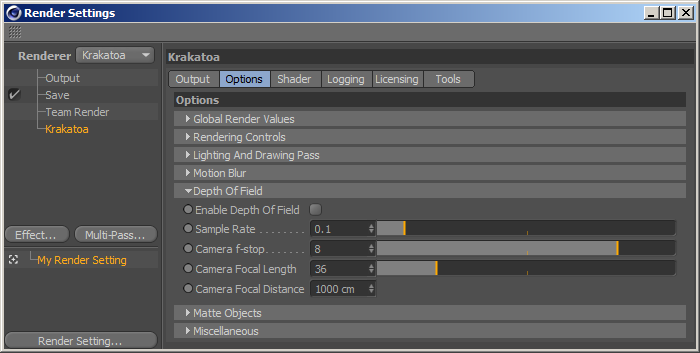
Enable Depth Of Field checkbox
- When unchecked (default), all particles will be drawn just once according to the Draw Point Filter settings.
- When checked, each particle will be drawn multiple times within the circle of confusion defined by the Sample Rate, f-stop, Focal Lenght and Focal Distance settings.
- Note that the Depth Of Field effect can affect performance significantly, especially with high Sample Rate and low f-stop values.
Sample Rate value spinner
- Defines the quality of the Depth Of Field effect.
- Default is 0.1 for a fast, low-quality Depth Of Field sampling.
- Reduce the value for faster previews at cost of quality.
- Increase the value for higher quality results at cost of performance.
- While the value is limited to a Maximum of 64, values above 1.0 are usually not needed and are not recommended.
- The following animated GIF shows a 3x magnification of the rendering of a low-density PRT Volume (700K particles) using:
- No Depth Of Field - render time less than 1 second.
- DOF with Sample Rate of 0.1 - render time less than 1 second.
- DOF with Sample Rate of 0.5 - render time around 5 seconds.
- DOF with Sample Rate of 1.0 - render time around 9 seconds.
- As you can see, Sample Rate of 0.1 is of quite low quality, but does not cause significant performance reduction. Sample Rate of 0.5 produces a much higher quality result at significant performance cost. Sample Rate of 1.0 produces marginally better result at nearly twice the time of 0.5.
Camera f-stop
- Defines the global f-stop value to use when no Krakatoa Camera is defined.
- If the view is a Camera with a Krakatoa Camera tag and the Override f-stop option in the Tag is checked, the Override f-stop value will be used.
- If the Override f-stop option in the Tag is not checked, the Camera’s Physical f-stop value will be used, but unfortunately CINEMA 4D does not enable that control unless the renderer is set to Physical, so this is considered a bug in BETA 2 and should be addressed in future builds.
Camera Focal Length
- Defines the global Focal Length to use when no Krakatoa Camera is defined.
- If the view is a Camera with a Krakatoa Camera tag and the Override Focal Length option in the Tag is checked, the Override Focal Length will be used instead.
- If the Override Focal Length option in the Tag is unchecked, the Camera’s own Focal Length will be used instead.
- If the view is a Camera, but no Krakatoa Camera tag is assigned to it, the global Render Settings dialog value will be used.
Camera Focal Distance
- Defines the global Focal Distance to use when no Krakatoa Camera is defined.
- If the view is a Camera with a Krakatoa Camera tag and the Override Focal Distance option in the Tag is checked, the Override Focal Distance value will be used.
- If the Override Focal Length option in the Tag is unchecked, the Camera’s own Focal Distance value will be used.
- If the view is a Camera, but no Krakatoa Camera tag is assigned to it, the global Render Settinfs dialog value will be used.
Matte Objects panel
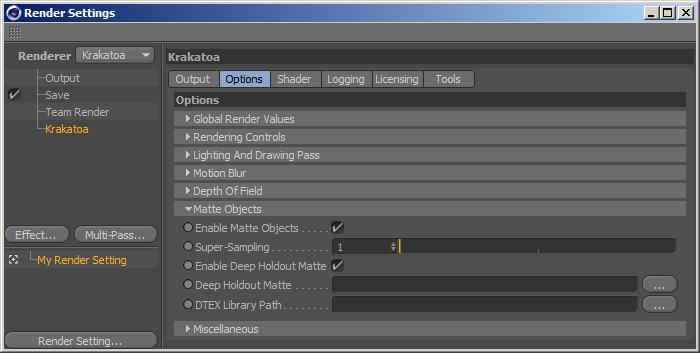
Enable Matte Objects checkbox
- When checked (default), any geometry object tagged as Krakatoa Mesh will be used to occlude particles.
- When unchecked, matte geometry will be completely ignored regardless of the Krakatoa Mesh tag options.
Super-Sampling value spinner
- The Matte Objects rendering uses an internal scanline rendered inside Krakatoa to convert the geometry objects into a Z-Depth occlusion buffer.
- This value controls the super-sampling of the Z-Depth occlusion buffer.
- Default is 1, producing a Z-Depth buffer with the same resolution as the final rendered image.
- Higher values produce higher resolution occlusion buffers and thus finer egde resolution at cost of memory usage.
- When drawing particles, the particle’s Z-depth is compared to the Occlusion buffer’s Z-depth value and if the particle is in front of it, it is drawn into the Beauty and various other Passes, otherwise it is either skipped or drawn into the Occluded Particles Pass.
Enable Deep Holdout Matte
- When checked (default), and if the Deep Holdout Matte is set to a valid DTEX sequence, the file will be used to occlude particles.
- When unchecked, the file sequence will be ignored even if defined.
- This is provided for compatibility with Krakatoa SR and does not really affects the typical workflows in CINEMA 4D.
Deep Holdout Matte
- Defines a DTEX sequence (usually rendred using a Renderman compliant renderer, typically Pixar PRman) to use as Occlusion buffer.
- This is provided for compatibility with Krakatoa SR and does not really affects the typical workflows in CINEMA 4D.
DTEX Library Path
- Defines the location of the Pixar DTEX Library used to read the Deep Holdout Matte files.
- This is provided for compatibility with Krakatoa SR and does not really affects the typical workflows in CINEMA 4D.
Miscellaneous panel
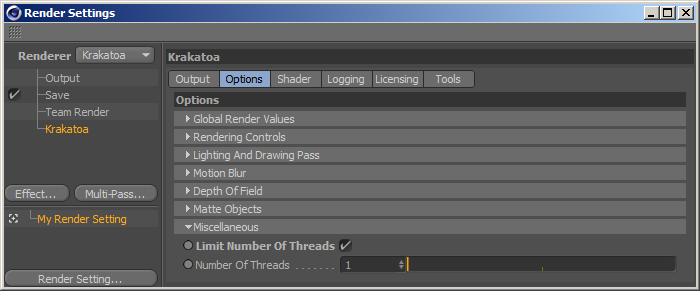
Define Number Of Threads checkbox
- When unchecked (default), all available threads will be used to perform multi-threaded operations (including sorting, lighting and drawing).
- When checked, the defined Number Of Threads will be used as a limit.
- This is useful when rendering on systems with too many cores (24, 32 or more)
- Krakatoa scales best up to between 8 and 16 threads and the overhead of managing more threads is not worth it.
- Also, each lighting or drawing thread in Particle mode has to allocate its own attenuation or image buffer, which can result in very high memory usage when the output resolution is 4K or higher. Thus limiting the number of threads can help keep the image buffer memory usage at bay.
Number Of Threads value spinner
- Defines the maximum number of threads to be used when the “Define Number Of Threads” checkbox is checked.
- Default is 1.
Shader tab
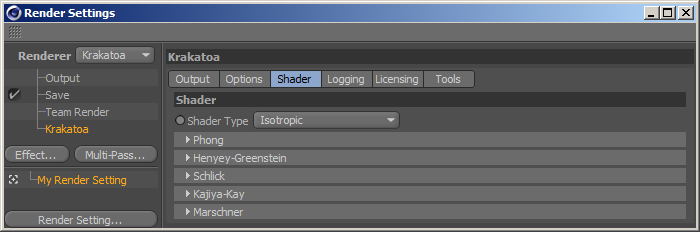
Shader Type drop-down list
- Defines the Scatter Function to use for all particles in the scene.
- Default is Isotropic which scatters light equaly in all directions.
- No additional channels will be required.

Phong panel
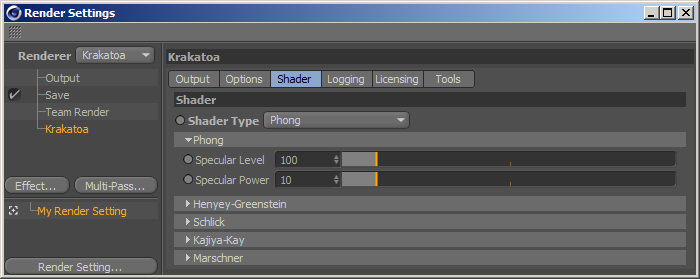
- The Phong Surface scatter function produces a highlight based on the particle Normal channel and the light and camera positions.
- A Normal channel will be allocated and populated with the per-particle Normal channel (if available).
- Typically, PRT Volume and Repolation particles will have a valid Normal channel.
- If no Normal channel is defined for a particle, it will scatter no light and will render black.
Specular Level value slider
- Defines the Specular Level (specular highlight intensity).
- Default is 100.0, minimum is 0.0, maximum is not limited.
- The slider represents the typical range between 0.0 and 1000.0.
Specular Power value slider
- Defines the Specular Power (specular highlight size).
- Default is 10.0, minimum is 0.0 (very large highlight), maximum is not limited.
- Higher values produce smaller specular highlights.
- The slider represents the typical range between 0.0 and 100.0.
Henyey-Greenstein panel
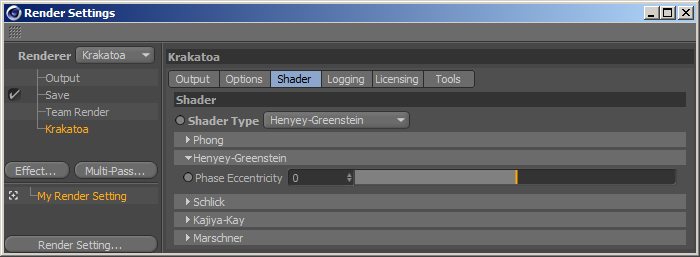
- The Henyey-Greenstein scatter function bounces off light differently depending on the direction of the light and the camera based on an Eccentricity value.
Phase Eccentricity value splider
- Defines the Henyey-Greenstein Eccentricity value.
- Default is 0.0 which produces the same result as Isotropic scattering.
- The value ranges between -1.0 and 1.0.
- The following animated GIF shows the same rendering with Eccentricity values from -1.0 to 1.0 with a step of 0.1:
Schlick panel
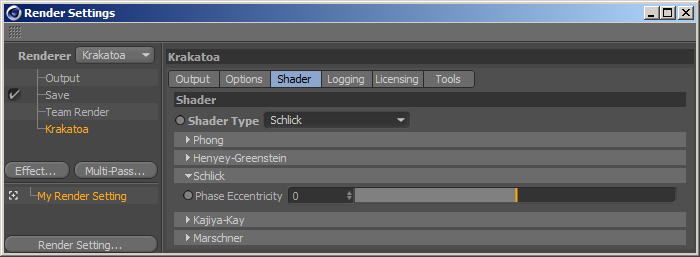
- The Schlick scatter function bounces off light differently depending on the angle between the light and camera direction based on an Eccentricity value.
Phase Eccentricity value splider
- Defines the Schlick Eccentricity value.
- Default is 0.0 which produces the same result as Isotropic scattering.
- The value ranges between -1.0 and 1.0.
- The following animated GIF shows the same rendering with Eccentricity values from -1.0 to 1.0 with a step of 0.1:
Kajiya-Kay panel
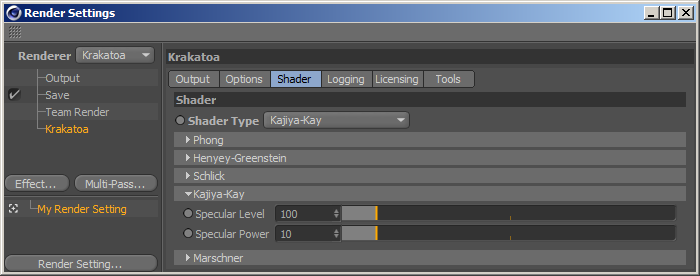
- The Kajiya-Kay scatter function implements a simple hair shader with only Specular Level and Power controls.
- It allocates the Tangent channel and requires per-particle Tangent information which might not be available in most particles.
- It is provided for compatibility with Krakatoa SR, but is currently not fully usable in CINEMA 4D due to the lack of Hair-To-Particles or Tangent channel support.
Specular Level value slider
- Defines the Specular Level (specular highlight intensity).
- Default is 100.0, minimum is 0.0, maximum is not limited.
- The slider represents the typical range between 0.0 and 1000.0.
Specular Power value slider
- Defines the Specular Power (specular highlight size).
- Default is 10.0, minimum is 0.0 (very large highlight), maximum is not limited.
- Higher values produce smaller specular highlights.
- The slider represents the typical range between 0.0 and 100.0.
- The following animated GIF shows the Specular Level animated from 0.0 to 100.0 with a step of 10.0:
Marschner panel
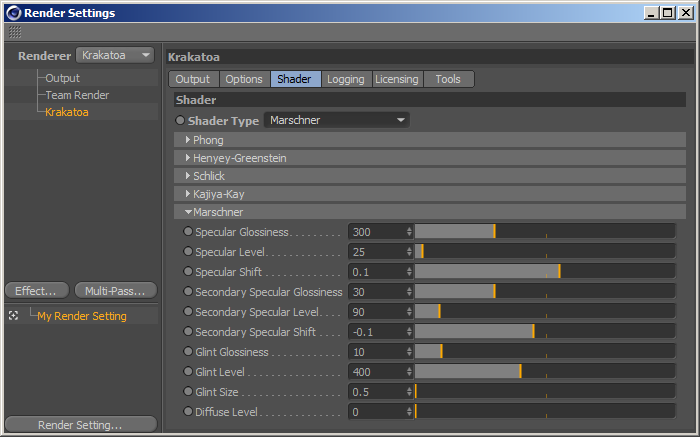
- The Marschner scatter function implements an advanced hair shader.
- It allocates the Normal and Tangent channels and requires per-particle Normal and Tangent information which might not be available in most particles.
- It is provided for compatibility with Krakatoa SR, but is currently not really usable in CINEMA 4D due to the lack of Hair-To-Particles or Tangent channel support.
Specular Glossiness value slider
- Has no effect if the Tangent channel does not exist.
Specular Level value slider
- Has no effect if the Tangent channel does not exist.
Specular Shift value slider
- Has no effect if the Tangent channel does not exist.
Secondary Specular Glossiness value slider
- Has no effect if the Tangent channel does not exist.
Secondary Specular Level value slider
- Depends on the Normal channel, has simular effect to the Specular Level in Kajuya-Kay.
Secondary Specular Shift value slider
- Has no effect if the Tangent channel does not exist.
Glint Glossiness value slider
- Has no effect if the Tangent channel does not exist.
Glint Level value slider
- Has no effect if the Tangent channel does not exist.
Glint Size value slider
- Has no effect if the Tangent channel does not exist.
Diffuse Level value slider
- Controls the Diffuse Level of the shader.
- This value does not depend on the Normal and Tangent channels and can be thus used with any particles.
- When set to 0.0, no diffuse conponent will be included. If the Specular Levels are 0.0, the result will be black RGB.
- When set to 100.0, if the Specular Levels are 0.0, the result will be identical to Isotropic shading.
Logging Tab
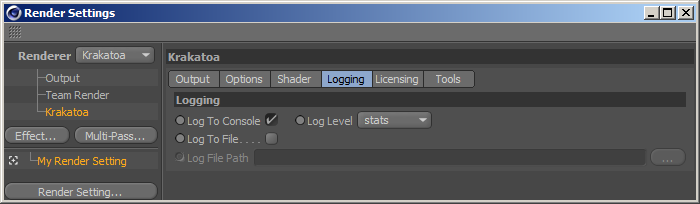
Logging panel
Log To Console checkbox
- When checked (default), the Krakatoa log output will be sent to the Console.
- When unchecked, the log will not be sent to the Console.
Log Level drop-down list
- Defines the Log Level.
- Default is “stats”.
- Possible values are:
- Error - only errors will be logged.
- Warning - only errors and warnings will be logged.
- Progress - both progress messages, warnings and errors will be logged.
- Stats - both statistics, progress messages, warnings and errors will be logged.
- Debug - everything will be logged, including debug messages meant for the developers.
Log To File checkbox
- When unchecked, no log will be written to disk.
- When checked, the log output will be written to the file specified in the Log File Path control (if any).
Log File Path filename
- Defines the output filename to save to when “Log To File” is checked.
Tools Tab

- The Tools tab contains a Birth Channel Generator panel.
- It is documented separately here.