Using the Krakatoa Atmospheric Effects
Applicable to Krakatoa MX 2.0.0 and higher
- Introduction
- Exploring The Krakatoa Atmospheric Effect
- The Basic Scene
- Casting Shadows From Geometry
- Casting Shadows From Volumetrics On Geometry
- Shadow Density And Color
- Smoothing Out The Stepping
- Using Jittered Particles
- Tweaking the Camera Density
- Controlling the Light Density Independently
- Improving Sampling Quality
- Rendering Only The Shadows
- Mapping Density Per Particle
- Raytraced Reflections
- Using Absorption
- See Also
Introduction
- The Krakatoa Atmospheric effect provides access to a raymarching solution that can process particle clouds inside other renderers than Krakatoa.
- For an overview of the available controls, please see the Krakatoa Atmospheric Effect topic.
Exploring The Krakatoa Atmospheric Effect
The Basic Scene
The following examples use a very simple scene.
- It consists of a Plane primitive and a Teapot primitive lit by a Spot light.
- The Teapot primitive is hidden and used by a PRT Volume to generate a teapot-shaped cloud of particles.
- The wireframe color of the PRT Volume is set to write.
- The Render Spacing of the PRT Volume is left at its default 1.0 value.
- The Jittering is turned off and no sub-divisions are performed.
- A Sphere is placed above the Teapot in the way of the Spot light.

- In the Environment dialog of 3ds Max, a Krakatoa Atmospheric effect is added and its UI is opened.
- In the Krakatoa Atmospheric effect UI, the PRT Volume of the teapot is added as the particle source.
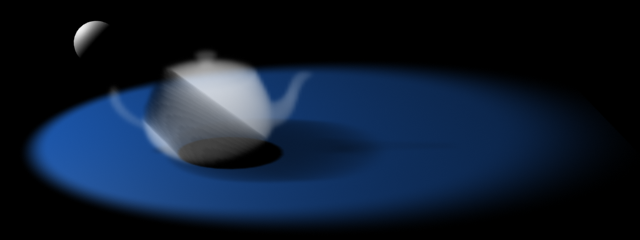
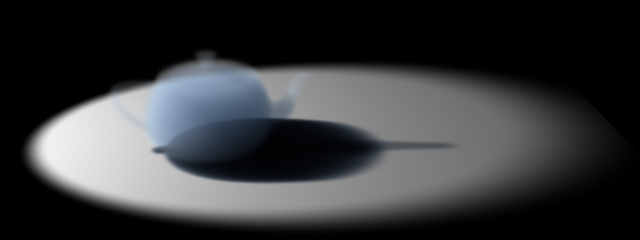
- All other settings are left at their defaults - Voxel Length 1.0, Camera Density 5.0/-1
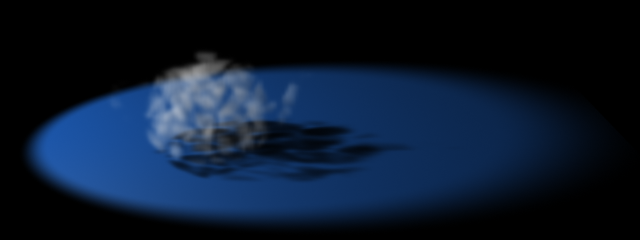
Rendering with this setup using the 3ds Max Scanline Renderer produces a rather unconvincing image - there is no shadow casting from the sphere onto the particles or from the particles onto the ground plane. This is because the 3ds Max lights don’t cast shadows by default.
Casting Shadows From Geometry
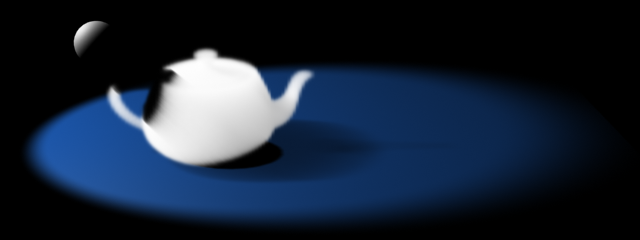
- Let’s check the On checkbox in the Shadows group of controls of the Spot light.
- Rendering again shows a shadow cast from the sphere onto the particles and on the ground plane, but still no shadows from the Krakatoa Atmospheric effect onto the ground plane:
Casting Shadows From Volumetrics On Geometry
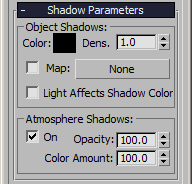
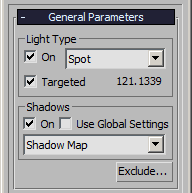
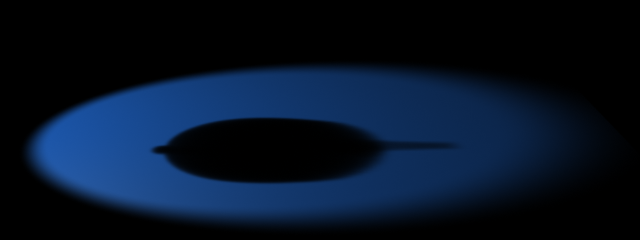
- As with all 3ds Max Atmospheric effects, we have to explicitly enable Atmospheric Shadows in the Spot light:
- Check the On checkbox in the Atmosphere Shadows group of controls inside the Shadow Parameters rollout of the Spot light.
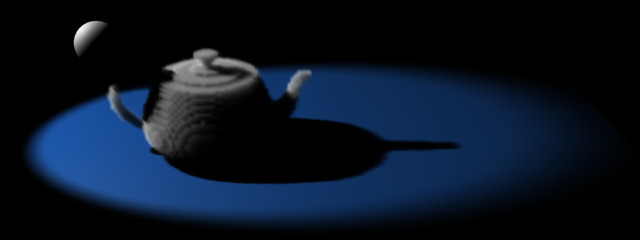
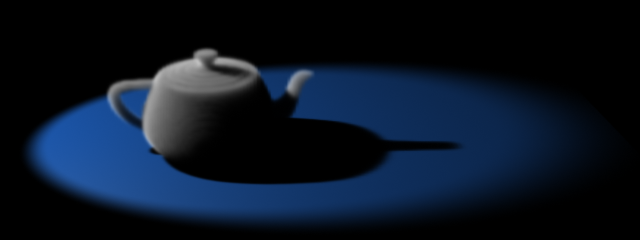
- Rendering now shows correct shadows from particles onto the ground plane!
Shadow Density And Color
- The 3ds Max Standard Lights provide two more controls in the Shadow Parameters rollout that the Krakatoa Atmospheric effect will respect:
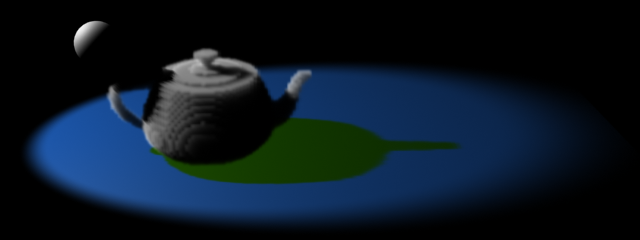
- Changing the Color from black to yellow produces a solid yellow shadow.
- Changing the Dens. value form 1.0 to 0.25 produces a less dense shadow:
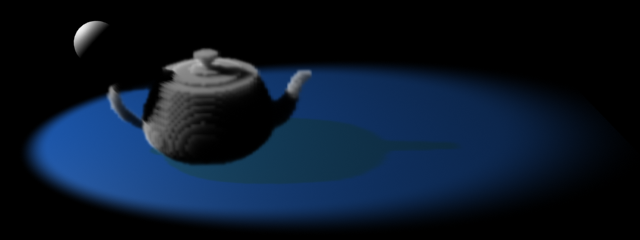
Both these controls are FAKE and should not be used with Krakatoa Atmospherics. As we will see a bit later, the density of the shadows cast by the PRT Volume can be controlled independently and much more naturally.
Smoothing Out The Stepping
- Currently we are producing one particle per cube with size 1.0 system unit using the PRT Volume, and we are also rendering with a Voxel Length of 1.0. This causes the stepping visible at the curved sides of the Teapot primitive.
- Let’s hide the Sphere for now as we are interested only in the Atmospherics’ look.
- In the PRT Volume, we enable the Subdivisions and leave the amount at one.
- As result, for each voxel generated by the PRT Volume, 2x2x2 = 8 sub-voxels will be created and up to 8 particles will be created, respecting the surface of the volume.
- Rendering this produces a smoother surface:
- While the result is much better, there are still some steps visible on the lid.
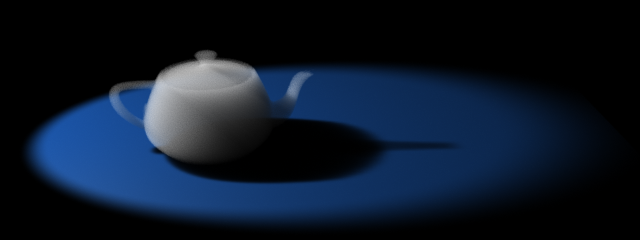
- Increasing the subdivisions to 2 will produce up to 27 particles per voxel and smooth out the result even more:

Why do these settings produce smoother results?
When only one particle is created per voxel, that particle carries a Per-Particle Density of 1.0. This means that each voxel of the Krakatoa Atmospheric effect gets typically one particle from the PRT Volume, so the Voxel is either On (there is a particle) or Off (there isn’t a particle).
When using Subdivision of 2, up to 27 particles are created inside each PRT Volume voxel and tested against the surface of the volume. Each of these particles receives 1/27 of the Voxel’s full Density. If half of these particles turn out to be outside the surface, the Krakatoa Atmospheric effect will receive only half the Density compared to the previous case, and thus shade the voxel with an intermediate density between fully on or fully off, producing correct anti-aliasing.
In other words, increasing the Subdivisions of the PRT Volume has the effect of sub-sampling the volume.
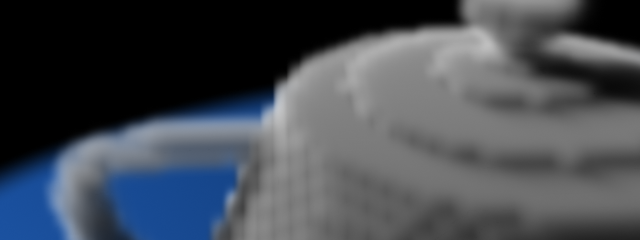
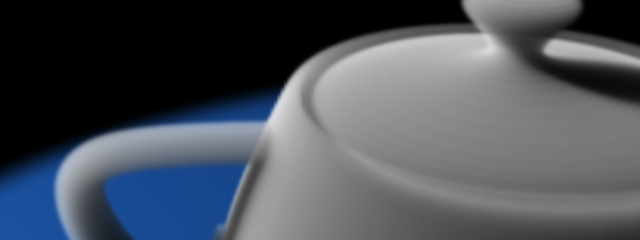
Here is a close up of the same teapot with Density of 5.0/-1. PRT Volume is set to Spacing 1.0.
- First we see the result with Subdivide Region unchecked:
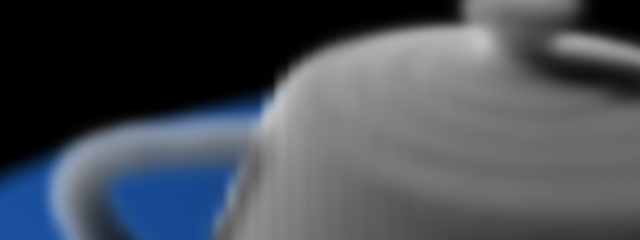
- Enabling Subdivide Region and using 1 and 2 Subdivisions, we get these:
As you can see from the above two images, we cannot improve the quality further because the Voxel size of 1.0 is too large and obvious in the close-up. The solution in this case is to increase the voxel resolution by reducing both the PRT Volume Spacing and the Krakatoa Atmospheric effect’s Voxel Length.
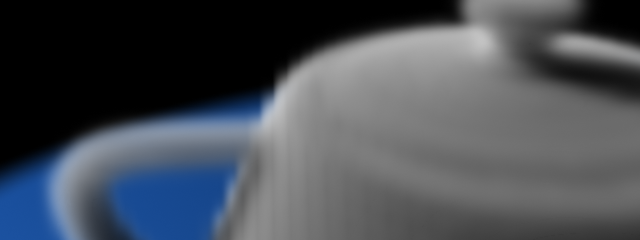
- Here is the result with both set to 0.25 units and no Subdivisions:

Now we have enough resolution, but each voxel is again only binary - either full or empty, so we must enable the Subdivisions to anti-alias the edges and get half-shaded voxels where fewer than all particles fall inside the voxel. The next image uses 2 Subdivisions at Voxel Size of 0.25 for a very smooth result even in a close-up:
Using Jittered Particles
Let’s explore the look of the PRT Volume rendered as Krakatoa Atmospheric effect when using Jittered distribution.
- In the PRT Volume, we disable the Subdivisions temporarily
- We check the Jittered option and render to compare to the “grid” distribution above:

As you can see, Jittered distribution can be useful to produce a more cloudy-looking result since each particle has a random position inside the voxel which affects the raymarching results.
- If we enable the 2 Subdivisions again, the rendering will look similar to the non-jittered subdivided look seen previously, although there is a certain amount of roughness to the surface:

Tweaking the Camera Density
As with regular Krakatoa rendering, reducing the Camera Density (known as Final Pass Density inside of Krakatoa) will affect both the light penetration in the volume, the shadow cast on geometry and the particle visibility throught he volume from the point of view of the camera.
- In the Krakatoa Atmospheric effect, we change the Camera Density from 5.0/-1 to 1.0/-1

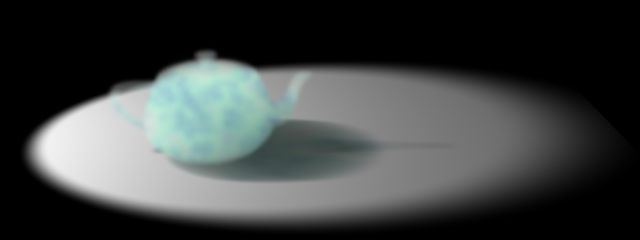
- If we continue reducing the Camera Density by an order of magnitude to 1.0/-2, we get a ghostly-looking cloud with semi-transparent shadow:
Controlling the Light Density Independently
Just like in Krakatoa itself, we can decouple the Light Density from the Camera Density and let more or less light penetrate the volume without changing the density of the particles as seen by the Camera.
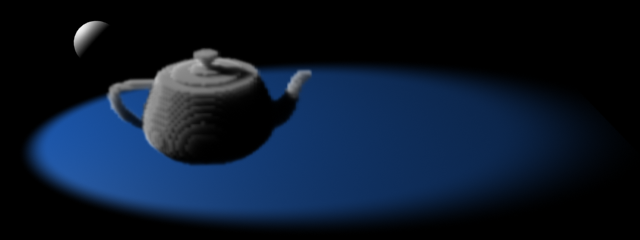
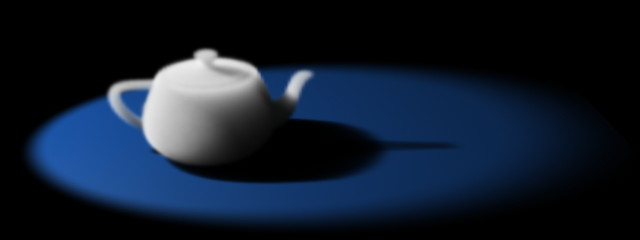
- We check the >Use option next to the Light Density controls and set the Light Density to 1.0/-1 and the Camera Density to 5.0/-1 (in other words, the particles are 5 times more transparent to the light rays than to the camera rays):
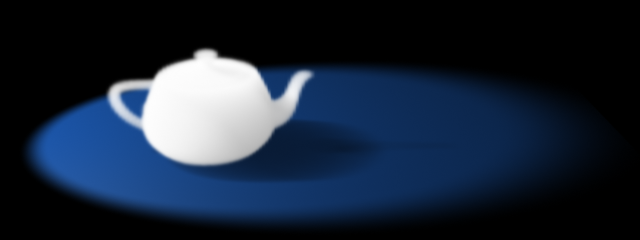
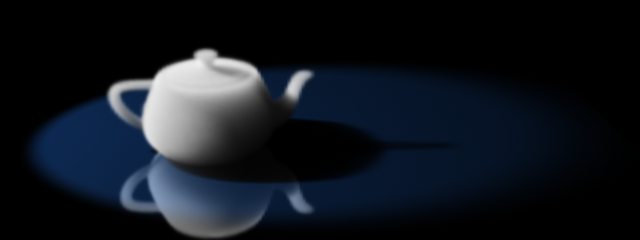
- If we go down with an order of magnitude in the Light Density without touching the Camera Density, we can produce a solid but glowing from the inside (due to transmitted and scattered light) teapot with a semi-transparent shadow on the ground!
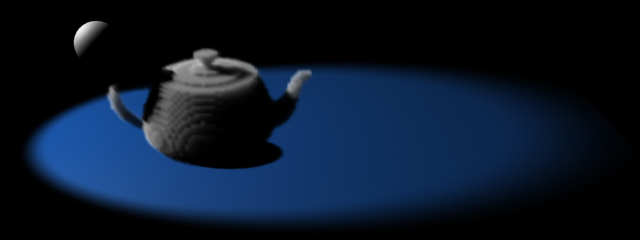
- At this point, we can unhide the hidden Sphere and see how it occludes light independently:

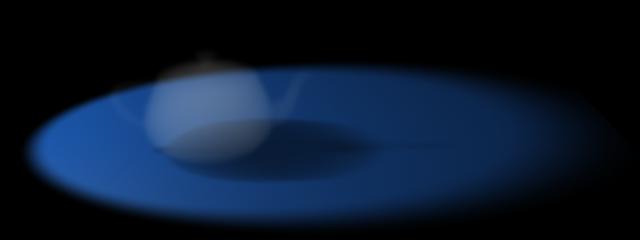
- To make this more obvious, we can reduce the Camera Density by another order of magnitude to 5.0/-2 to reveal the volumetric shadow inside the teapot:
Improving Sampling Quality
In the last two images above, you can surely see the moire patterns caused by the sampling through a voxel grid using Step Size equal to the Voxel Length.
- Let’s reduce the Min.Step value from 1.0 to 0.5

Already we can find a significant improvement, at cost of render time. The previous image took less than one second to render, while the last one took around 2 seconds.
- We can reduce the Min.Step further to improve quality - since the Max.Step is still 1, in areas where the density is not changing abruptly or at all, the ray marching will still be fast. In fact, Min.Step of 0.25 and 0.1 produce slightly finer results in the same time of 2 seconds:


- And here is the higher Camera Density image rendered with Min.Step of 0.1:
Rendering Only The Shadows
By reducing the Camera Density to 0.0 while leaving the Light Density high, we can easily produce a shadows-only rendering (in case the actual particle rendering is supposed to be performed in Krakatoa, for example in Particle mode).
- Let’s hide the Sphere again
- We will set the Camera Density to 0.01/-30 (which is pretty much zero)
- We can set the Light Density to a solid-looking value like 1.0/-1
- Here is the Krakatoa Particle Rendering of the PRT Volume with Lighting/Final Pass Density of 0.1. The Subdivisions had to be increased to 3 to produce enough particles (1.8 million) for a smooth result:

- And this is the Video Post output of the two composited using Alpha Compositor:
Mapping Density Per Particle
Using a Krakatoa Material or a Magma modifier, we can assign a different Per-Particle Density value to each Particle. Like all other channels, the Density of the particles will be accumulated in the Krakatoa Atmospheric effect’s voxels and respected by both Light and Camera rays.
- Let’s assign a Krakatoa Material to the PRT Volume object
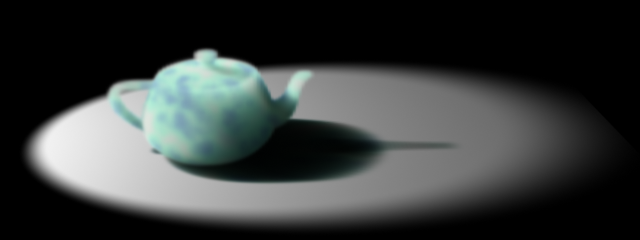
- We can add a procedural map like Cellular to the Density slot and enable the Density in the Material.
- To make the result more obvious, let’s increase the Map Size to 10.0 and set it to Chips mode.
- As expected, the shadow will respect the variable density throught the volume, and the Camera will also see the noisy nature of the Density channel.
Raytraced Reflections
Like all other Atmospheric effects, the Krakatoa Atmospheric can appear in Raytraced reflections in the Scanline renderer, VRay, finalRender or Brazil (the renderers supporting the 3ds Max Atmospherics).
mental ray would require a separate implementation. It is currently not supported by the Krakatoa Atmospheric effect.
- Let’s remove the Krakatoa Material from the PRT Volume, or at least disable the Density mapping.
- We can set the Light Density to 1.0/-1 and the Camera Density to 5.0/-1 once again.
- If we add a Raytrace material to the groud plane and set the Diffuse color to about the same color as the original wireframe color, and the Reflection to mid-gray (about 50%), we get the following result:
Using Absorption
Similar to the regular Krakatoa Voxel rendering, the Krakatoa Atmospheric effect supports the Absorption channel of the particles to absorb energy from the R, G and B components of the light individually.
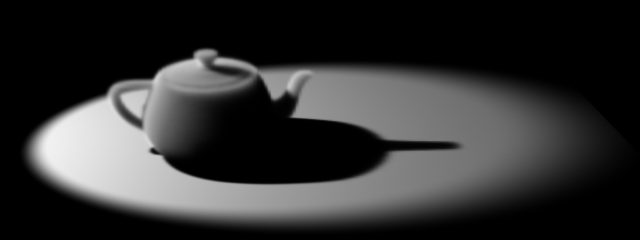
- When the >Use Absorption option is turned off, the self-shadowing effect will always produce gray shadows because R,G and B are absorbed equally according to the particle density:
- Even when the >Use Absorption option is turned on, if the particles have no explicit Absorption channel provided by a Magma modifier or Material, the result will be identical (Absorption will default to [0,0,0] and produce gray scale shadows)

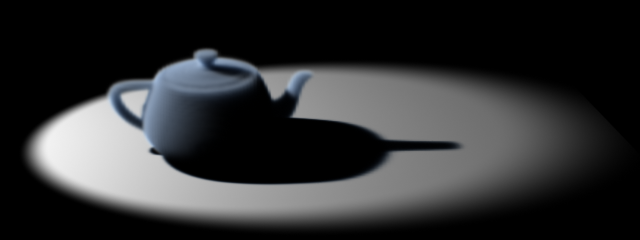
- Let’s enable the Absorption checkbox in the Krakatoa Material assigned to the particles and set the color swatch to [80,40,0] which is a shade of brown
- The result is a blue tint since Red and Green are absorbed and the Blue component is unaffected:
- Changing the Density to 0.05 (5.0/-2) reduces the density of the particle cloud and makes the shadow less opaque, revealing a blueish tint at its edges:
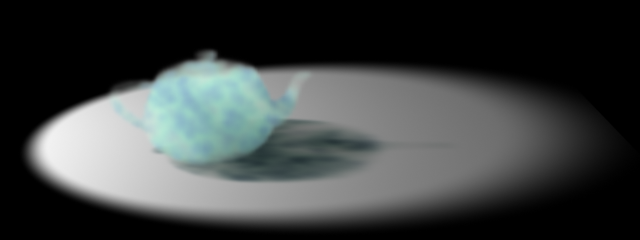
- Naturally, the Absorption channel can be defined by a texture like the Cellular procedural map.
- In this case, the Lighting density was set to 5.0/-2 while the Camera Density was 5.0/-1:
- Reducing the Density further to 1.0/-2 and 1.0/-1 reveals the colored shadow on the ground plane even better:
Note that other than regular 3ds Max volumetrics, the colored shadows work regardless of the Shadow type in the 3ds Max light - both Shadow Maps and Raytraced Shadows produce the same result.
- Using the Density mapping from the previous discussion, we can boost the Density where the Absorption is higher by instancing the same map in the Density Scale slot of the Krakatoa Material.
- The Camera Density is back to 5.0/-1 and Lighting Density to 5.0/-2, but due to the Density Scaling mapping, the overal density is closer to the previous image: