Lighting Channel Saving and Relighting
Available in Krakatoa v1.5.0 and higher
Overview
- When rendering in Particle Rendering mode, a Lighting channel will be allocated and optionally cached to allow for faster rerendering by skipping the Lighting Pass.
- In order to speed up the rendering of saved particles loaded via a PRT Loader, it would be useful to save the Lighting channel into the PRT file and thus load the particles already pre-lit.
- Krakatoa v1.5.0 added the ability to calculate the Lighting channel during the saving of particles and copy its content into the Emission channel.
- The resulting particles can then be rendered as self-illuminated, replicating exactly the lighting conditions at the moment of saving.
- Note that view-dependent effects like Specular Highlights in Phong Surface Phase Function Mode, Environment Reflections etc. cannot be saved and replicated using this method. Also, advanced shading effects like light Absorption cannot be manipulated using this method since they require the interaction of all shading channels including Scatter, Emission and Absorption.
Workflow
- The option to copy the Lighting Channel into the Emission Channel is found in the Channels rollout of the Krakatoa GUI.
- Since only Particle Rendering mode generates a Lighting channel in memory, it is necessary to switch Krakatoa to Particle Rendering mode.
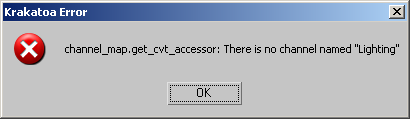
- Attempting to save particles with Lighting to Emission channel copying while in Voxel Mode will cause an error message about the Lighting channel not being allocated.
- It is also necessary to add the Emission channel to the list of channels to save. This will happen automatically when the option is invoked, but if the channel is removed accidentally, lighting will be stored in the PRT files and there will be no warning.
Saving and Loading Lighting
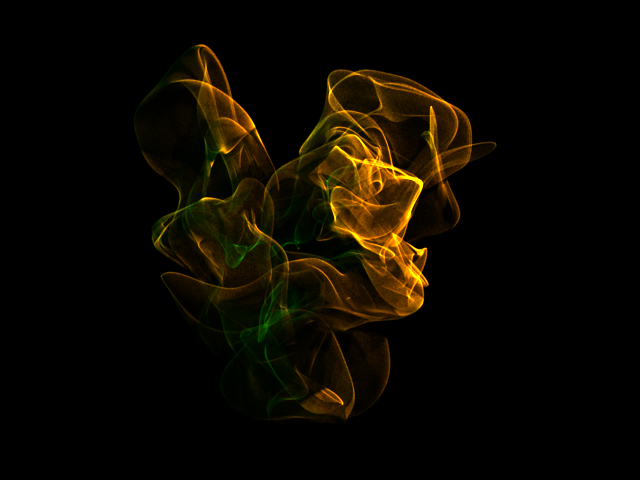
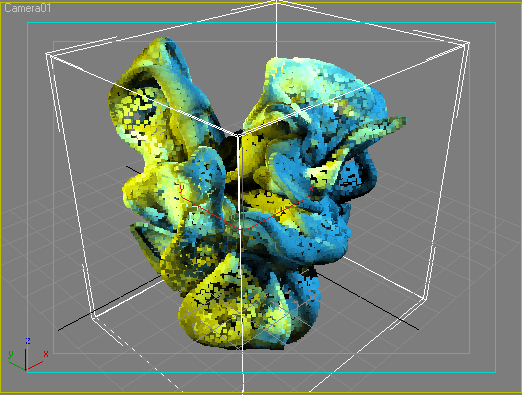
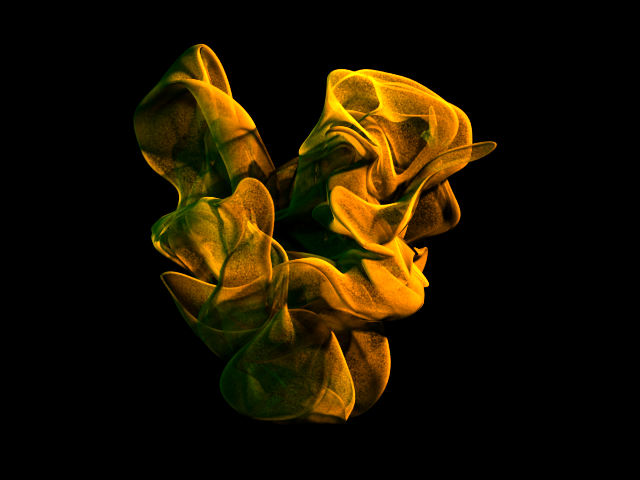
- Using the last frame from the initial tutorial with 10 partitions of 1 million particles each set to while particle color and lit by two spot lights - one red and blue - we can render an image at 640x480 in 34.843 seconds:

- Then we can switch Krakatoa to Save Particles To File Sequence mode, enable the Lighting channel copying into the Emission channel and save the particles to a PRT file with just Positions and Emission channels enabled for saving. This took 44.781 seconds. Saving more channels like Velocity and Normals would have increased this time.
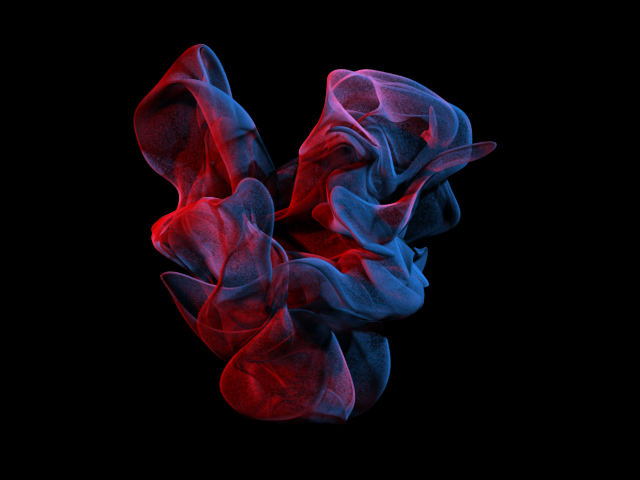
- Now we have a PRT file that contains both the positions and the illumination of the particle cloud.
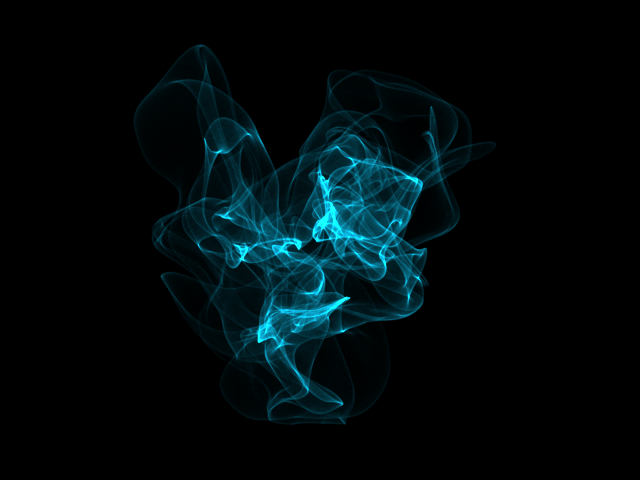
- We can turn off the lighting, hide the original PRT Loader, create a new PRT Loader and load the file we just saved.
- In order to make the lighting visible, we have to enable >Use Emission in the Main Controls rollout.
- Rendering the same view now takes only 14.047 seconds and the result is identical:
Relighting Examples
- The real power of this approach is that we can not only re-render the particles as they were pre-lit, but we can also modify the saved lighting using a Krakatoa Channels Modifier either added to the PRT Loader, or applied via the Global Channel Overrides to the whole scene!
Preview in the Viewports
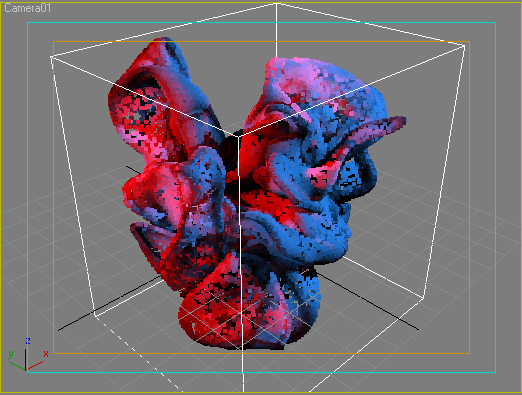
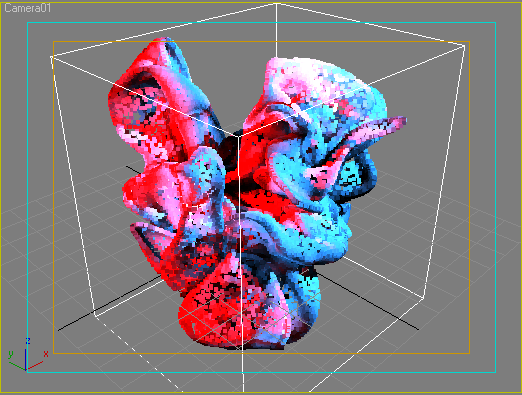
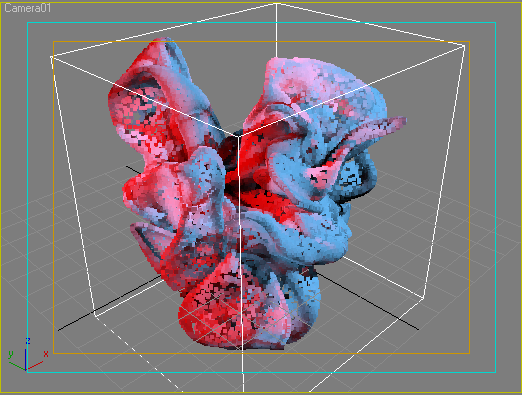
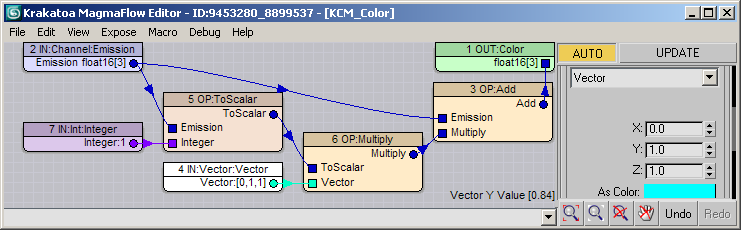
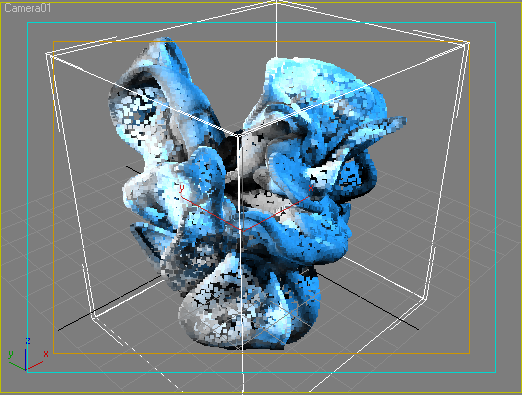
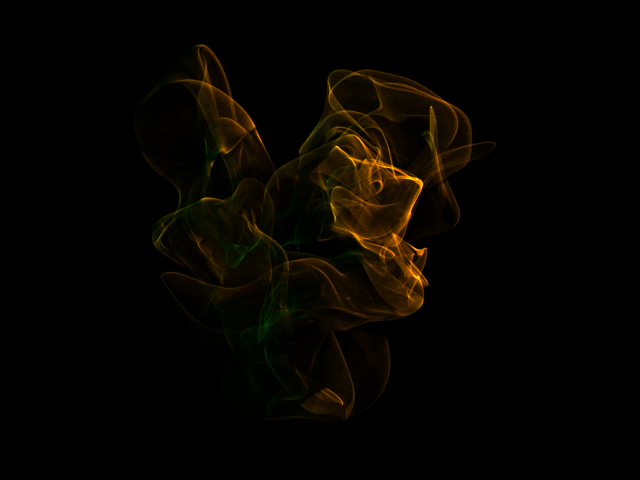
- By adding a KCM to the PRT Loader to copy the Emission channel into the Color channel, we can even preview the saved lighting in the viewports and adjust the effect we want interactively without the need to render previews!
- The screenshot below shows only 100,000 particles out of the 10 million, loaded using Every Nth Particle mode and set to Load Single Frame Only, thus operating on a cached version of the particles and removing the need to reload particles on every KCM update!
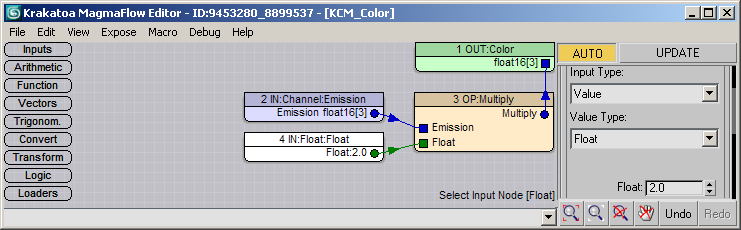
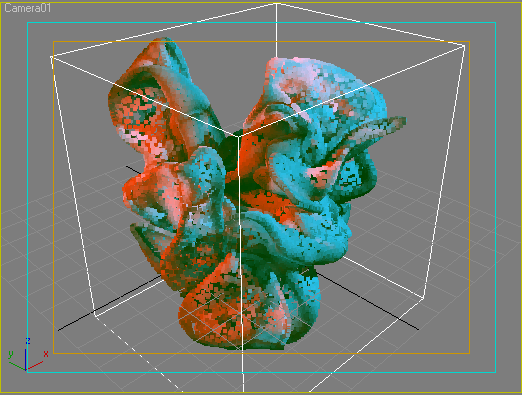
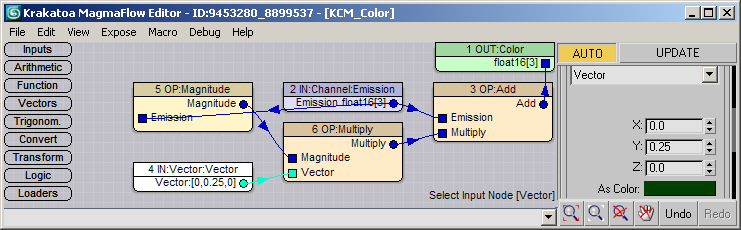
Light Gain
- Let’s say we want to boost the lighting two times.
- Using a simple MagmaFlow that multiplies the Emission Color two times, we can get the particles illuminated as if the original spotlights had multipliers of 2.0!
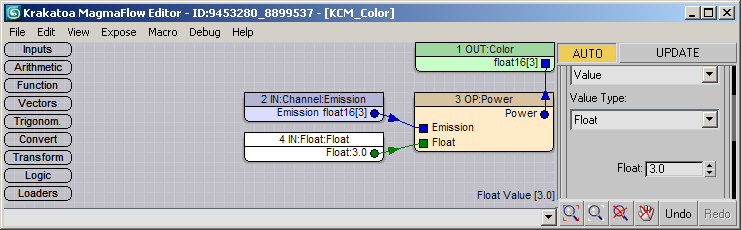
Brightness/Contrast
- Simply by switching the Operator from Multiply to Power, we get a Brightness/Contrast control:

Filter Light By Color
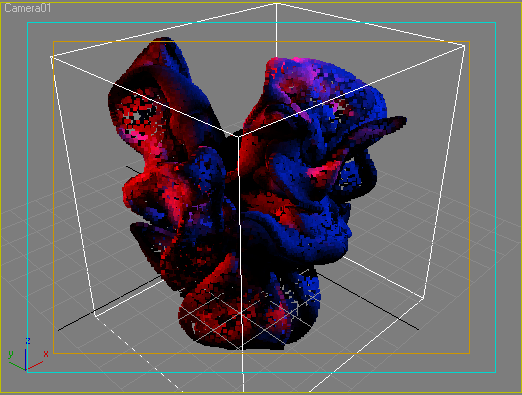
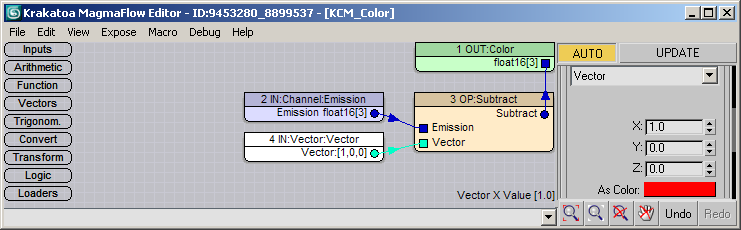
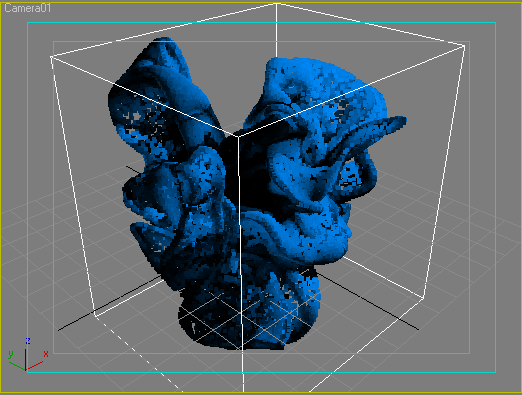
- If we would like to remove all red light from our particles (which were white initially and were then lit with red and blue spot lights), all we have to do is subtract Red from the Emission channel and we end up with the Blue lighting only:
Ambient Light Color
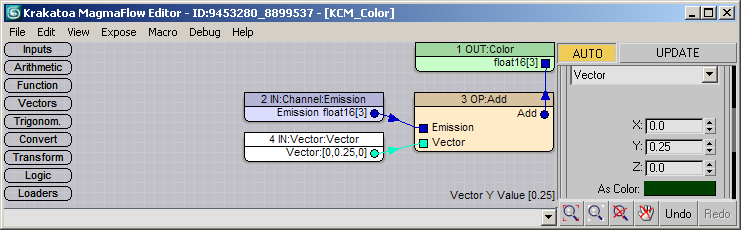
- Adding “ambient light” to the particles is as simple as adding a constant color to the Emission Channel.
- For example, here we add dark green color to all particles:
Illumination Tinting
- In the previous example, the green color was added to all particles, including to those in the shadow areas.
- If we wanted to add the green color only to particles that were lit by either one (or both) lights, we can modify the MagmaFlow a bit.
- All we have to do is multiply the green color by the Magnitude of the Emission channel.
- Thus particles that are dark will darken the green color while brightly illuminated particles will get it all:
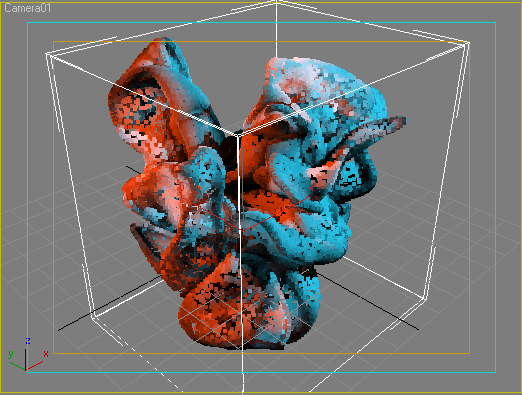
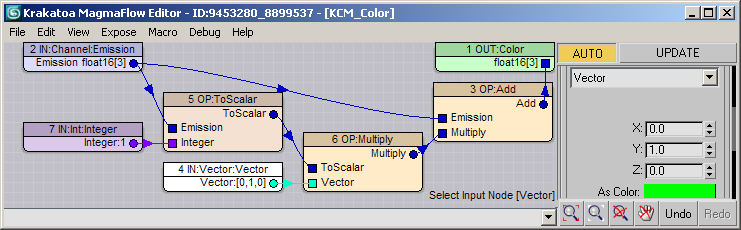
Tinting One Light Only
- What if we wanted to tint only the red light but not the blue? We can read the Red Component of the Emission channel using a ToScalar Operator with first Input being the Emission channel and second Input being the Integer of 1 (standing for first, red component).
- Then we can multiply the Vector containing pure Green color with the Red component of the Emission and add the result to the Emission, thus turning the red light into yellow!
- If we wanted the red light to be white, we can add to its existing red the green and blue it is missing:
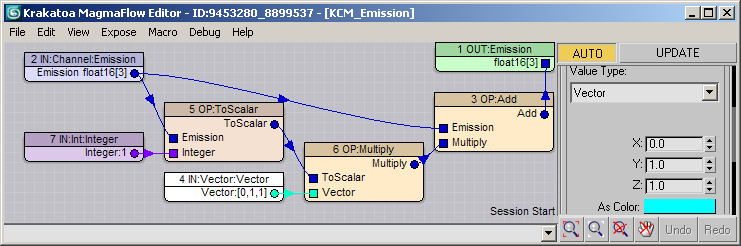
- In order to render the color-corrected lighting, all we have to do is switch the Output of the KCM from Color to Emission in order to overwrite the existing Emission channel of the PRT file with the modified one:
- The time to render the modified lighting was only 14.39 seconds vs. 14.047 without the KCM!
- In other words, the time to relight 10 million particles is negligible!

Isolating Lights using Stacked Magma Modifiers
- We saw above how to tint and isolate lights based on the color component (Red, Gree or Blue) used.
- In the Visual Effects practice, pure Red, Green and Blue lights are often used for relighting in a 2D compositing application like Fusion, Nuke etc.
- Similarly, in Krakatoa we can illuminate the particles with two or three lights using the component colors, then isolate each light based on the component and completely manipulate each light using a separate KCM or even multiple KCMs.
- In a way, Krakatoa allows a 3D relighting workflow since the particles could still be rendered from ANY angle after the relighting - whereas 2D compositing packages work on 2D pixels, the particles in a PRT file are like 3D pixels in space that can then be turned into a 2D image by the renderer!
- In this particular example we are using only a Blue and a Red light for simplicity, but we could process a third Green light if needed.
- To do this, we will have to apply a number of KCMs to move data between channels and accumulate the results of the separate lights into the final result:
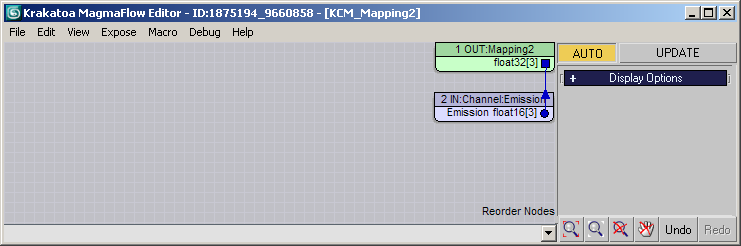
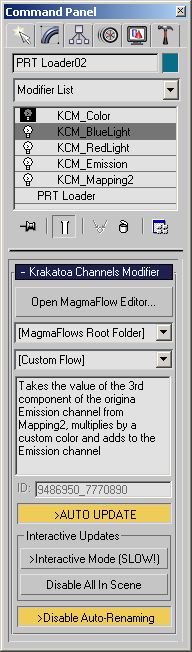
- First we add a KCM to copy the Emission channel coming from the PRT file into a custom channel, for example Mapping2 which has the same format of float16[3] as the Emission channel. We have to do this because we want each light manipulating KCM to read from the same unmodified data, so we “cache” it in a different channel:
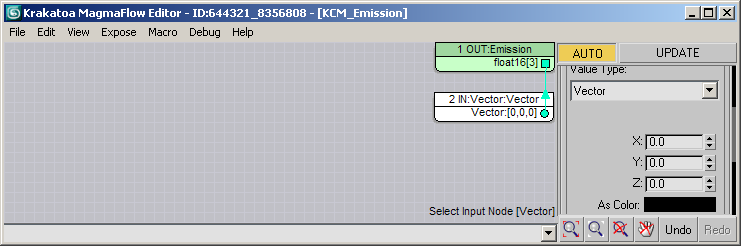
- Next we kill the Emission channel by writing black into it. This gives us an empty canvas to add our lighting to:
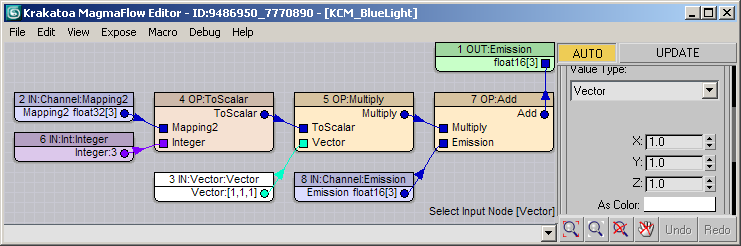
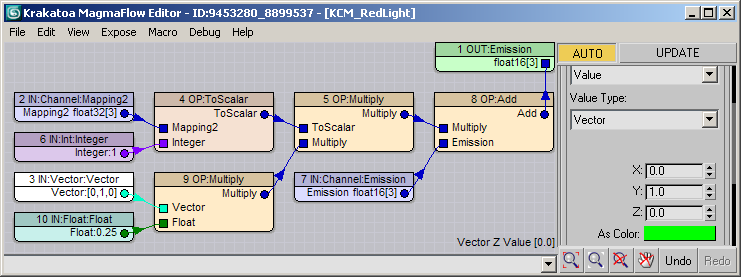
- Now we can take the first component of the color stored in the Mapping2 (the original Emission color) which represents the intensity of the Red light. We multiply it with a color of our choice (for now, pure white) and add it to the Emission channel (which is black up until this point):

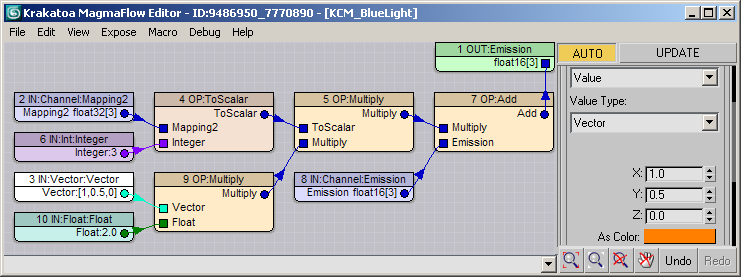
- Then we copy the same KCM and change the Integer Node defining the Component to 3 (Blue). The color (also while) gets multiplied with the component and also added to the Emission channel, accumulating with the red light’s value:
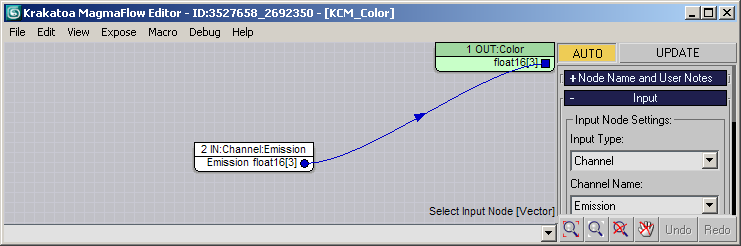
- To see the result in the Viewport, we add one last KCM to copy the Emission channel produced by the KCMs below it into the Color channel. We can set this modifier to Off In Renderer because we don’t need the Color during the rendering:
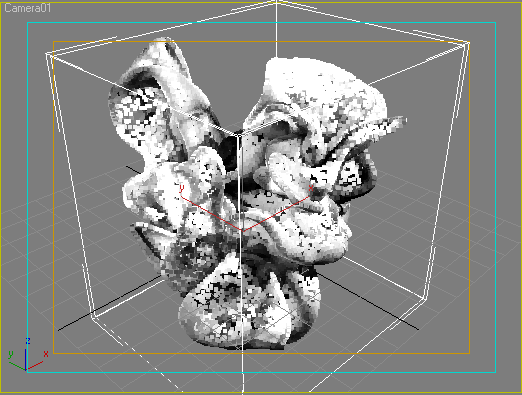
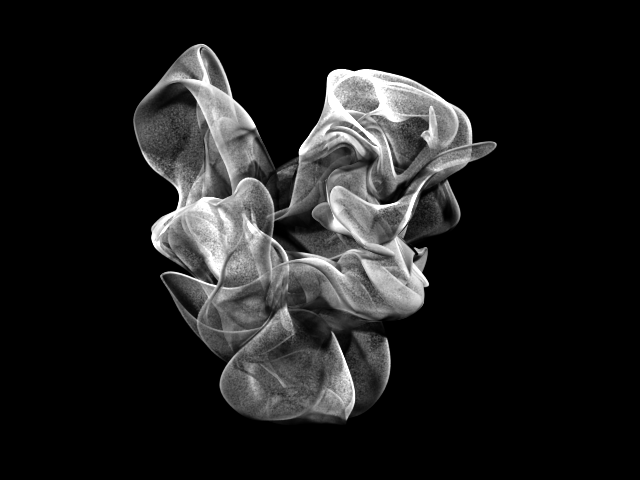
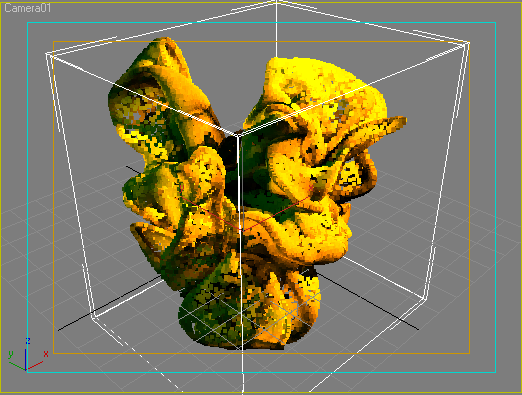
- Here is the resulting Modifier Stack and the result in the viewport:
- Rendering takes a bit longer now - 15.625 seconds because we are copying all data between channels twice:
- Now we can manipulate the lighting of each light independently - for example turning off the KCM_RedLight will turn off that light:
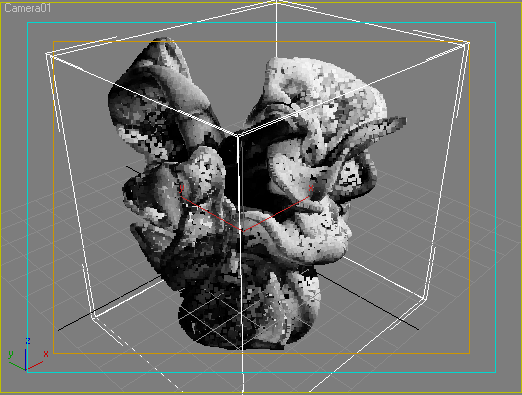
- Turning off the KCM_BlueLight modifier while turning on the KCM_RedLight disables the blue light:
Tinting and Gaining Each Light Individually
- Obviously, we can now control the color and intensity of each light separately, for example let’s change the red light to green and dim it to 25%, then make the Blue light twice as intense and tint it in orange:
Rendering Additively
- Turning on the >Force Additive Mode option does not produce the result you would expect:
- The reason for this surprising result - the >Force Additive Mode copies the Color Channel into the Emission Channel internally, thus overwriting the data we just created using KCMs with the Object Color of the PRT Loader which could be anything, in the above case it happened to be blueish.
- To solve this, we have to ensure that our data is written to the Color Channel instead (or in addition to) the Emission channel.
- Instead of changing all KCMs on the stack, all we have to do is switch the last KCM on top of the stack to be enabled in the Renderer in addition to the Viewport (it used to be Off In Renderer). This will copy our Emission data into the Color channel, then Krakatoa will copy the Color back into Emission internally while resetting Color and Absorption to black, thus producing Additive Rendering:
- Increasing the Density from 3.0/-3 to 6.0/-3 might be a good idea: