Krakatoa MY Rendering Maya Particles
Introduction
- Krakatoa MY can naturally render the native Maya particles.
- In this tutorial, we will look at the basic steps involved in rendering a Maya particle simulation directly in Krakatoa. We will look at the typical settings to produce volumetric and additive shading.
- We will also discuss the limitations of the direct rendering approach. In a second follow-up tutorial based on the same scene setup, we will take a look at the tools Krakatoa MY provides too work around these limitations of the host application.
The Scene
- The Maya scene used for this tutorial contains a dynamic Maya Particle simulation involving particle birth and death. The scene range is from 1 to 200.
- The particles are affected by several fields: an Air Field, a Turbulence Field and a Drag Field. The result is a low-turbulence stretchy cloud of particles.
- A Spot light is placed in the scene to illuminate the particles when rendering with volumetric shading.
- Initially, we will emit 10,000 particles per second and render frame 100.
- Click here to download the base scene file (Maya 2012, ZIP, 10KB)
Basic Rendering
First Rendering Steps
- Simulate until frame 100.
- Open the Render View window and assign Krakatoa as the current renderer.
- Click the Redo previous render (Krakatoa) icon to render.
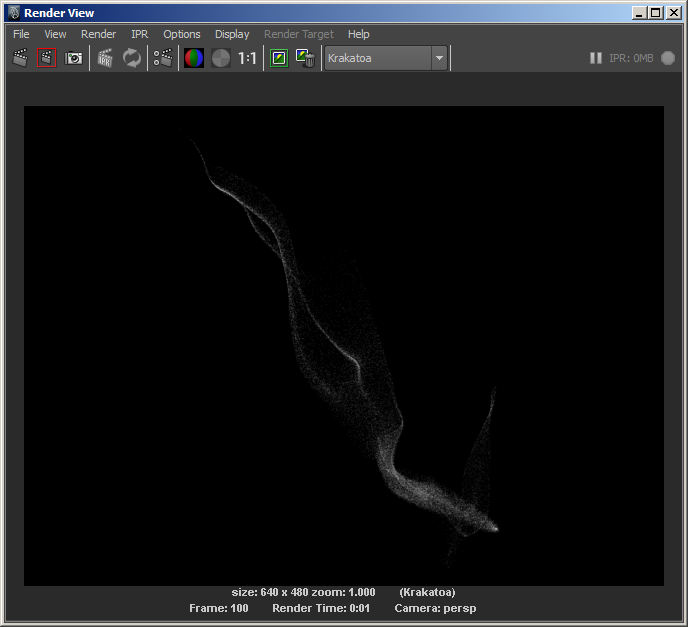
- Surprisingly, there seems to be nothing there!
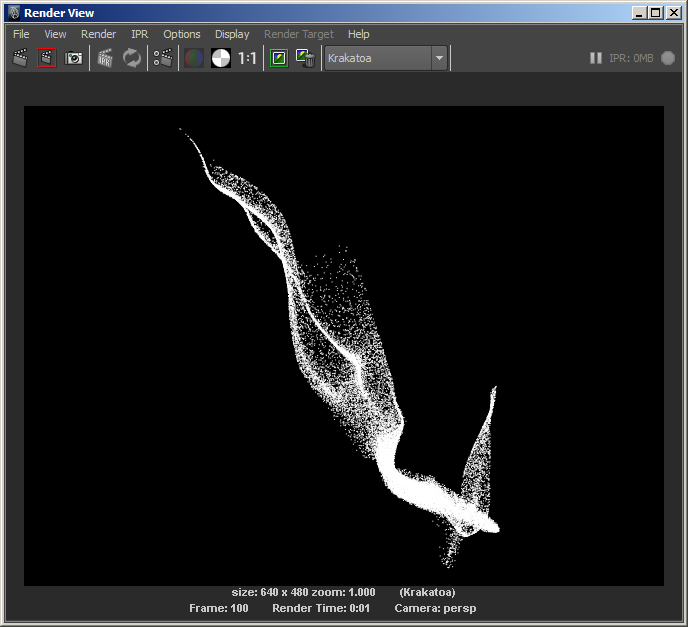
- Checking the Alpha channel though shows that there are particles in the image:
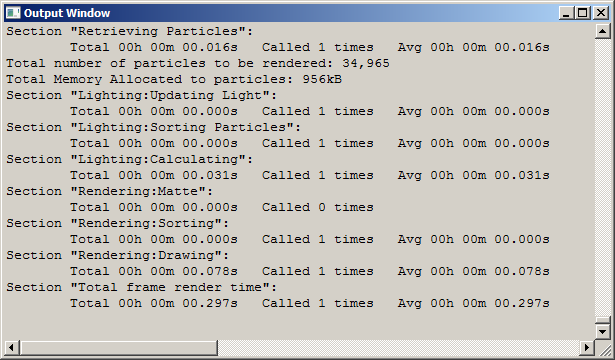
- This is also obvious from the Output Window showing the Render Log output of Krakatoa MY:
Rendering Agains Non-Black Backround
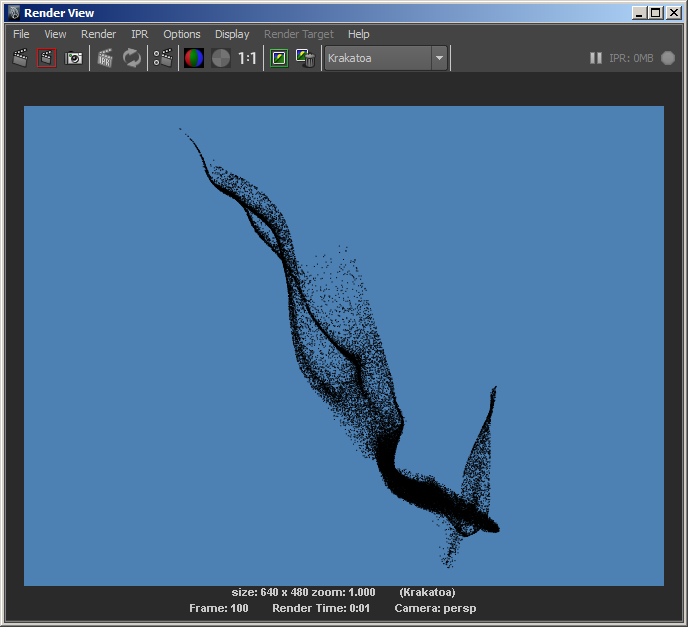
- Click the Open Render Settings window Krakatoa icon in the Render View window’s toolbar.
- Check the Override Background Color checkbox in the Global Render Values panel of the Krakatoa Settings tab of the Render Settings window.
- Click the Redo previous render (Krakatoa) icon to render - now we can see that the particles are actually drawn in black which explains why they were not visible on black background.
Overriding The Particle Colors
- One way to quickly (but usually just temporarily) solve this problem is to force all scene particles to use the same color.
- Check the Override Color checkbox in the Global Render Values panel of the Krakatoa Settings tab in the Render Settings window.
- Leave the Color Override control at its default white.
- Uncheck the Override Background Color checkbox.
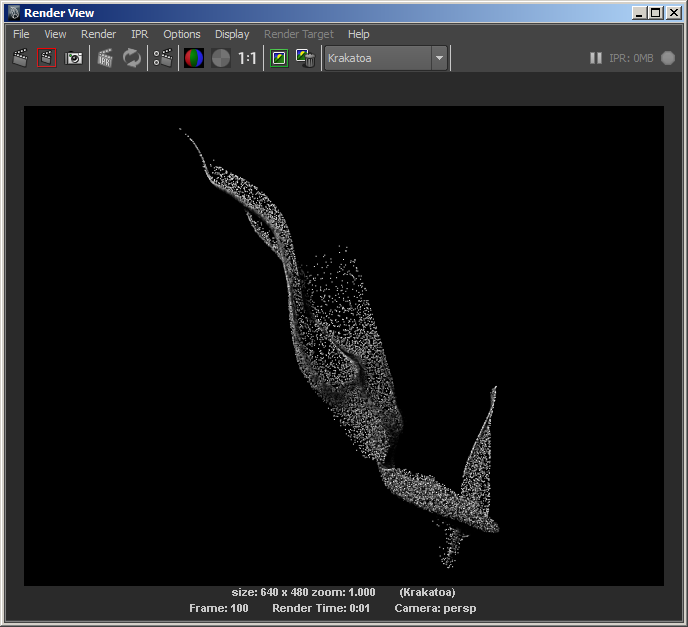
- Click the Redo previous render (Krakatoa) icon.
- This time, we get visible particles on black background, but they look too rough:
Tweaking The Density
- Krakatoa calculates the density in world units.
- This means that the scale of the particle simulation matters.
- If you are rendering a simulation that has 10,000 particles within a single cubic scene unit and each particle carries a per-particle Density value of 1.0, the resulting volumetric spatial density will be 10,000.
- But if the same particles are simulated as a larger cloud occupying a cubic volume of 10x10x10 units, the average spatial density will be 1000 times lower per cubic unit.
- This is because the per-particle density will be distributed into a much larger volume.
- This is why we will have to reduce the Final Pass Density multiplier of Krakatoa a lot more than in the previous tutorial where the Buddha statue a was significantly larger object.
- Reducing the Final Pass Density from its defaults of 5.0 and Exponent of -1 to 5.0E-3 or 5.0E-4 does not change the result at all!
- Change the Final Pass Exponent to -5 and leave the Final Pass Density at 1.0.
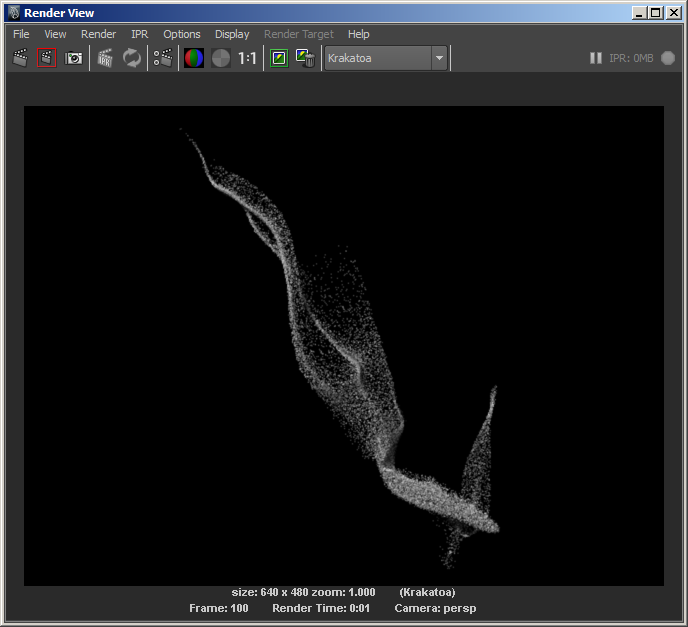
- Click the Redo previous render (Krakatoa) icon - the individual particles become a bit less pronounced, but there is still a bit of shadow casting from particles onto particles:

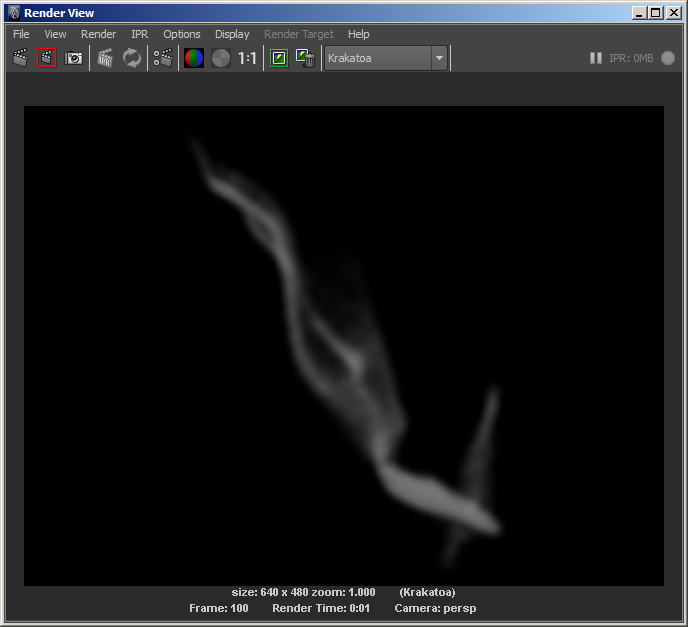
- Going down one step further with the Final Pass Density produces much fainter particles:
- When rendering in Krakatoa, it should be your goal to produce an image where individual particles cannot be distinguished.
- But with only 34K particles, this is not really possible.
- Let’s keep the Final Pass Exponent at -5 and try some other settings before we look at how to increase the particle count.
Changing The Draw Point Filter
When drawing the particles as point, you have the choice between three filtering modes: Nearest, Bilinear and Bicubic.
- Change the Draw Point Filter control from the default Bilinear to Nearest.
- Click the Redo previous render (Krakatoa) icon - the resulting image will have each particle drawn into exactly one pixel, producing a very sharp result without any anti-aliasing.

- Change the Draw Point Filter control to Bucubic.
- Click the Redo previous render (Krakatoa) icon - the resulting image will have each particle drawn into a pattern of 3x3 pixels, producing a slightly smoother look:
- Normally, the default Bilinear filter draws in a 2x2 pixels region, but there is a Final Pass Filter Size control which defaults to 1 and can be increased to increase the filtering region and smooth out the results even more.
- Change the Draw Point Filter control to Bilinear.
- Change the Final Pass Filter Size value to 2.
- Click the Redo previous render (Krakatoa) icon - the resulting image will be about as smooth as the Bicubic filtering result:

- You can continue increasing the Filter Size to 3, 5 and even 10 and rerender to see the influence of this parameter:


Enabling Motion Blur
- Another way to produce more samples per particle and smooth out their look is by enabling Motion Blur. Krakatoa draws multiple passes of the same particles moved along their velocity vectors and combines these passes into the final image.
- Change the Final Pass Filter Size to 1.
- Locate the Motion Blur and DOF panel in the Krakatoa Settings window
- Check the Enable Motion Blur checkbox.
- Set the Particle Segments value to 4.
- Leave the Shutter Angle at 180.0 degrees.
- Click the Redo previous render (Krakatoa) icon - the image will be rendered 4 times and the result will be smeared along the velocity vectors within half frame interval.

- The make the effect more pronounced, we can increase the Shutter Angle to 360.0 degrees (one frame), but you will start seeing individual samples where the particle is moving very fast.

- Increasing the Particle Segments to 8 solves this problem:

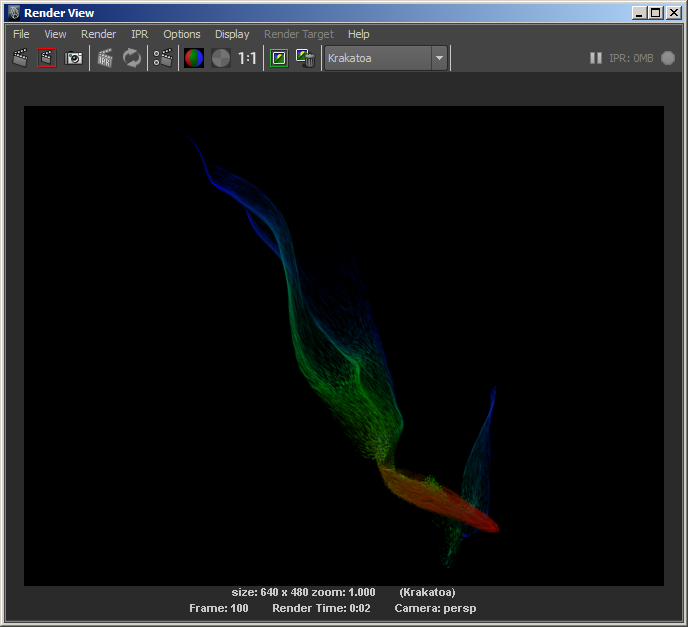
Rendering Color Per Particle
- So far we used a global override color to make all particles white. But if the particles would define their own color, Krakatoa could render that instead.
- Select the particle system and look at the particleShape1 object in the Maya Attribute Editor.
- Press the Color button in the Add Dynamic Attributes panel and select Add Per Particle Attribute.
- Right-Click in the RGB PP field in the Per Particle (Array) Attributes panel and select Create Ramp.
- Uncheck the Override Color checkbox in the Krakatoa Settings window.
- Click the Redo previous render (Krakatoa) icon - the particles will now be colored according to their Age:
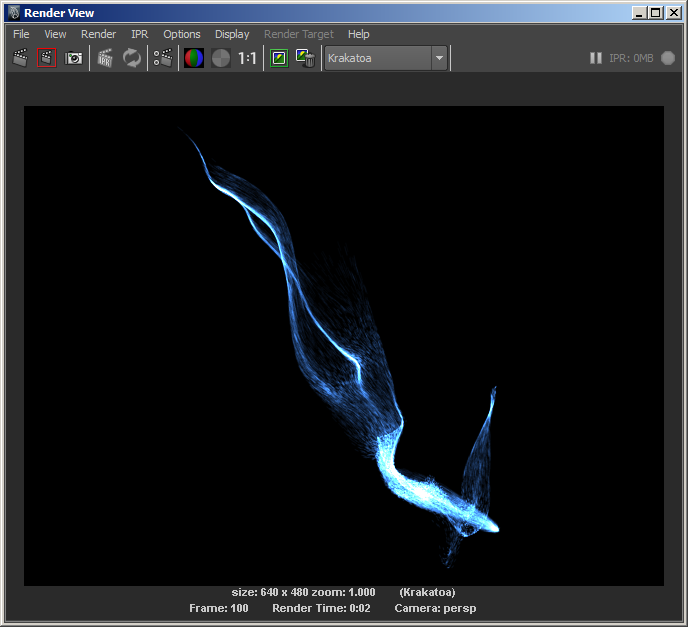
Force Additive Rendering
- Additive rendering in Krakatoa is fully-emissive shading where the Color and Absorption of the particle is zero (black), and the Emission is set to the original Color value. Krakatoa allows the mixing of volumetric shading and additive shading within the same image by setting the respective channels (Color, Emission and Absorption) to different values, but for the cases where the whole scene has to be rendered additively, it provides a useful shortcut.
- When the Force Additive Mode checkbox is checked, the Color (RGB PP) channel will be copied internally into the Emission channel, and the Color and Absorption will be reset to black automatically. In addition, no particle sorting will be performed, as well as no lighting calculations. This will significantly reduce rendering times when dealing with millions of particles.
- Check the Force Additive Mode checkbox in the Rendering Controls panel of the Krakatoa Settings window.
- Increase the Final Pass Exponent value to -1.
- Click the Redo previous render (Krakatoa) icon - the particle colors will be added together to produce a glowing, plasma-like effect:
Accumulating Color To Produce Hoter Whites
In the above image, we have a gradient going from red through yellow, green, cyan and blue, but we never get particles that contain enough of all three (R,G and B) components at the same time to add to a white glow.
When using a color that has all three components (albeit in different amounts), if enough particles overlap in certain pixels, you will get white hotspots which can be desirable when producing effects like seen in movie “The Avengers”:
- Check the Override Color checkbox again.
- Change the Color Override value to RGB 0.2, 0.4, 0.7 blue color.
- Click the Redo previous render (Krakatoa) icon - individual particles will contribute that color to the pixels they occupy, but when multiple particles come together, they will eventually produce white color.
Here is a Making Of The Avengers Reel by Brent Droog who used Krakatoa at Hydraulx:
Avengers Reel from Brent Droog on Vimeo.
Next Tutorial:
- In the next tutorial, we will see how Krakatoa can help you increase the particle count and produce much more refined images.