Stoke MX And 3ds Max Space Warps
The Base Scene
We will create the test scene from scratch:
- Start a new 3ds Max scene.
- Create a Teapot with Radius 15.0 units at the world origin [0,0,0]
- Create a Wind SpaceWarp at position [30,-30,0]
- Set the Force Strength to 0.2
- Set the Wind Turbulence to 1.0
- Set the Wind Frequency to 0.01
- Set the Wind Scale to 0.05
- Select both the Teapot and the Wind SpaceWarp and click the Stoke icon in the toolbar (assuming you have customized a toolbar with the Stoke MacroScripts), then click anywhere in the ground plane to place the Stoke icon. Note that the Stoke icon’s position plays NO ROLE in the simulation, only the positions of the source objects do.
RESULT: A new Stoke object called Stoke001 will be created in the scene. The Teapot will be added automatically to the Distribution Sources list, and the Wind will be added to the Velocity Sources list.
Alternatively, if you have not customized a toolbar with the Stoke icons, you can
- Go to the Create tab of the Command Panel
- In Geometry mode, select “Thinkbox” from the Categories list
- Click the Stoke button
- Click in the viewport to create a Stoke object
- Click the Pick… button in the Distribution rollout and pick the Teapot in the viewport to add.
- Click the Pick… button in the Velocity Field rollout and pick the Wind in the viewport to add.

Simulating With Default Settings
Now we can perform a particle simulation using the default settings of the Stoke object. 100 particles will be emitted from the surface of the Teapot on every frame over 101 frames and will be advected using the Wind SpaceWarp’s force vectors used as actual Velocity vectors.
- Press the SIMULATE button.
- Wait for the progress bar to reach 100% - on a typical QuadCore system, this should take around 2 seconds.
RESULT: A PRT sequence will be saved to disk and will be stored in the memory cache, too.
You can now drag the time slider to see the resulting particle motion. Below is Frame 50 of the simulation:
Changing Particle Display
By default, the particles are drawn as large dots. Let’s change the display to show the Velocities:
- In the “Viewport Display” rollout, change the “Display” drop-down list to “Velocity”.
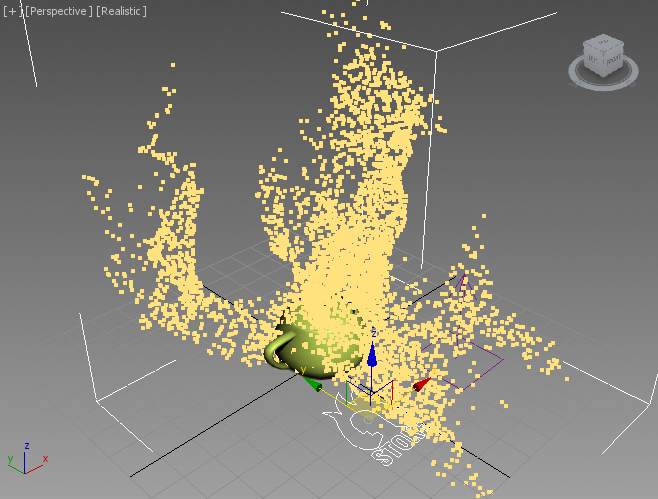
RESULT: Frame 50 displays the following:

The Line drawing start at the particle position and display the Velocity vector of the particle, pointing in the direction of the next frame’s position.
We can also change the Color of the particle to represent the Velocity vector:
- In the “Viewport Display” rollout, change the “Color” drop-down list to “Velocity”.
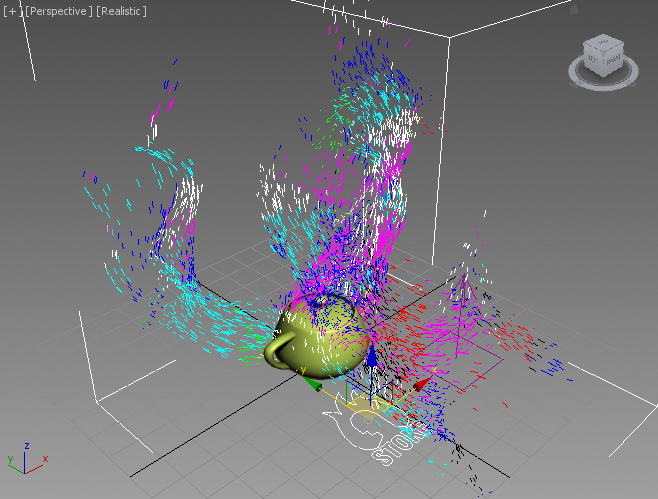
RESULT: The particles will now show RGB colors according to the XYZ components of the Velocity channel.
Understanding The Difference Between Force and Velocity Field
The animation we produced uses the Wind Force Space Warp as an actual velocity field.
Normally, when used with Particle Flow or legacy particles, the Wind accelerates the particles which get faster and faster on each frame. Without another force like Drag to provide resistance, the particles will accelearate forever. Should the Force stop applying its influence, the particles would continue moving according to their last velocity. This is consistent with the Newtonian laws of motion.
When using Stoke, we assume that the particles are not moving in vacuum, but instead are imbedded in a fluid that causes them to move. The particles do not maintain their own velocity, they inherit the velocity of the Velocity Field that causes their motion. In this case, the Wind Space Warp defines the field, and the particles move according to the vectors in the field. If the field’s velocity becomes zero (for example because the user animated the Scale factor to 0.0), the particles will stop moving.
We can visualize this difference by creating a Particle Flow:
- Open Particle View and create a Standard Flow
- Set the Birth to range 0 to 100 and the Rate to 3000 (100 particles per frame over 30 frames = 3000 particles/second)
- Delete the Speed and Rotation operators
- Replace the Position Icon operator with a Position Object and pick the Teapot as object.
- Add a Force operator and pick the Wind Space Warp.
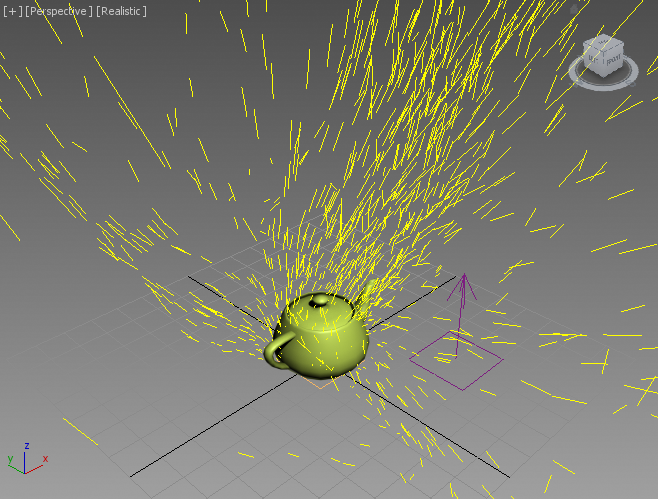
- Set the Display operator to Yellow color and Lines display mode.
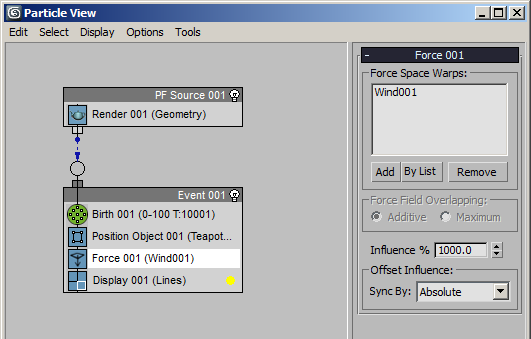
RESULT: On Frame 50, the Particle Flow looks significantly different because the particles are being accelerated over time by the Wind force.
To match the behavior of Stoke, we can
- Create a Drag Force Space Warp and set its Linear Damping to 100.0 for the X, Y and Z Axes.
- Add another Force operator before the existing one in the Particle Flow and pick the Drag Space Warp - this will kill the previously accummulated velocity on each frame.
- Set the existing Force operator with the Wind force to 3000.0% Influence.


Animating The Velocity Field
The origin of the Velocity Field created from a Wind Space Warp with Turbulence greater than 0.0 depends on the object’s position in world space.
When the Space Warp object is not moving, the corresponding Velocity Field will be fixed in space, and the Stoke particles will be traversing the force lines over time:
This means that simply moving the Wind object somewhere else would produce a different result.
- Change the Wind object’s X Position from 30.0 to 90.0
- Simulate again
RESULT: Compare the difference - the distribution of the particles is different because we offset the Velocity Field in space!
Obviously, we can offset the position of the Velocity Field over time to animate it.
- Keyframe the Wind object’s X Position from 30.0 on frame 0 to 120.0 on frame 100.
RESULT: The Velocity Field is shifting over time, producing more interesting motion:
