Creating Snow Cover Using Frost and Krakatoa
Introduction
The following tutorial was inspired by this CGTuts+ Tutorial by Cristian Pop, which on itself was inpired by the SnowFlow commercial script by Zwischendrin/48design.
It was presented as part of the Frost and Krakatoa Master Class at the End User Event 2011 in Utrecht, The Netherlands on June 30th, 2011.
The original presentation used Krakatoa v1.6. This page was updated on September 24th, 2012 to reflect the new features of Krakatoa MX 2 and its updated Magma channel editing system.
The main goal of this demo is to underscore the difference between History-Dependent Particle Simulation in Particle Flow and Histroy-Independent Particle Channel Editing using Krakatoa Magma. Both approaches can use FROST as the meshing solution instead of the 3dsMax’ BlobMesh.
Overview
In this demonstration, we will create some geometry, produce some particles using the Krakatoa PRT Volume object, use MagmaFlow to move the particles to the surface of the geometry objects, then delete particles dynamically based on the angle between the surface normal and the world up vector to make the snow stick differently. The particles will be meshed using FROST.
Creating The Base Scene
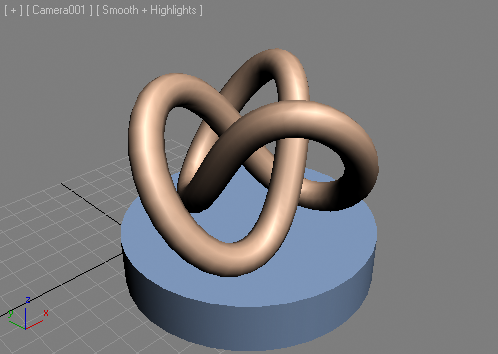
Fist, let’s create some geometry to drop the particles onto. We will use approximately the same setup as in Cristain Pop’s tutorial mentioned above - a Torus Knot on a Cylinder:
- Create a Cylinder standard primitive with Radius 50.0 and Height 20.0 anywhere in the scene. (the location of the object does not affect the final result in either the PFlow or Krakatoa+Frost setup)
- Increase the number of Cylinder Sides to 36 to inprove its appearance.
- Create a Torus Knot extended primitive with Base Curve Radius 25.0 and Cross Section Radius 6.0.
- Use the Align tool to align the bottom Z of the Torus Knot to the top of the Cylinder, then Center the Pivot of the Torus Knot to the Pivot of the Cylinder:
Creating the Particle Emitter
We will use a Circle shape and a Krakatoa PRT Volume object to emit the particles.
- Create a Circle shape with a Radius of approx. 55.0 units.
- Align the Circle shape to the Cylinder, then move the Circle up to about Z:100.0 (the exact location does not matter as long as it is completely above the Torus Knot)

Now let’s create some particles within the Circle shape:
- With the Circle shape selected, go to the Krakatoa menu in the 3ds Max Main Menu bar and select the “Create PRT Volume object(s) from selected Object(s)…” item.
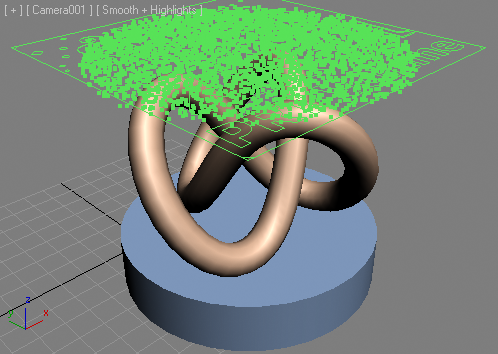
Note that we could have used ANY geometry shape to distribute the particles, but using a Circle shape demonstrates nicely that the PRT Volume does NOT require CLOSED volumes to generate particles!
Moving The Particles To The Surface
Next, we want our particles to be moved to the geometry surfaces below them.
- With the PRT Volume object selected, click on the “Add Krakatoa Channels Modifier (KCM) to selected object(s)…” item in the Krakatoa menu of the 3ds Max Main Menu bar. This will add a Magma modifier to the PRT Volume’s modifier stack.
- With the Magma modifier selected in the Modify Panel, click the “Open Magma Editor” button.
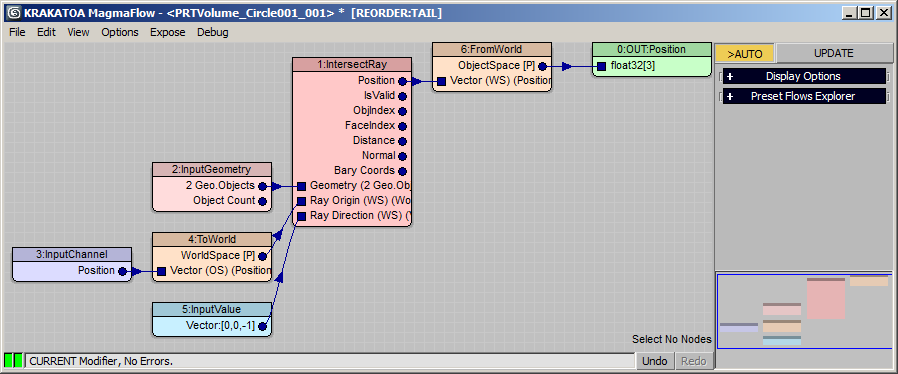
- Press [Ctrl]+[O] to create a new Output node. Set it to Position channel.
- Press [O] for Object category and [R] for IntersectRay operator - its Position output socket will be connected automatically to the Output node.
- Drag a connection from the first input socket of the IntersectRay operator - this will create a new InputGeometry node.
- Drag a connection from the second input socket - a new Position InputChannel with Transform>ToWorld will be created.
- Drag a connection from the third input socket, press the [Ctrl] key and release over an empty area of the editor - this will create an InputValue with a Vector value of [0.0,0.0,-1.0], a ray pointing down along the -Z axis.
- Select the InputGeometry node and use the “Add Names…” button to add the Cylinder and Torus Knot objects to the list of Geometry nodes to intersect with.
- Select the RayIntersect node again - we just need the resulting intersection Position to be transformed back to Object Space because the PRT Volume operates in its own local space, but the RayIntersect returns values in World Space. Press [T] for Transform and [W] to insert a FromWorld operator:
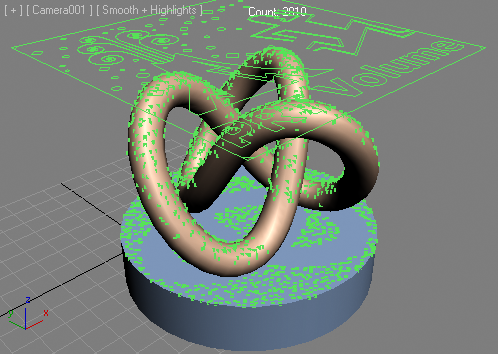
RESULT: Here is the result in the viewport - all particles are moved to the closest point on one of the two surfaces:
Creating the FROST Object
Now that we have a basic particle distribution where we want it, let’s mesh the PRT Volume using FROST:
- Select the PRT Volume object
- If you have custromized a Frost toolbar, click the Frost icon. If not, go to Create tab of the Command panel, select the Thinkbox category, click the Frost button, click and drag anywhere in the viewport to create the Frost object, then switch to Modify panel and use the Pick button in the Frost UI to add the PRT Volume to the list of objects to mesh.
Hopefully the above paragraph will convince you to set up a Frost toolbar with all shipping icons to speed up your workflow!
- With the FROST object selected, check the Frost rollout > Viewport Update > “When Particles Change” option. This will ensure our FROST object will remesh dynamically anytime we tweak the PRT Volume.
- Switch the Meshing mode from the default Union Of Spheres to Metaballs.
- Change the Particle Size > Radius from 5.0 to 2.0.
- Assign a Standard material with white diffuse color and higher specularity to the FROST object. Of course, you can assign any material you want to render in your renderer of choice…
- Select the PRT Volume object again, go to the PRT Volume base object, enter 1.5 for Spacing and uncheck the Viewp. Spacing checkbox to use the same distribution for both the Viewport and Rendering - the FROST object will update dynamically:
Controlling the Particle Stickiness By Angle
Currently, our particles are placed on the surface as long as the ray intersection produces a valid position. In fact, some particles will appear at the origin because their intersections returns no valid hit and the Position was returned as [0,0,0]. There are ways to deal with these stray particles explicitly by checking whether the intersection result was valid, but our next step will take care of them as a side effect of figuring out whether the particles should stick to the surface based on the normal vector’s angle to the world’s up axis.
We will add another Krakatoa Channels Modifier to the PRT Volume’s stack and select particles that should not stick to the surface, then delete them using a Krakatoa Delete modifier.
- Select the PRT Volume object.
- Press the “Open Magma Editor” button of the existing Magma modifier.
- Press [Ctrl]+[O] to add a second Output node. Set it to Selection channel.
- Drag a wire from the Normal output socket of the existing IntersectRay to the new Output node.
- Select the new wire and press the [.] key to insert a VectorDot operator.
- With the VectorDot node selected, hold down SHIFT and press the 3 key for a [0,0,1] Vector InputValue. This represents the World Up Z axis.
- Select the DotProduct node again and hit [SHIFT]+[,/<] keys to insert a Less logical operator which expects a second input to compare the dot product value to.
- Press [Ctrl]+[1] key to create a Float input node with a value of 1.0. This is our threshold value.
- Since the output value of the Logic operators is an Integer which is either 1 for TRUE or 0 for FALSE, but the Selection channel expects a Floating point value, we have to convert the Integer to Float. Simply select the Less node and click the “Convert To Float” button to insert the necessary operator.
- All we need now is to add a Krakatoa Delete modifier to the top of the PRT Volume’s stack. Any particles that are on a surface where the Dot Product between the World Up and the Face Normal is Less than the threshold value will be set to Selected 1.0 and will be deleted.
FROST_SnowCover_Selection_Magma.png
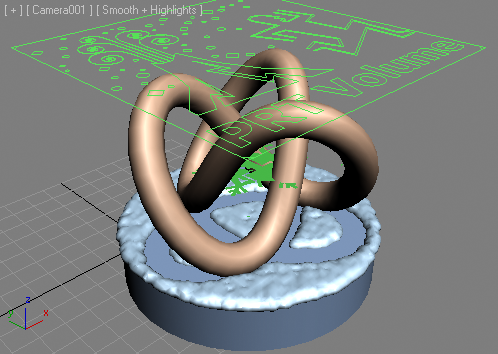
RESULT: Only particles on top of the Cylinder will remain because the Face Normal is parallel to the World Up vector, all other particles on the Torus Knot will be deleted:
Exposing And Tweaking The Threshold
Let’s tweak the Threshold value and see how it affects the particle distribution and the FROST object.
- Select the Magma modifier and open the Magma Editor if it was closed previously.
- Select the Float InputValue going into the second socket of the Less operator and check the “Expose” option - the control will be exposed in an “Exposed Parametets” rollout in the 3ds Max Command Panel.
- Now you can close the MagmaFlow Editor and tweak the threshold value from the Command Panel.
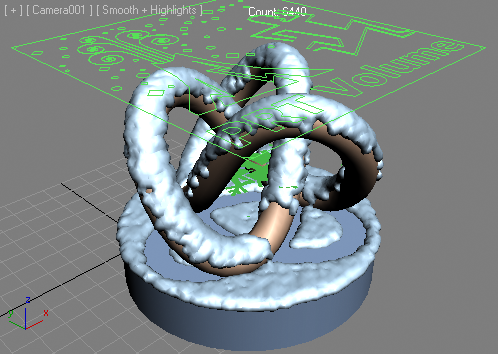
- Enter 0.7 instead of 1.0 in the Command Panel and the particles will reappear on the Torus Knot:
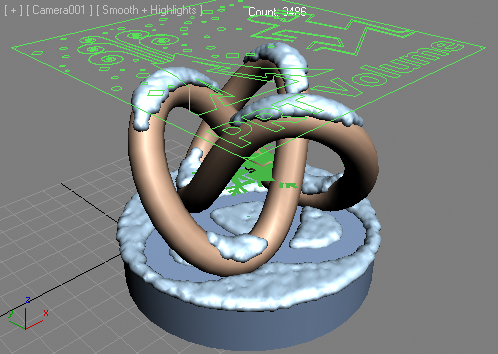
RESULT: You can now spin the threshold spinner up and down between 0.0 (all particles there) and 1.0 (only particles on top). Values above 1.0 will delete all particles.
Conclusion
This demonstration provided an alternative approach to using Particle Flow history-dependent simulation to determine whether a particle hits a mesh surface or not. Using Krakatoa Magma channel editing and its very fast kd-tree accelerated Ray Intersection methods, we were able to place the particles on the surfaces instantaneously without optimizing the geometry or processing the particle positions over multiple frames to interact with a Deflector.
Using this setup, you could add more objects with literally millions of polygons and cover with millions of particles in reasonable channel processing and meshing times.
