Frost Presets
Overview
- The FROST object implements the following preset systems:
- A general presets system (nearly identical to the one employed by the Krakatoa PRT Loader) which allows you to save the current value of any number of parameters to disk and load them later with a single click.
- A system for overriding the factory defaults with any preset created using the above method at the time of creation of the FROST object.
- A per-value Presets system (also identical to the one used by Krakatoa) which allows you to add, remove and restore the value of an individual UI parameter using an Options menu accessed via a
![[>>]](../../_images/options_button1.png) button.
button.
Using The General Presets System
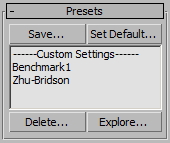
- The General Presets system is accessed via the dedicated Presets rollout of the FROST UI:
Saving A Preset
The Presets system uses the current settings of the FROST object to define the preset’s values.
This means that you must adjust the FROST UI’s parameters that you want to save, then press the [Save…] button in the Presets rollout.
- A dialog listing the names of all available parameters will will shown.
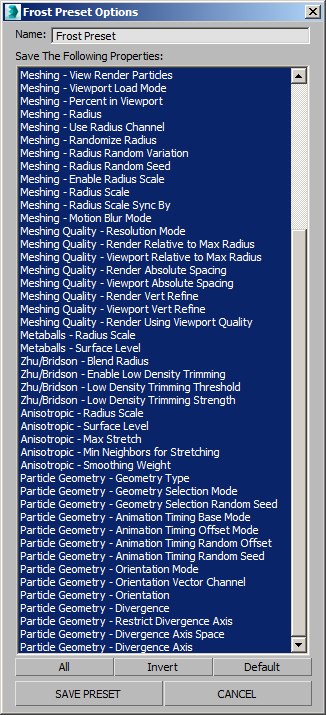
- By default, all lines except for the Icon Size will be highlighted and will be saved to a new preset.
- You can use the Ctrl+Click method or the available buttons (All, None, Default) to change the selection before saving.
- The name of the preset is defined in the text field on top of the dialog - enter a descriptive name to recognize the content or intention behind the preset before saving.
- To save, press the [SAVE PRESET] button.
- To cancel without saving, press the [CANCEL] button.
Loading A Preset
- The names of all existing presets previously saved on this machine will be displayed in the list box in the Presets rollout.
- To load an existing preset, simply select a name from the list - all parameters stored in the file will be applied to the current FROST object.
Managing and Sharing Preset Files
- Since the presets are stored in individual text files, they can be easily copied, archived, emailed to other users or deleted from disk.
- Some of these actions are directly accessible through the Presets dialog.
- To delete an existing preset, simply select it from the list and press the [Delete] button.
- Keep in mind that selecting the preset will also apply it to the current FROST object.
- If you want to avoid this, you can press the [Explore…] button instead - a new Windows Explorer will be opened at the Local User location where the Preset files are stored.
- Using the Windows Explorer, you can delete presets files, or perform any other file-related operations including copying them or sending them to others.
- If you have received FROST presets from another user, simply create a FROST object, expand the Presets rollout, press the [Explore…] button and paste the preset files into the folder opened in the Windows Explorer.
Using Custom Defaults
Setting a General Preset as Custom Defaults
- One of the currently available Preset files can be defined as a custom starup default for newly created FROST objects.
- To make a Preset the default,
- Select it from the list in the Presets rollout
- Press the [Set Default…] button.
- A query dialog will appear, asking you to confirm the operation.
- If answered with Yes, the selected Preset will be stored in the FROST preferences file as the startup default.
- Next time you create a FROST object, the specified Presets file will be applied automatically.
- For example, if you tend to work in Zhu/Bridson meshing mode using Absolute Spacing, you could create a preset with your favorite settings and define is the custom startup default.
- All your new FROST objects will be created with these parameters already set automatically.
- To disable the custom defaults and return to factory defaults, simply
- Select the —-Custom Settings—- entry from the list and press the [Set Default…] button.
- You will be prompted to confirm the change.
- If you confirm with Yes, future new FROST objects will be created with the factory default settings.
Using Parameter Presets
- The UI numeric parameters that support Presets will show a button with a double arrow pointing to the right next to the value spinner.
- Pressing such a button will display a menu showing a number of pre-defined values and the options to either Add the current value to the list if it is not on it yet, or to Remove it from the list if it is already there.
- When FROST is first installed and used on your system, it will pre-define a number of typical useful values for each parameter.
- For example, the Radius parameter will provide such values as 1.0, 2.0, 3.0, 5.0 and 10.0.
- Whenever you find out that a value is useful and applied to FROST objects more than once, you can simply select the option to add it to the value’s presets list.
- The custom value will be stored in the FROST preferences file and will be available in all future sessions of that 3ds Max version until it is removed explicitly.
- Over time, you can create a veritable library of useful values for each parameter, thus reducing the guess work and the need for entering numbers manually.
