View Control Toolbar
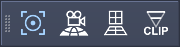
- This toolbar is visible by default.
- The three icons in it provide access to the following Viewport-related operations and modes:
ZOOM Extents In The Current Viewport
- Clicking this icon will zoom the current Viewport (equivalent to pressing the Z key shortcut).
- If one or more objects are selected, the selected objects’ extents will be used.
- If no objects are selected, the whole scene’s bounding box will be used.
- If no objects are displayed, the viewport will be zoomed to the extents of the Home Grid, matching the zoom factor of the startup Home View.
Toggle GLOBAL VIEW In The Current Viewport
- Clicking this icon will lock the current Viewport to a Global View control. Note that the current view transforms will be lost and will be reset to the Global View’s transforms.
- Locking two or more Viewports (from the same or different Documents) to the Global View lets you navigate them synchronously at the same time.
- This is useful for example to compare different versions of the same object, view a Point Loader and a Mesher side-by-side, see the same object using different lighting and shading settings and so on.
Toggle PERSPECTIVE / ORTHOGRAPHICS Projection In The Current Viewport
- Clicking this icon will toggle the current Viewport between Perspective and Orthogonal Projection.
- This is equivalent to pressing the P and O keyboard shortcuts which force Perspective and Orthogonal Projection modes.
- Note that the Projection mode can also be changed implicitly under certain circumstances:
- Switching to Front, Top, Left etc. Orthogonal View presets will switch the view to Orthogonal Projection implicitly.
- Switching to Home View preset will switch the view to Perspective Projection mode implicitly.
- Orbiting a preset Orthographic view like Front, Top, Left etc. while the Main Menu > Options > PREVENT VIEW ORBIT In Orthographic Views option is unchecked will turn the view into an Isometric Orthographic Projection showing all three axes without any perspective effect.

Toggle DISTANCE CLIPPING In The Current Viewport
- When checked, the Current View will be clipped between the Near and Far Clipping Planes.
- When unchecked, no custom Clipping will be performed (Clipping ranges will be adjusted automatically internally to ensure optimal display though).
- The Near and Far Clipping distances can be adjusted using dedicated sliders in the Viewport Settings panel > Distance Clipping - Viewport Settings rollout, or by picking objects in the viewport via the Viewport Right Click Menu.
- This icon is a duplicate of the Use Clipping checkbutton in the Viewport Settings panel.
- It is also duplicated under the Viewport’s
![[]>G](../../_images/options_menu_icon_viewport_green.png) Options menu > View Controls sub-menu.
Options menu > View Controls sub-menu.