Mesh To Field Conversion
Applicable to Stoke MX 2.0 and higher, Last Edited May 30, 2014.
Overview
The following tutorial discusses the various ways to include mesh information in Stoke Field creation and processing using Stoke MAX 2.0.
These include
- Geometry Lookup operators in Magma,
- LevelSet conversion in Magma using the Stoke LevelSet operator, and
- Direct LevelSet or Density Field conversion via a dedicated Stoke MeshToField Modifier.
Magma Geometry Lookup Operators
As we saw in a previous tutorial, the Magma implementation in Stoke Field objects (Field Magma, Field Simulator) provides the same Geometry Lookup operators as the Krakatoa and Genome counterparts. These include the NearestPoint, IntersectRay and InVolume operators and the related FaceQuery, MeshQuery and ElementQuery operators. We already discussed the creation of a Velocity field from the Tangents of a Torus. Now let’s look at the creation of a Density field from the volume of any mesh.
The Test Scene
We will use a simple object and a Field Magma for our first test.
- Start a new 3ds Max scene.
- Create a GeoSphere with Radius of 50.0 generic units at the world origin [0,0,0].
- Switch the Perspective viewport to Wireframe display to be able to see inside the mesh later.
- With the GeoSphere still selected, hold down SHIFT and pick the Create a Field MAGMA object… item from the Stoke menu in the 3ds Max Main Menu.
RESULT: This will create a Field Magma around the GeoSphere.

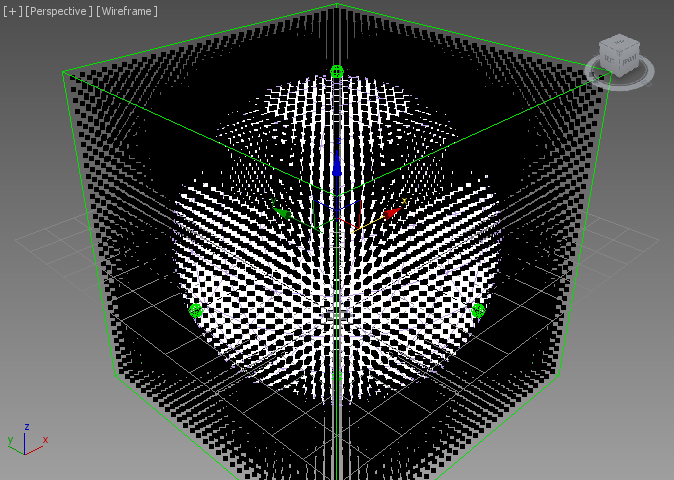
Why use a GeoSphere for this test? A sphere is a very simple surface, but at the same time possibly the worst case for fitting on an orthogonal grid - basically we have to encode data on “cubes” about an object that does not have any flat portions on its mesh that would ever align to the grid. Typically, encoding a sphere on a grid will produce all sorts of patterns, so this setup is both simple, and at the same time representative of the worst case scenario.
Creating A Constant Density Field
Let’s create a Density field where points inside the volume have a constant positive density value, and points outside of the volume have a value of 0.0.
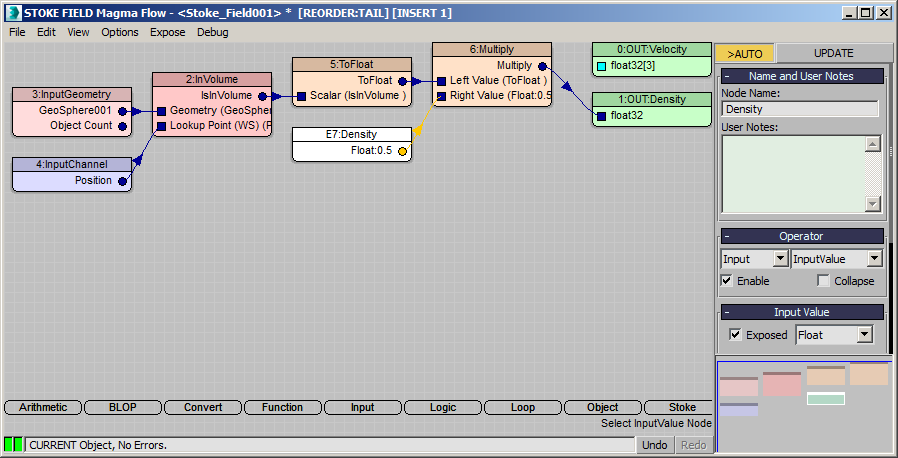
- Press the Open Magma Editor… button of the Field Magma object.
- Select the Density output node.
- Press O for Object category, then V for InVolume node - an error message might appear in the Stoke Log Window about unconnected sockets. You can ignore that, or even suppress future error and warning reports via the Help rollout of the Field Magma object.
- Drag a wire from the Geometry input socket of the InVolume node and release over an empty area of the Editor - a new InputGeometry node will be created and connected.
- Click the Pick From Scene… button in the Properties and Actions rollout of the InputGeometry node and pick the GeoSphere from the scene. Alternatively, use the Get by Name… button to select from a list.
- Drag a wire from the Lookup Point (WS) socket of the InVolume node and release over an empty area of the Editor - a new InputChannel Position will be created and connected.
- Press CTRL+R to enable Auto-Reorder.

RESULT: The Field Magma display in the viewport will now show samples only inside the GeoSphere. This is because the boolean output value of the InVolume operator produces the equivalent of 1 inside and 0 outside. The boolean value is converted to a valid Scalar Field by the Density Output node.
Alternative Viewport Display
By default, the Stoke Field Magma is set to Mask the samples based on the Density channel, so that positive values produce visible points, while zero and negative values produce no points. The color defaults to the object color of the Field Magma.
We can switch the display to show all samples regardless of value, and set the color to the actual Field value.
- Under the Viewport Display rollout of the Field Magma object, change the Mask drop-down list to “No Mask”.
- Change the Color drop-down list to “Density”.
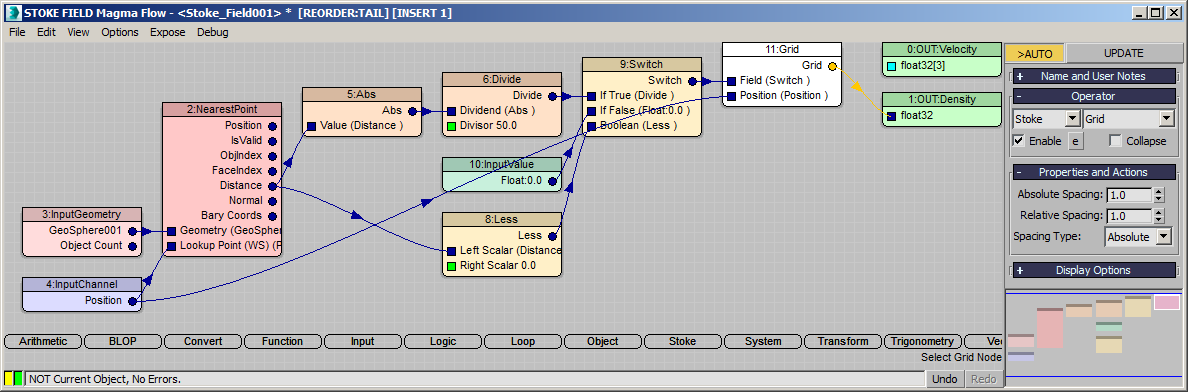
RESULT: All samples are now drawn, and they reveal a white ball inside a black box.
Scaling The Field
As mentioned above, the value of the field is now 1 everywhere inside the volume, and 0 outside. If we want to scale the value down, we have to first convert the Boolean output of the InVolume to a Float, then multiply by another Float factor.
- Select the InVolume node in the Magma Editor.
- Click the button Convert To Float in the Properties and Actions rollout - a new ToFloat node will be inserted between the InVolume and the Density Output nodes.
- Press the * key on the Numeric Keypad - a new Multiply operator will be inserted behind the ToFloat operator.
- Press CTRL+1 to create and connect an InputValue Float with value of 1.0 to the second socket of the Multiply.
- Under the Name and User Nodes rollout, rename “InputValue” to “Density”.
- Check the Exposed checkbox.
- In the 3ds Max Command Panel, you can now tweak the Density value. Enter 0.5.
RESULT: The white ball inside the black box now turns mid-gray because all samples contain a value of 0.5.
- Enter 0.25 for the Density.
- Change the Mask drop-down list back to Density to remove the black samples and reveal only the volume.
Rendering The Density Field As Atmpsheric Effect
From the previous tutorial we already know how to render a Density Field in the Default Scanline renderer, V-Ray, finalRender etc. All we need is a light source and the Stoke Atmospheric Effect in the Environment dialog.
- In the Front viewport, create a Target Spot illuminating the GeoSphere from the side.
- Select the GeoSphere and either hide it, or uncheck Renderable in its properties as we don’t want the mesh rendered by the Default Scanline renderer.
- Open the Environment dialog, add a Stoke Atmospheric effect and open the UI.
- Pick the Stoke Field Magma as a source, leave all other controls at their defaults
- Render.
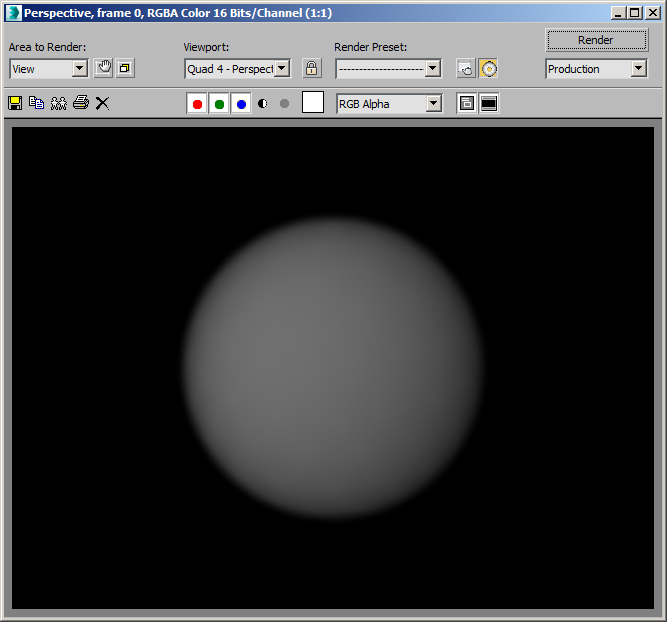
RESULT: The rendering will be quite slow, and the output will have once again severe self-shadowing since the Density per cubic generic unit is very very high.
We could fix the shading artefacts by reducing the Camera Density > Exponent to -3. There will still be some steppingvisible, but the general shape will be ok.

Why Is The Performance So Bad?
Our current setup uses a fully procedural field. At any point in space, the Field Magma can evaluate the flow and by using InVolume, determine the value of the Density.
In the viewport, we only evaluate the flow once for every point sample displayed. But when rendering, each time a Camera or a Light ray has to step through the volume, it will ask the Density Field for a vaue, and the (quite expensive perforamcen-wise) InVolume operator will be called again anf again.
On a QuadCore i7, the rendering took about 100 seconds.
Can We Speed It Up?
Yes, there are several approaches to improve the performance.
Increasing the Min.Samples to 2.0 reduces the time to about 90 seconds.
But the real way to speed up calculations is to cache the Density Field on a Grid!
- In the Magma Editor, select the ToFloat node, press S for Stoke category, then select the Grid entry.
- Drag from the second input socket of the new Grid operator and release over an empty area of the Editor - it will be connected automatically to the existing InputChannel Position node!
- Render.
RESULT: The rendering finishes in only 3 seconds on the same machine, and while it also has some stepping artefacts, it is quite usable already.

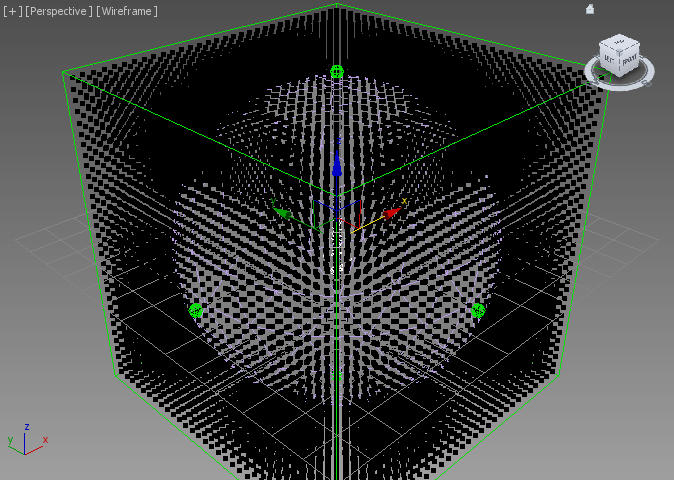
Also note that the viewport shows some anti-aliasing at the edhges of the sphere were voxels have near-zero, but not quite zero values.
Adjusting The Grid Spacing
The Grid operator, like all other grid-based Stoke operators in Magma. will use the current World Space Grid Spacing value of the Field Magma object as reference. By default, the Spacing was initialized to 3.331 when the object was created.
There are several ways to define the actual spacing of the Grid operator though.
Field Magma Grid Spacing
Obviously, we could reduce the Spacing of the Field Magma to 1.0. This would produce over 1 million samples in the viewport and just waste valuable time. But the render results would look smooth and take only 2 seconds:
Instead of reducing the Grid Spacing of the Field Magma itself, we can change the spacing of the Grid operator in the Magma Editor!
Grid Operator Relative Spacing
By default, the Spacing Type option is set to Relative and the default Relative Spacing is 1.0, which means “Use exactly what the host object dictates”. This is what we just did in the previous step - our grid was using the Field Magma’s Grid Spacing because the Magma Grid operator was multiplying that by 1.0, producing the same value. So if we wanted to use a fraction of the Field Magma’s Spacing, we could just enter 0.333 and the Grid operator would use 1/3 of the host’s spacing!
Grid Operator Absolute Spacing
Alternatively, we could change the Spacing Type to Absolute and simply enter the desired value in generic units. In our case, since the default Absolute Spacing of the Grid operator is 1.0 anyway, all we have to do is change the Spacing Type drop-down list to Absolute and the Grid cache will have voxels with size 1x1x1 generic units!
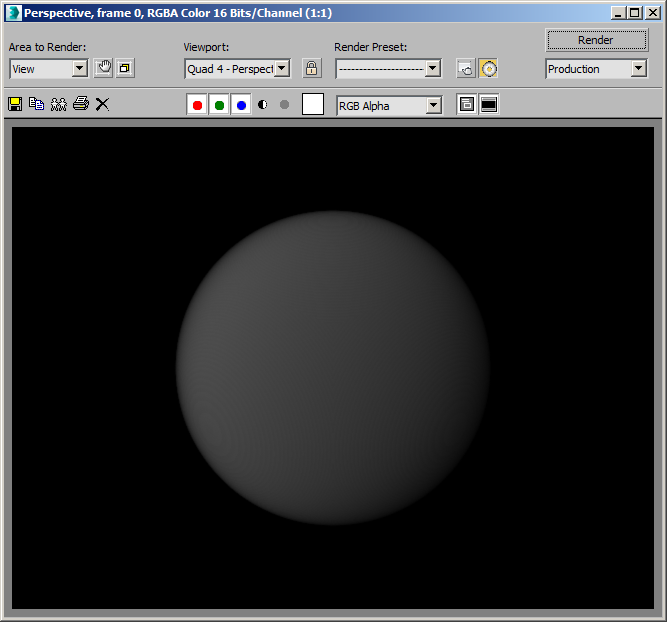
To further smooth out the visible stepping caused by the Min. and Max. Steps of 2.0 in the Atmospheric Effect itself, we can now reduce both to 0.5. We also have to balance the Density by increasing the Exponent to -2 to produce similar apparent density. The render time is now 28 seconds:

How Does This Compare To a Fully Procedural Function Without Any Mesh?
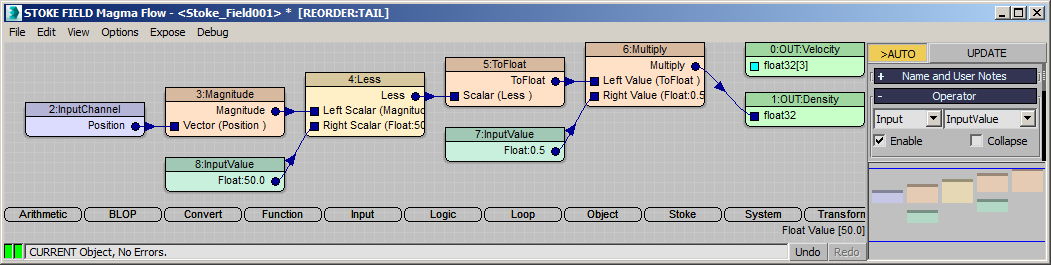
So far, we used the volume of the GeoSphere to determine the Density Field. But in this special case of a spherical volume, we could produce a Density Field based on pure mathematical calculations without using a mesh.
All we need to do is take the InputChannel Position, calculate the Magnitude, compare using a Less logical operator against 50.0 (the Radius of the spherical volume), and output the result converted to Float and Multiplied by 0.5 as the Density value.
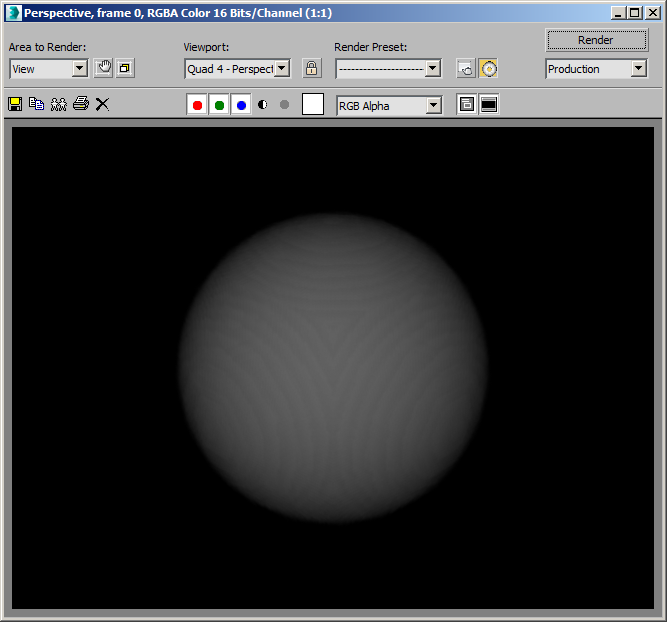
Turns out that this setup renders in 19 seconds on the same machine and produces the following output:
As you can see, the fully procedural spherical field is a bit smoother and also faster to render, but the Grid caching yields quite similar results and performance.
Gradient Field Using NearestPoint
So far, we filled the volume of the GeoSphere with a single value, producing an isotropic Density field.
Using the NearestPoint geometry lookup operator, we can instead base the Density value on the distance from the GeoSphere’s surface - dense in the center, near zero at the surface.
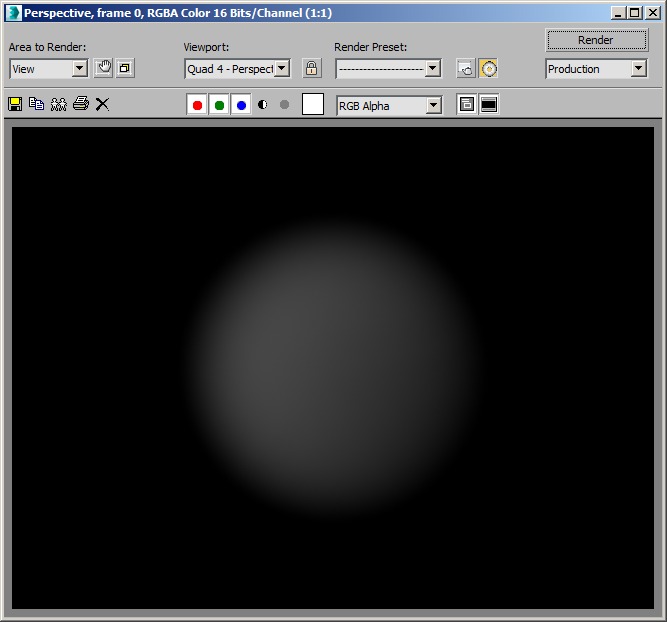
Using The LevelSet Operator
Another way to convert a mesh volume to a Field is by using the LevelSet operator in Magma. The LevelSet operator produces a similar Distance field as the NearestPoint operator, but does not allow the access to additional mesh surface data like UV coordinates etc. The LevelSet conversion is fast and smooth and a good alternative to the previously discussed methods.
To convert the Distance output of the LevelSet operator to a Density value, we can either compare the value to 0.0 using the Less operator to generate a constant value everywhere, or use the Negative values to generate a falloff from center to the surface.
Below is the Magma flow showing the conversion of the InputGeometry to a LevelSet, then comparing the Distance output (which is negative throughout the volume) to 0.0 using the Less operator. We then use the same flow as before, converting the Boolean value to a float, multiplying by a Float of 0.5 and outputting the result as Density.
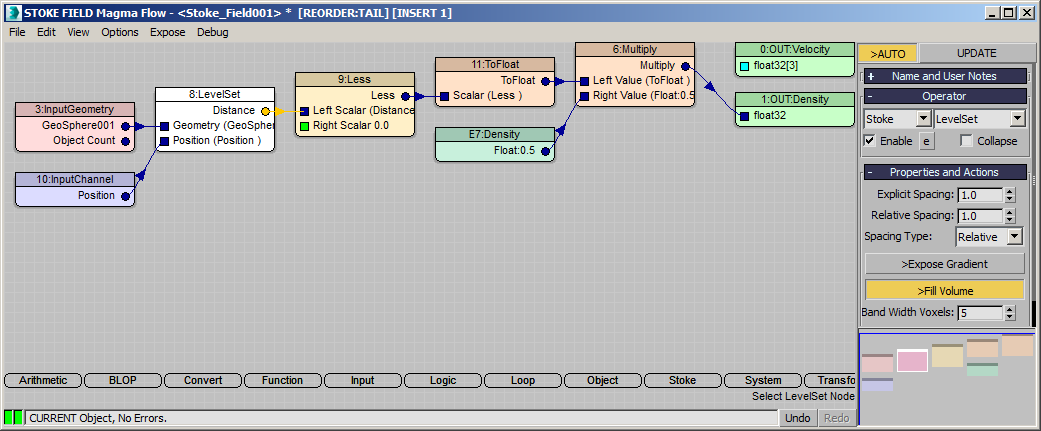
Here is the result using Min. and Max. Step sampling of 1.0, rendered in 14 seconds:
There is still some visible stepping, but it is inevitable at this resolution when sampling a spherical surface onto a grid. Reducing the Step would further smooth out the result at cost of render time.
Also note that the LevelSet operator works just like the Grid operator - by default the LevelSet grid spacing is relative to the host object’s Grid Spacing, and you have the option to switch it to Absolute Spacing. Using finer resolution for the LevelSet can help improve the quality of the output.
Using the Distance field to create a falloff gradient will obviously result in much smoother results because there won’t be an abrupt change from 0.0 to positive Density at the surface of the GeoSphere.
Using the MeshToField Modifier
The Stoke MeshToField modifier is a quick and very simple way to convert any mesh volume to a Density Field. Simply adding the modifier to the stack produces a valid Field any other component of Stoke can use, including the Magma InputField operators, Stoke Field Texmap, and the Stoke Atmospheric effect!
We can delete the Field Magma object from the scene and simply turn the GeoSphere to a Density Field:
- Select the GeoSphere.
- From the Stoke menu in the 3ds Max Main Menu bar, select “Add a MESH TO FIELD modifier…” (alternatively, use the Modify Panel of 3ds Max to add from the list)
- Switch the Output Type from Level Set to Density.
- In the Stoke Atmpsheric dialog, remove the deleted Field entry if it is still there, and pick the GeoSphere itself.
- Set the Min.Step and Max.Step values to 1.0 and render with Camera Density of 5.0 Exponent -2.
The following rendering took 22 seconds and is completely smooth: