Import Point Files Dialog
Opening The Dialog
- The Import Multiple Point Files dialog is opened via the Main Menu > Batch > IMPORT Multiple Point Files... menu item.
- Once the menu item is selected, a multi-file Open dialog will open.
- It can be used to select one or more input files from the same folder to be converted.
- The files can be of different datasets and can have different supported file formats.
- Once the files are selected, the [Open] button will populate the Import Multiple Point Files dialog will these files.
- Cancelling the File Dialog will still open the Convert Multiple Point Files dialog, but it will be empty - the [ADD Files...] button can be used to add files later.
- Alternatively, drag and drop one or more .SPRT files into a SEQUOIA Viewport to open and populate the dialog automatically.
- The various columns of the Listview will be populated automatically with the best suggestions SEQUOIA can make based on the file format, content and name.
- Each entry and each column beyond the Input File column can then be edited individually or en-masse before performing the conversion.
User Interface Controls
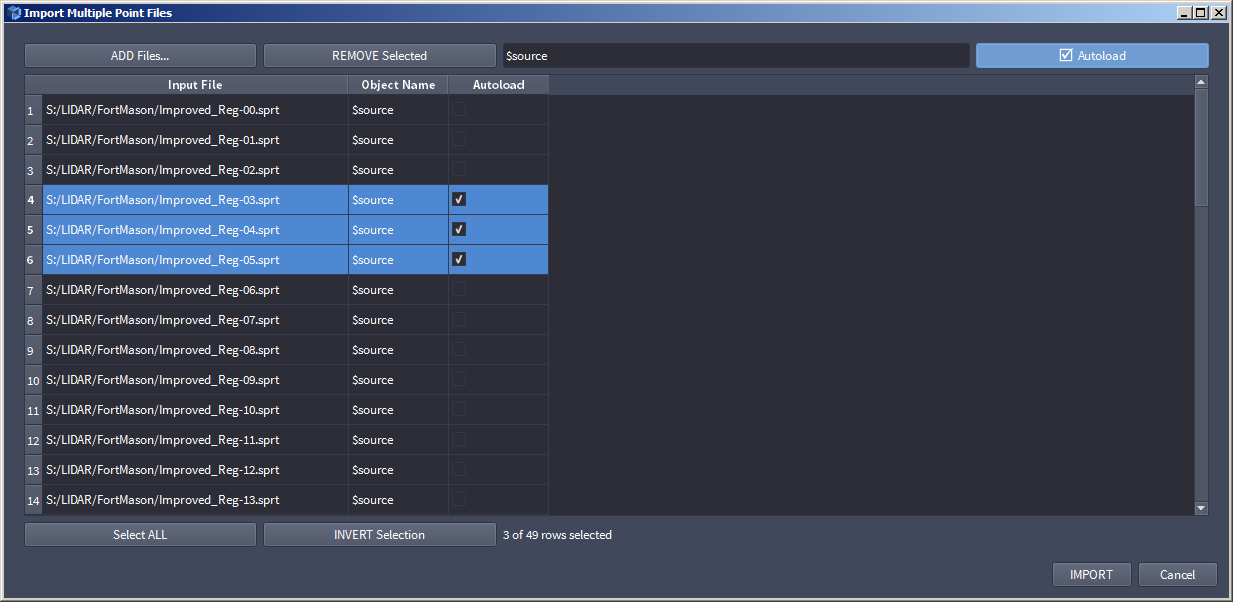
Point Files Import Queue Listview
- The main element of the Import dialog is the Listview representing the Processing Queue.
- Each row represents a point file scheduled to be imported using a newly created Point Loader object.
- Each column represents a mandatory or optional setting used by SEQUOIA to perform the Point Loader creation.
- The majority of UI controls in the dialog modify the Listview - either the content of specific columns, or the selection of the ListView.
Loader Name Pattern Textfield
- The text field defines the base name of the Point Loader to be created.
- The default value is $source, which will name the Point Loader according to the input filename.
Selection Status Text
- This text displays the number of selected entries, as well as the total number of entries on the Queue.